Read this section for information on functions you may find useful when filming movies.
To hide or display indicators in the monitor, press the button.
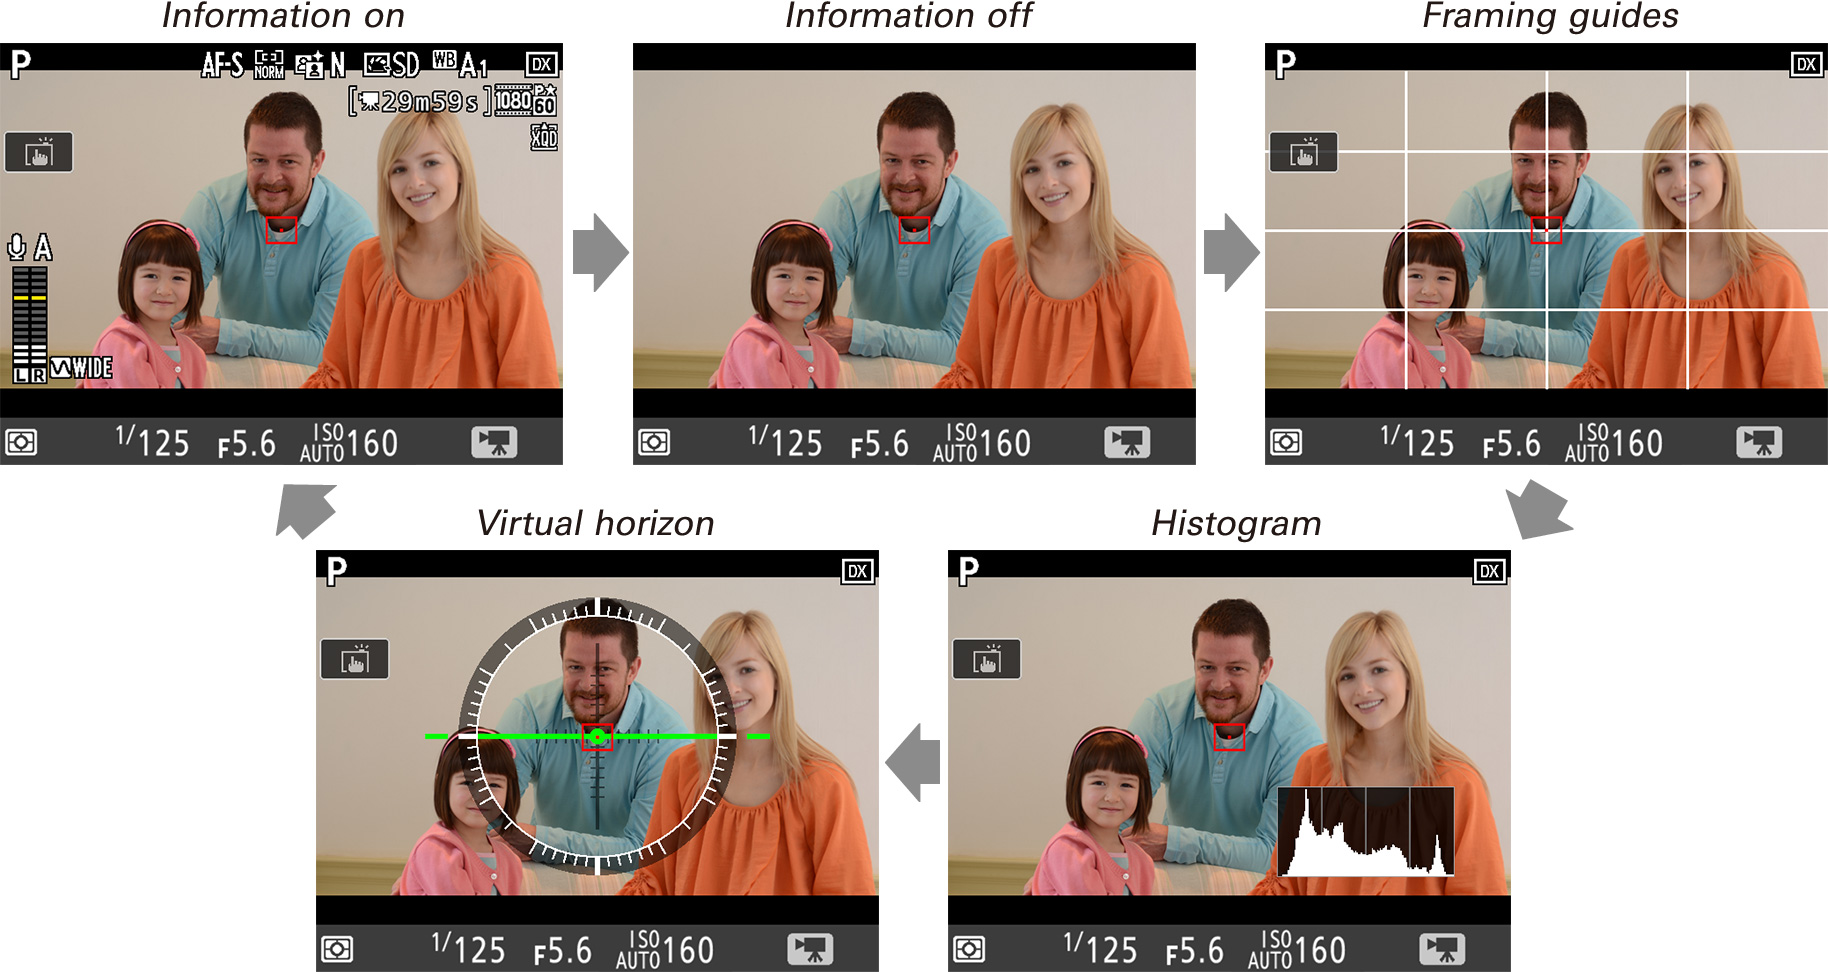
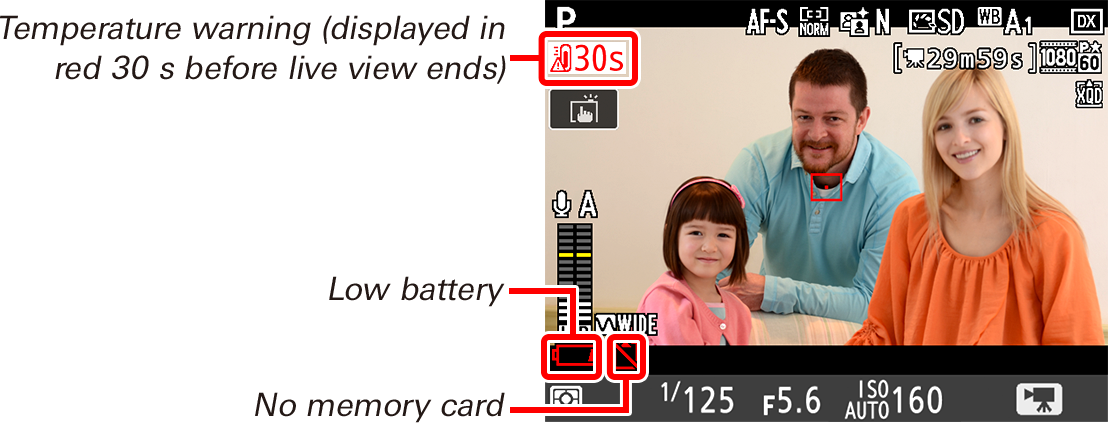
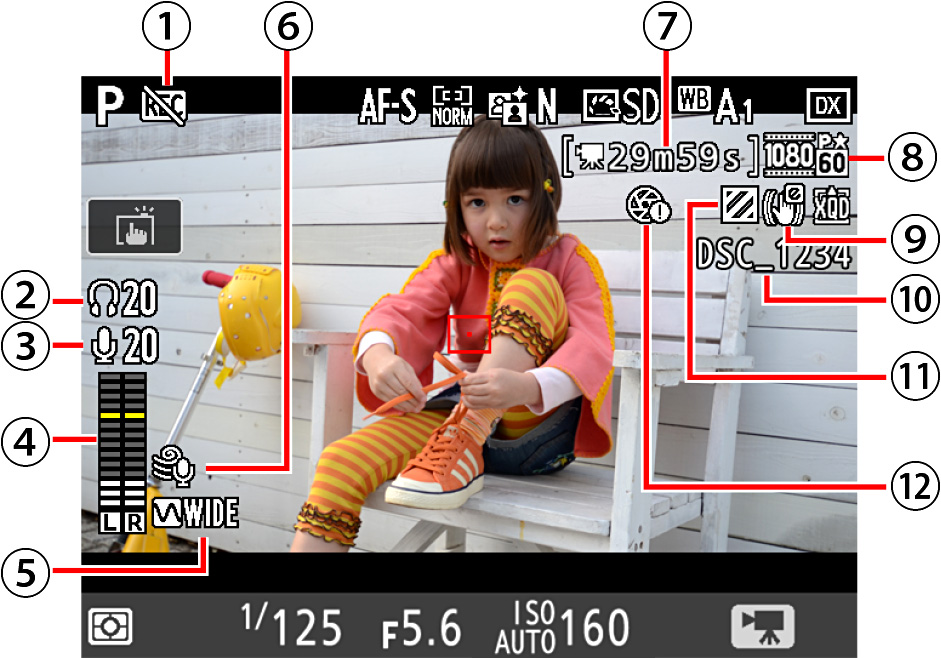
The indicators at right appear in the information display in movie mode (in live view and during recording).
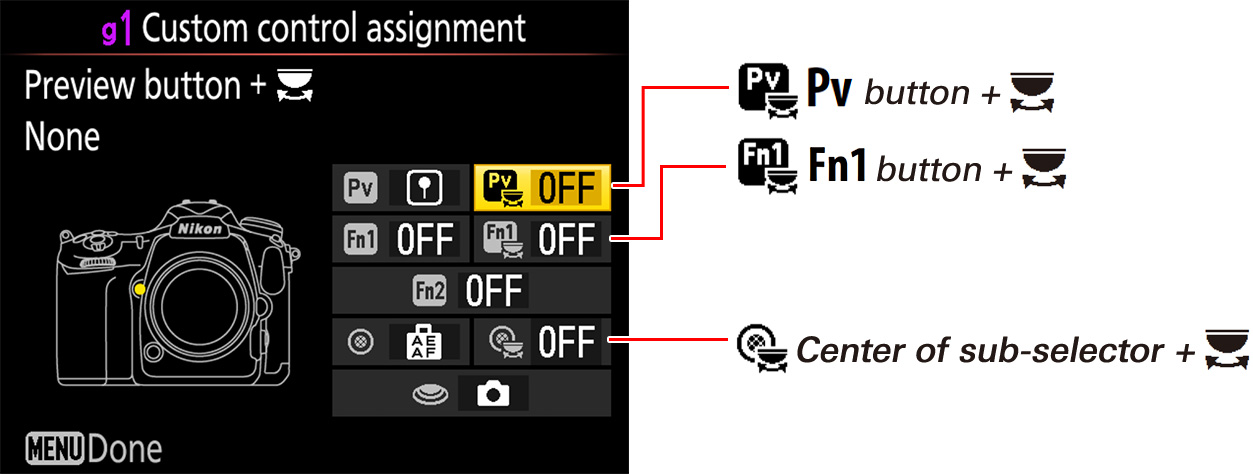
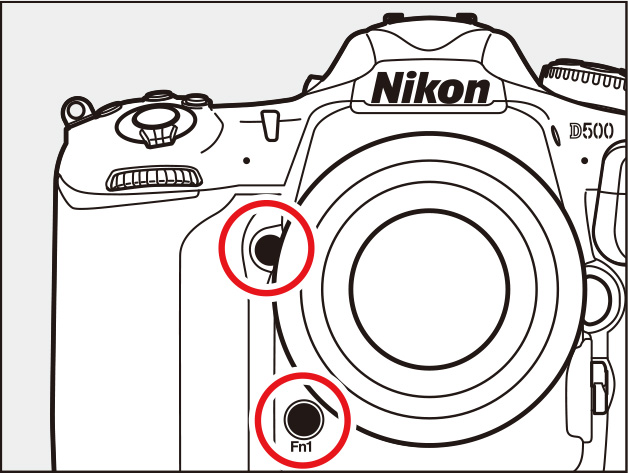
Use Custom Setting g1 (Custom control assignment) to choose the roles played by camera controls during movie recording.
To choose the roles played by the following controls, highlight an option and press the center of the multi selector:

The functions that can be assigned to these controls are:
| Power aperture (open) | ✔ | ― | ― | ― | ― | |
|---|---|---|---|---|---|---|
| Power aperture (close) | ― | ✔ | ― | ― | ― | |
| Exposure compensation + | ✔ | ― | ― | ― | ― | |
| Exposure compensation − | ― | ✔ | ― | ― | ― | |
| Index marking | ✔ | ✔ | ✔ | ✔ | ― | |
| View photo shooting info | ✔ | ✔ | ✔ | ✔ | ― | |
| AE/AF lock | ― | ― | ― | ✔ | ― | |
| AE lock only | ― | ― | ― | ✔ | ― | |
| AE lock (Hold) | ― | ― | ― | ✔ | ― | |
| AF lock only | ― | ― | ― | ✔ | ― | |
| Take photos | ― | ― | ― | ― | ✔ | |
| Record movies | ― | ― | ― | ― | ✔ | |
| None | ✔ | ✔ | ✔ | ✔ | ― | |
Click here for the image optimized for small screens. (JPG 261KB).
Power aperture is available only in exposure modes A and M and can not be used while photo shooting info is displayed (a icon indicates that power aperture can not be used). The display may flicker while aperture is adjusted.
To choose the roles played by the following controls in combination with the command dials, highlight an option and press the center of the multi selector:
Choose from Choose image area and None.
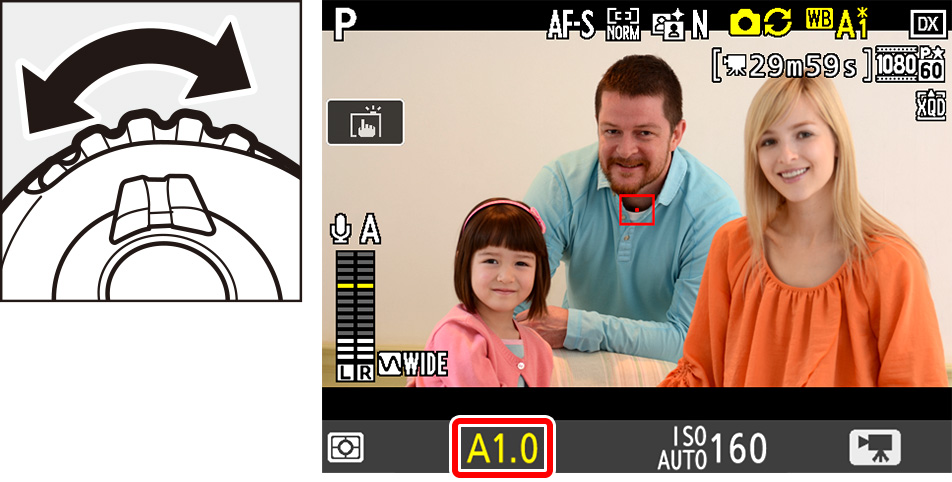
At default settings, exposure compensation can be adjusted by pressing the button and rotating the main command dial. The sound of the dial may however be audible in the audio recorded with movies. This can be prevented by using Custom Setting g1 (Custom control assignment) to assign Exposure compensation + to the Pv button and Exposure compensation - to the Fn1 button. Exposure compensation can then be adjusted by pressing and holding one or the other of these buttons instead of rotating the main command dial.
To lock exposure when filming in P, S, or A mode or when auto ISO sensitivity control is enabled, assign AE‑L lock (Hold) to the center of the sub-selector. Exposure will lock when the center of the sub-selector is pressed and remain locked until it is pressed again. Exposure lock will not be interrupted if the shutter-release button is pressed all the way down to take photographs during filming.
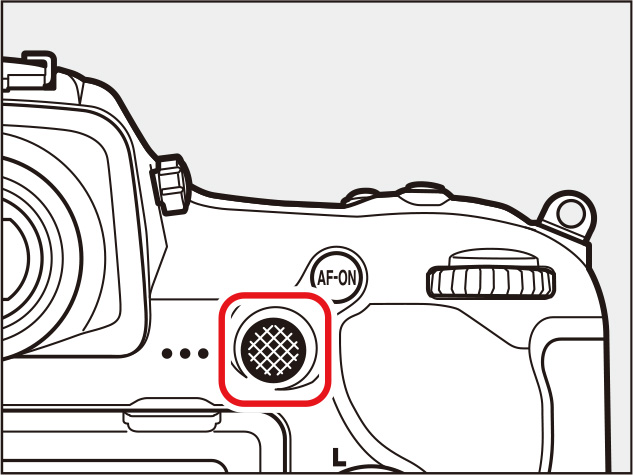
Center of sub-selector
If Record movies is assigned to the shutter-release button and the live view selector is rotated to , you can start live view by pressing the shutter-release button halfway and start and end recording by pressing it all the way down. To prevent camera shake, you can mount the camera on a tripod and start and end recording using an optional remote cord (such as the MC-36A or MC-30A) or wireless remote controller (such as the WR-R10/WR-T10).
To prevent unintended operation of the button, select Disable for Custom Setting f8 (Live view button options).
To enable electronic vibration reduction in movie mode, select On for Electronic VR in the movie shooting menu. Electronic vibration reduction is best with hand-held cinematography; select Off when the camera is on a tripod. Note that if electronic vibration reduction is on and DX is selected for Choose image area (see this section), the angle of view will be reduced and the edges of the frame cropped out.
Electronic vibration reduction is not available at a frame size of 3840 × 2160 (see this section). Regardless of the option chosen for ISO sensitivity settings > ISO sensitivity (mode M) in the movie shooting menu (see this section), the upper limit when electronic vibration reduction is on is ISO 51200.
Pressing the button in movie mode displays the following options:
button.
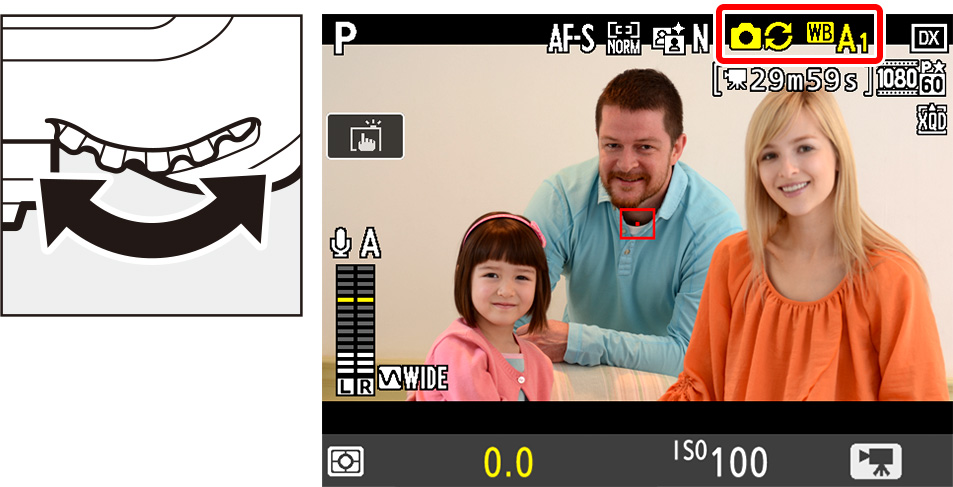
In movie mode, white balance can be set by pressing the WB button and rotating a command dial.
Choose a white balance option. The effect can be previewed in the monitor.
Fine-tune white balance on the amber (A)–blue (B) axis in increments of 0.5.
If (Choose color temp.) is selected for white balance, you can choose a color temperature by pressing the WB button and rotating the subcommand dial (adjustments are made in mireds), or enter a color temperature by pressing and holding the WB button and using and to highlight digits and and to edit.

If Preset manual is selected for white balance, you can use the WB button and sub-command dial to choose a preset.

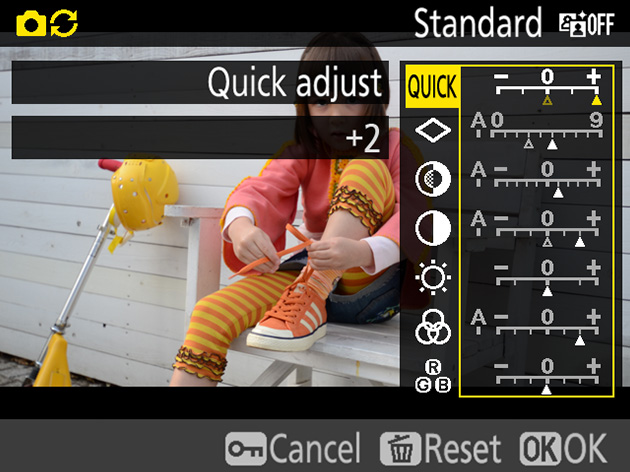
To choose a Picture Control in live view, press the ( / ) button. The effect of the selected control can be previewed in the monitor.
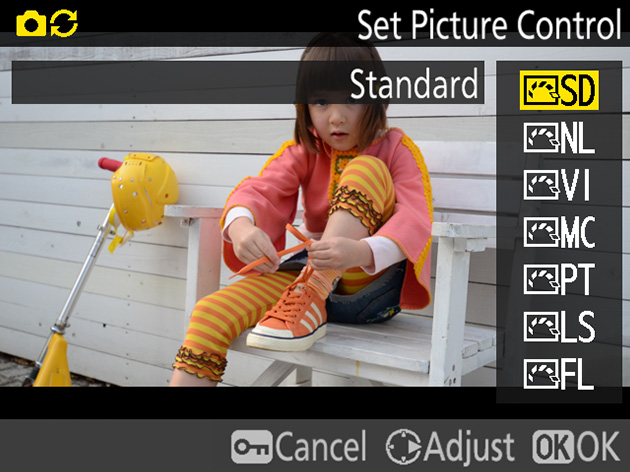
To modify the selected control, press .
In movie mode, photos can be taken by keeping the shutter-release button pressed all the way down (note that photos will not be taken if the camera is unable to focus). If filming is in progress, recording will end and any footage shot to that point will be saved. The photos will have an aspect ratio of 16∶9; size varies with the option selected for movie frame size and, in the case of photos taken at frame sizes of 1920 × 1080 and 1280 × 720, with the image area and the option selected for Image size > JPEG/TIFF in the photo shooting menu.
| Frame size | Image area | Image size | Photo size (pixels) |
|---|---|---|---|
| 3840 × 2160 | ― | 3840 × 2160 | |
| 1920 × 1080 1280 × 720 |
DX | Large | 5568 × 3128 |
| Medium | 4176 × 2344 | ||
| Small | 2784 × 1560 | ||
| 1.3× | Large | 4272 × 2400 | |
| Medium | 3200 × 1800 | ||
| Small | 2128 × 1192 | ||
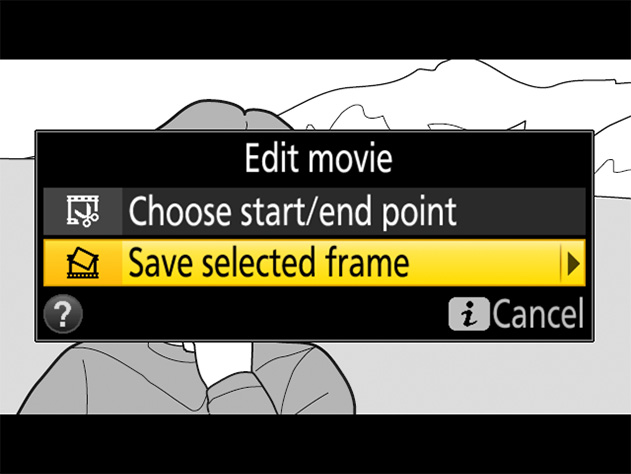
During movie playback, you can use Save selected frame to save selected frames of 4K UHD movies as JPEG images.
1 Pause playback on the desired frame.
Press to pause playback.
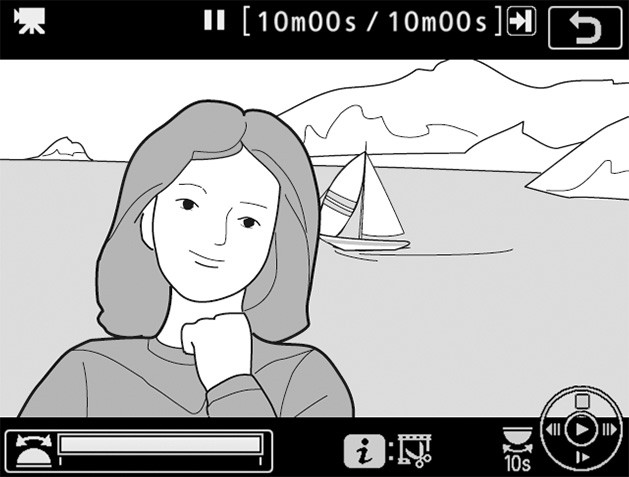
2 Choose Save selected frame.
Press or , then highlight Save selected frame and press .
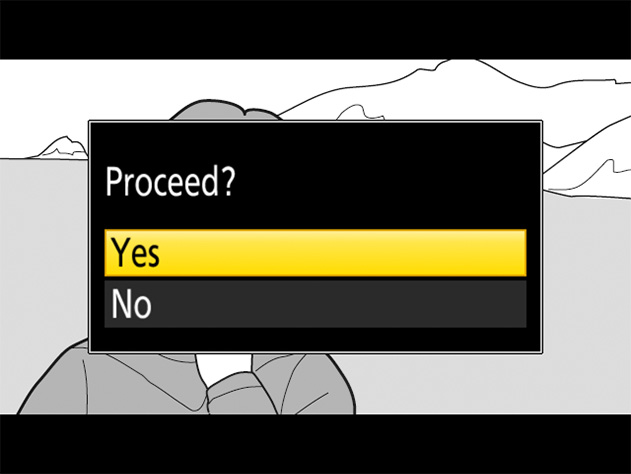
3 Create a still copy.
Press to create a fine★-quality JPEG copy of the current frame. A confirmation dialog will be displayed; highlight Yes and press .
Movie stills lack some photo information and can not be retouched.
The camera can be connected to HDMI devices for high-definition movie playback and recording.
The camera can be connected to high-definition video devices using an optional High-Definition Multimedia Interface (HDMI) cable or a third-party type C HDMI cable. Always turn the camera off before connecting or disconnecting the cable.
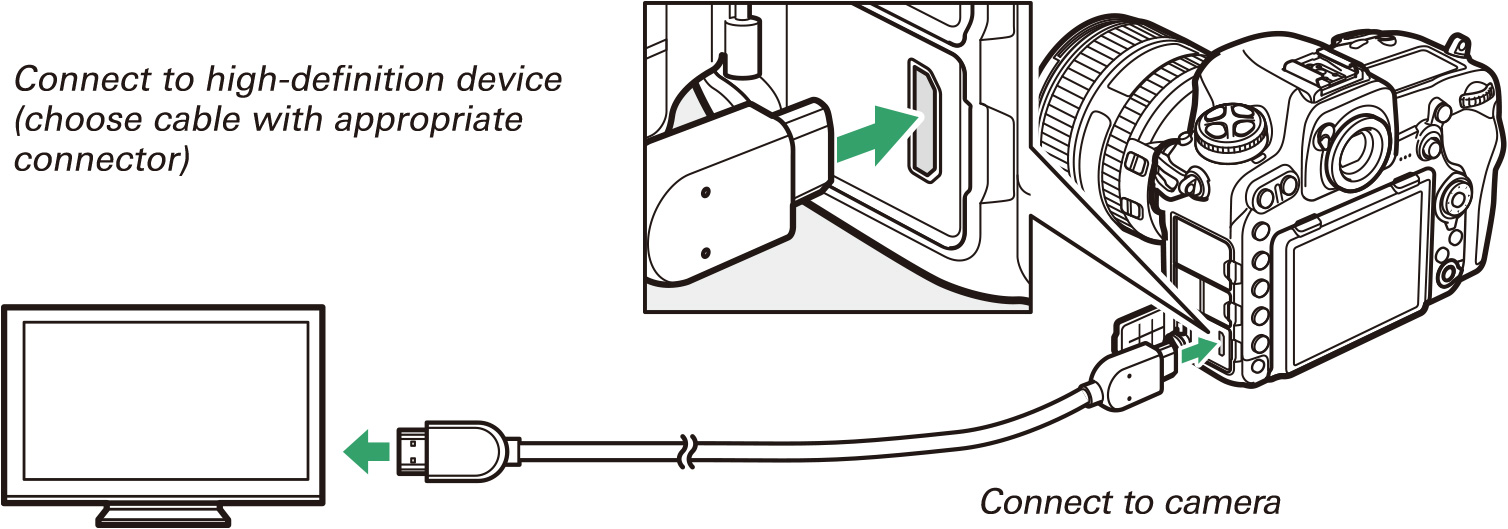
Tune the device to the HDMI input channel, then turn the camera on and press the button. During playback, images will be displayed on the television screen. Volume can be adjusted using television controls; the camera controls can not be used.
If the camera is connected to a third-party HDMI video recorder, you can film movies and save them directly to the device even if no memory card is inserted in the camera.
When using the optional Nikon HDMI cable, attach the supplied clip as shown to prevent accidental disconnection. Do not use cable clips with non-Nikon cables.

The HDMI option in the setup menu controls output resolution and offers a variety of advanced HDMI options.
Choose the format for images output to the HDMI device. If Auto is selected, the camera will automatically select the appropriate format.
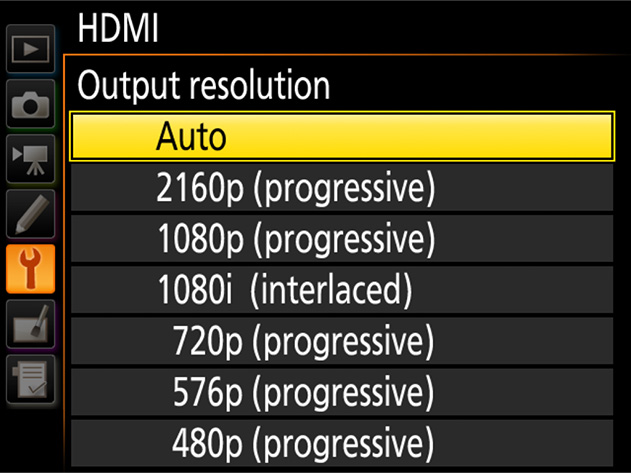
Selecting Advanced displays the following options: