Time-lapse movies can be created from photos shot using time-lapse photography, the interval timer, or unlimited continuous release. In the first case, the camera generates the movie automatically, while the last two methods require third-party movie-editing software, a powerful computer, and advanced image-processing skills.
The three methods of creating time-lapse movies are compared below.
In interval-timer photography, the camera takes photos at preset intervals. Image quality, size, and other settings can be adjusted for exactly the results you want, while shots containing unwanted objects can be edited or deleted. You can create frames for high-quality movies and even (in NEF/RAW format) choose the color temperature.
This is the least complicated method: the camera creates movies from photos taken at preset intervals, sparing you the task of splicing the shots together. You are however limited to the frame sizes, bit rates, and quality options available in the Frame size/frame rate and Movie quality menus and can record movies in MOV format only. In addition, the individual frames that make up the movie are not stored in separate files.
Selecting a shutter speed of 4 s or slower in exposure mode S or M lets you take an unlimited number of photographs in continuous release mode (CL, CH, or QC): shooting can continue as long as the battery lasts and there is space on the memory card, regardless of the option selected for Custom Setting d2 (Max. continuous release). Although the lack of shutter speeds faster than 4 s limits your choice of subjects, the interval between shots is as short as in normal photography, producing smoother footage of subjects that require exposure times of 4 s or more, such as stars or auroras.
| Interval timer | Time lapse | Continuous | ||
|---|---|---|---|---|
| Format | Stills | NEF, JPEG, TIFF | ― | NEF, JPEG, TIFF |
| Movies | ― | MOV | ― | |
| Max. frame size | 5568 × 3712 | 3840 × 2160 | 5568 × 3712 | |
| Time between shots | 0.5 s or more | 1 s or more | Time selected in CL or CH mode | |
| Exposure time | 1/8000–30 s | 4–30 s | ||
| Creates | Material for advanced time-lapse movies and film logs | Hassle-free time-lapse movies | Material for time-lapse movies featuring star trails or auroras | |
Filming 4K UHD time-lapse movies is simple: just select a frame size of 3840 × 2160 for Frame size/frame rate in the movie shooting menu and then follow the steps below. The crop (see this section) is the same as for 4K UHD movies.
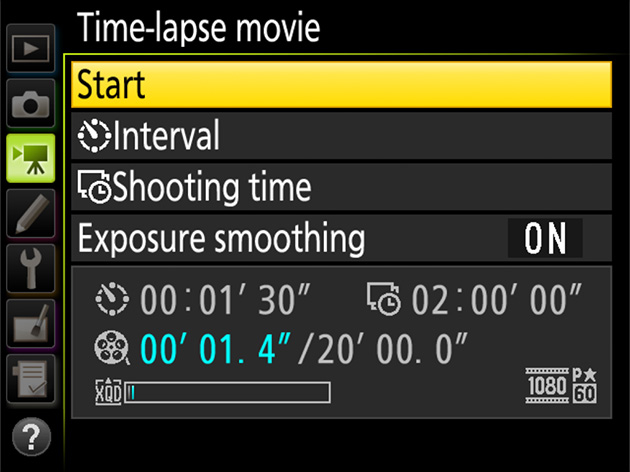
1 Adjust time-lapse movie settings.
Select Time-lapse movie in the movie shooting menu and adjust the following settings:
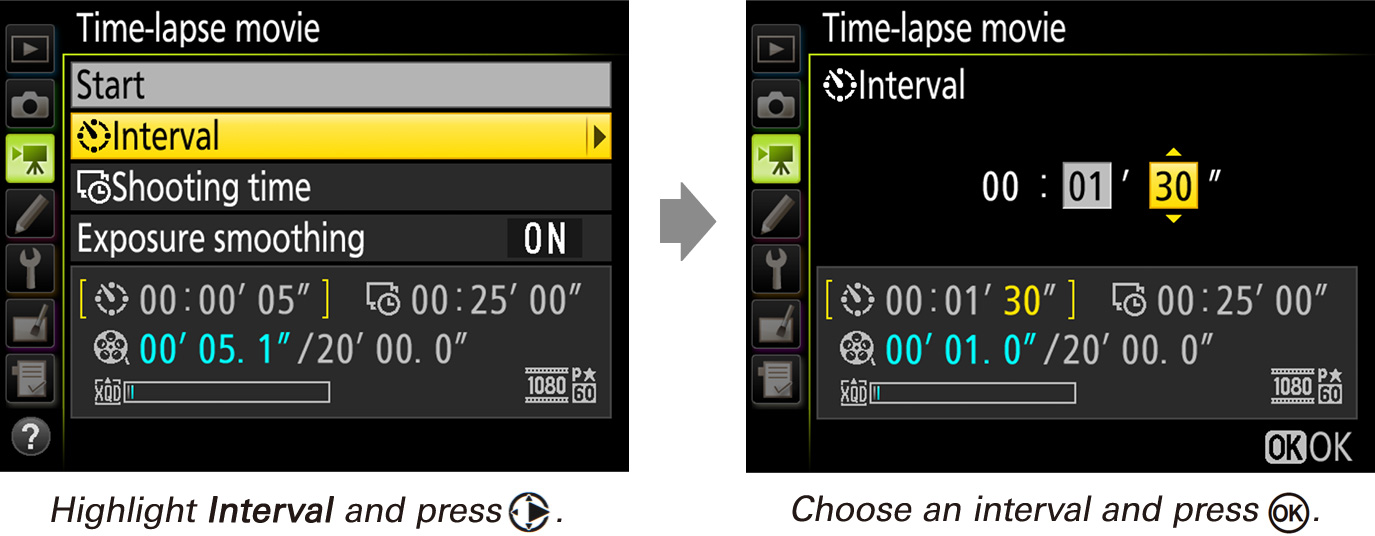
Interval: The interval (in minutes and seconds) should be longer than the slowest anticipated shutter speed.
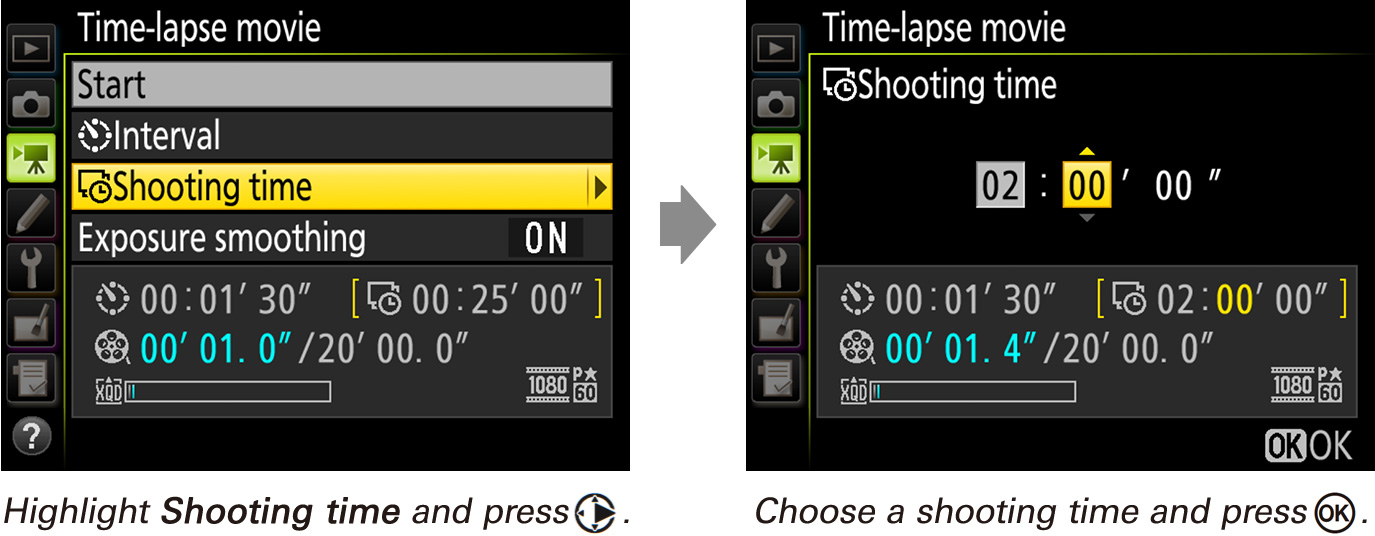
Shooting time: The total shooting time (in hours and minutes) can be up to 7 hours and 59 minutes.
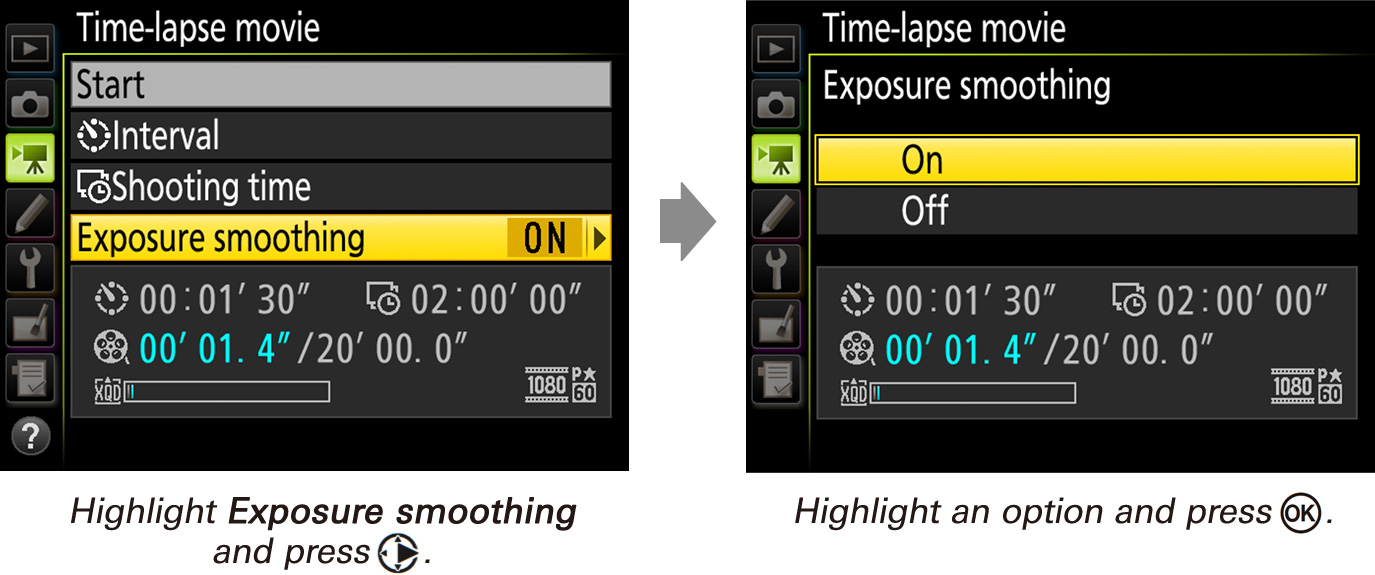
Exposure smoothing: Select On to smooth abrupt changes in exposure in modes other than M (note that exposure smoothing only takes effect in mode M if auto ISO sensitivity control is enabled in the photo shooting menu).
2 Start shooting.
Highlight Start and press . After about 3 s, shooting will start and the camera will take photographs at the selected interval for the selected shooting time. To end shooting early and create a time-lapse movie from the frames shot to that point, highlight Off in the time-lapse movie menu and press , or press between frames or immediately after a frame is recorded.