Before recording, adjust settings in the movie shooting menu.

Choose an option according to how you will use the movie.
| Option | Maximum length (★ high quality/Normal) |
|---|---|
| 3840 × 2160 (4K UHD); 30p |
29 min. 59 s (recorded across up to 8 files of up to 4 GB each; the number and length of the files varies with Frame size/frame rate and Movie quality; files can be joined together using ViewNX‑i as described on here). |
| 3840 × 2160 (4K UHD); 25p | |
| 3840 × 2160 (4K UHD); 24p | |
| 1920 × 1080; 60p | |
| 1920 × 1080; 50p | |
| 1920 × 1080; 30p | |
| 1920 × 1080; 25p | |
| 1920 × 1080; 24p | |
| 1280 × 720; 60p | |
| 1280 × 720; 50p | |
| 1920 × 1080; 60p crop | |
| 1920 × 1080; 50p crop | |
| 1920 × 1080; 30p crop | |
| 1920 × 1080; 25p crop | |
| 1920 × 1080; 24p crop |
The movie crop varies with frame size and, at frame sizes of 1920 × 1080 and 1280 × 720, the option selected for Image area > Choose image area in the movie shooting menu.

Footage with a frame size of 3840 × 2160 (4K UHD) can be filmed with DX lenses.
ISO sensitivity can be adjusted in movie mode (in live view or during recording).
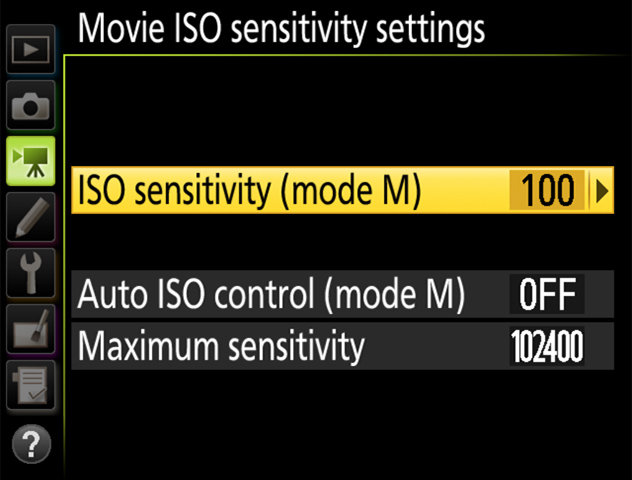
Auto ISO Sensitivity Control
At high ISO sensitivities, the camera may have difficulty focusing and noise (randomly-spaced bright pixels, fog, or lines) may increase. This can be prevented by choosing a lower value for Movie ISO sensitivity settings > Maximum sensitivity.
Choose a Picture Control for movies.

Adjust white balance according to lighting conditions. Choose Same as photo settings to use the white balance settings currently selected in the photo shooting menu.

Instead of using a specially-prepared reference object, you can measure white balance from any white or grey object in the frame.
When Preset manual is selected for white balance, you can hold the WB button in live view to enter direct measurement mode. PRE will flash in the display; tap a white or grey object to position the spot white balance target ( ) over the selected object and measure white balance. To zoom in on the target for precise positioning, press the button. Press the WB button again to exit direct measurement mode.

White balance presets d1–d6 can be viewed by selecting Preset manual for White balance in the movie shooting menu. The white balance targets are shown on the preset.

Adjust settings for the built-in stereo microphone or optional ME‑1 stereo or ME‑W1 wireless microphones. Choose Auto sensitivity to adjust sensitivity automatically, Microphone off to turn sound recording off. To select sensitivity manually, select Manual sensitivity and choose a value between 1 and 20 (higher values indicate increased sensitivity).
If Wide range is selected, the built-in microphone will respond to a wide range of frequencies, from music to the bustling hum of a city street. Choose Vocal range to bring out human voices.
Select On to enable the low-cut filter for the built-in microphone (optional stereo microphones are unaffected), reducing noise produced by wind blowing over the microphone (note that other sounds may also be affected). Wind-noise reduction for optional stereo microphones that support this feature can be enabled or disabled using microphone controls.