Add IPTC metadata to pictures.
The following tools can be used to edit and save IPTC metadata that will later be appended to pictures:

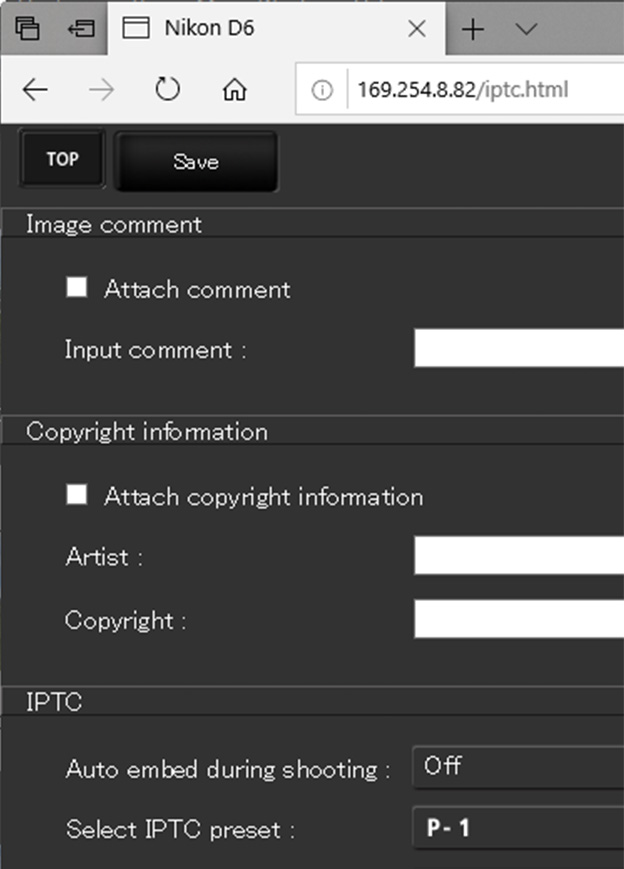
IPTC Preset Manager can be used to create presets with the 14 fields supported by the camera and save the results in NMS format (extension ".nms"). From version 1.2, presets can also be saved in XMP/IPTC format (extension ".xmp").

Follow the steps below to import XMP/IPTC presets created using third-party software.
1 Save the presets on the computer.
For more information, see documentation for the XMP/IPTC software.
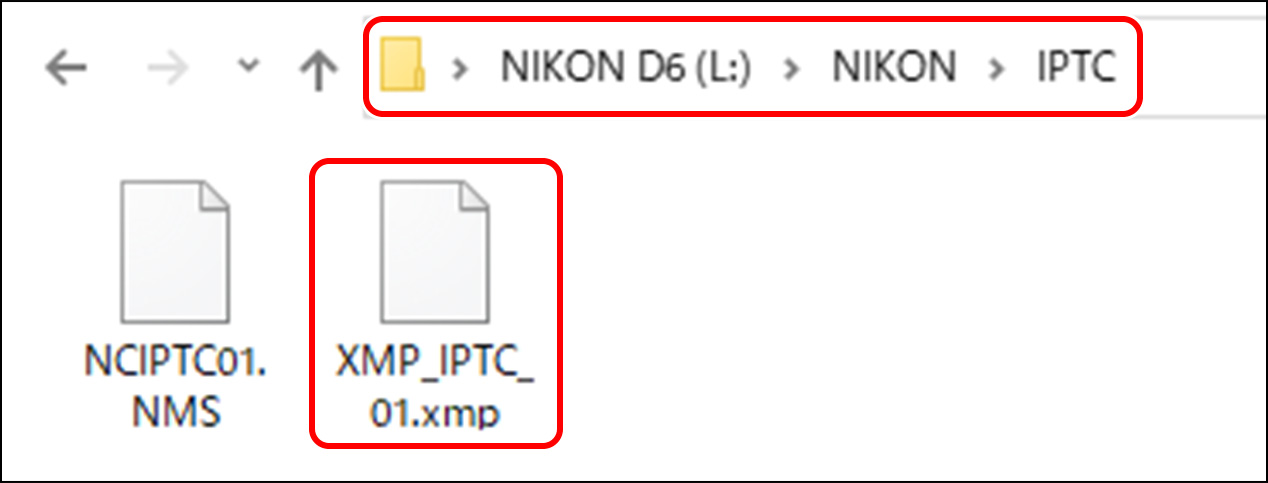
2 Copy the presets to a memory card.
Create a folder on the memory card as shown and copy the XMP/IPTC presets (extension ".xmp") to the folder.
3 Insert the memory card in the camera.
The card can be inserted in either slot.
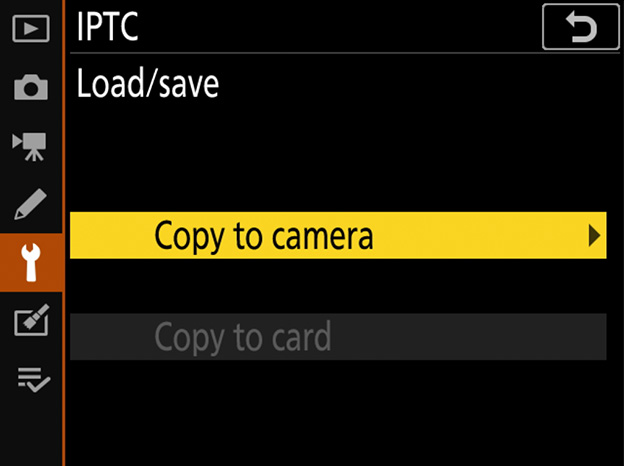
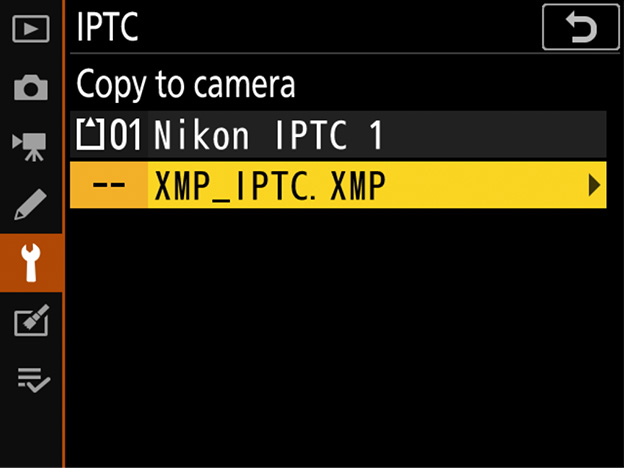
4 Display the presets.
In the setup menu, select [IPTC] > [Load/save], choose the slot in which you inserted the memory card in Step 3, and then highlight [Copy to camera] and press to display a list of the presets on the card in the selected slot.
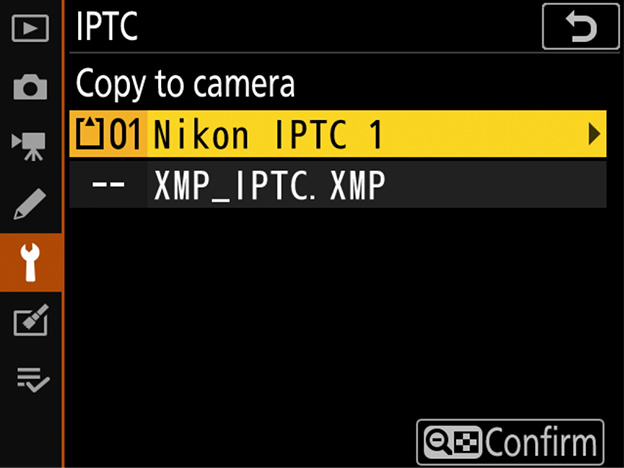
5 Select a preset.
Highlight a preset and press .
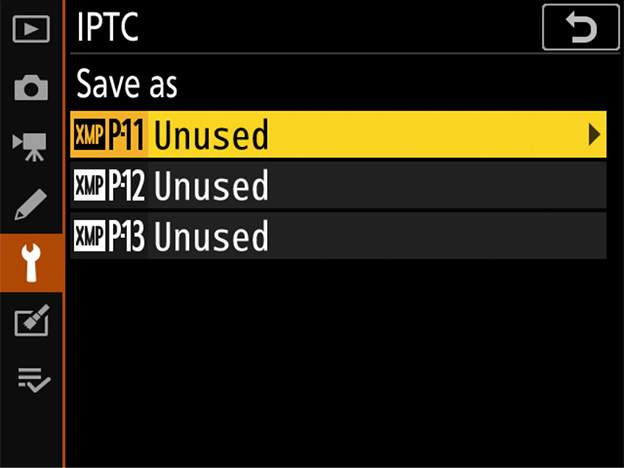
6 Choose a destination.
Highlight the desired destination (P11, P12, or P13) and press .
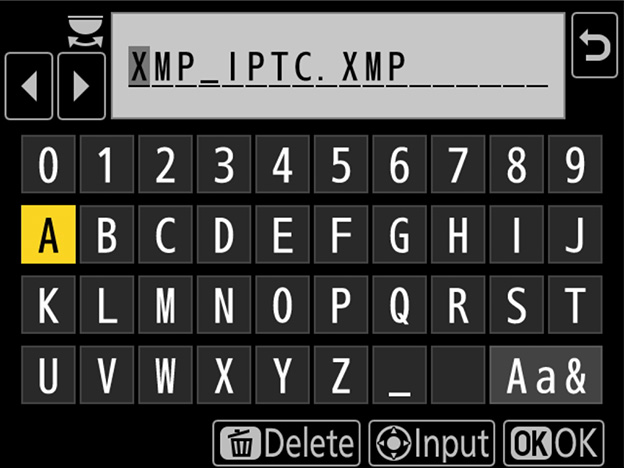
7 Copy the preset to the camera.
A text-entry dialog will be displayed; name the preset and press to copy the selected preset to the camera.
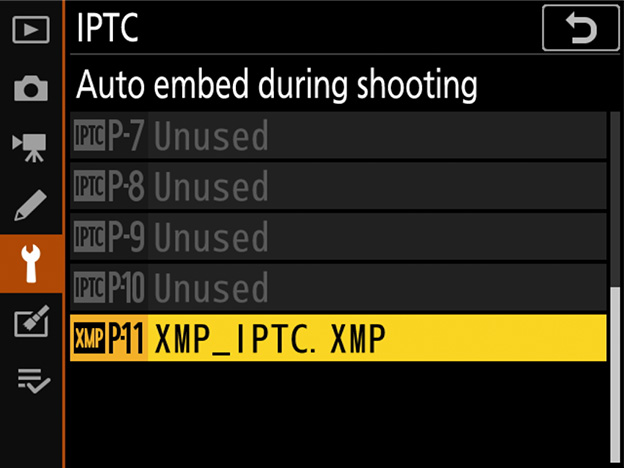
8 Select the preset for auto embedding.
In the setup menu, select [IPTC], then highlight [Auto embed during shooting], press , and choose the preset you copied to the camera in Step 7. The selected preset will be embedded in all subsequent photographs.
XMP/IPTC presets cannot be exported from the camera to a memory card.
During playback, the camera will not display IPTC metadata for pictures in which XMP/IPTC presets have been embedded.