The camera location data feature can be used to record track logs that when opened in ViewNX-i show the route of your travels for a given day. Location data from the logs can be added to pictures taken with other cameras.
Log files are stored in the "NIKON" > "GNSS" folder on the memory card and have names of the form "Nyymmddx.log", where "yy" is the last two digits of the current year, "mm" the month, "dd" the day, "x" a single-character identifier from "0" (zero) to "Z" assigned in ascending order by the camera, and ".log" the extension. Logs are in NMEA format, although this does not guarantee that they will display correctly in all software or on all devices.
Track logs can be recorded as described below.
1 Insert a memory card in Slot 1.
Log files are recorded to the memory card in Slot 1. Log files will not be recorded if no card is inserted or if a card is inserted only in Slot 2.

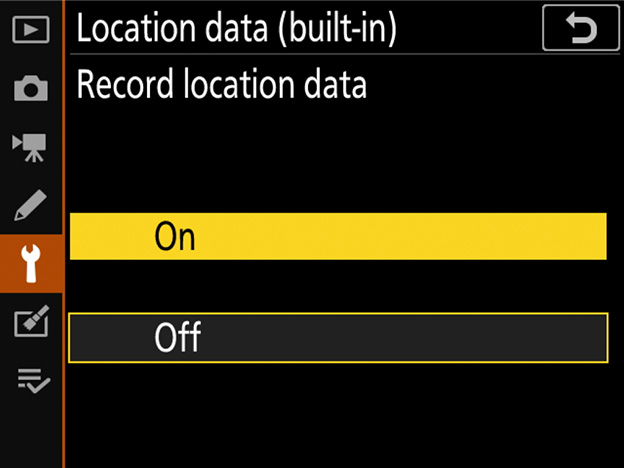
2 Enable location data.
Select [On] for [Location data (built-in)] > [Record location data] in the setup menu to enable the camera's built-in location data feature and start downloading location data from the satellite system.
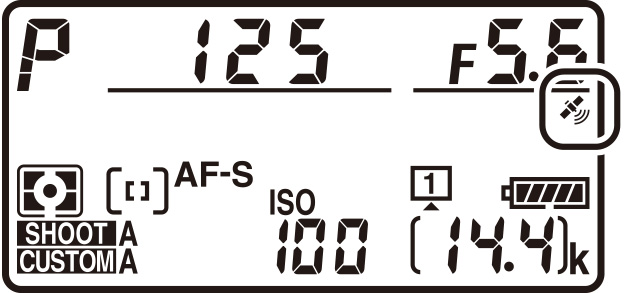
Confirm that the icon has lit in the top control panel.
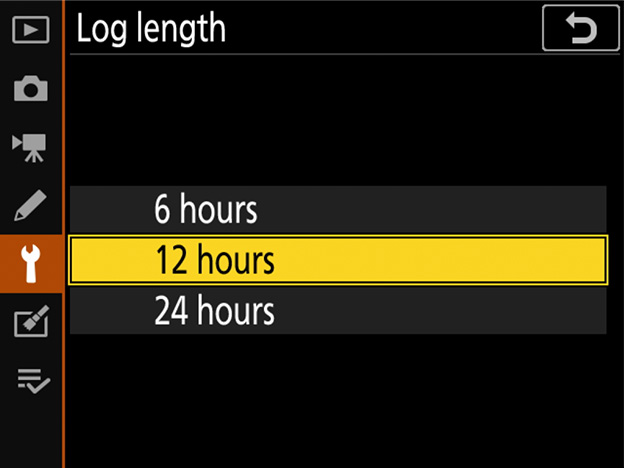
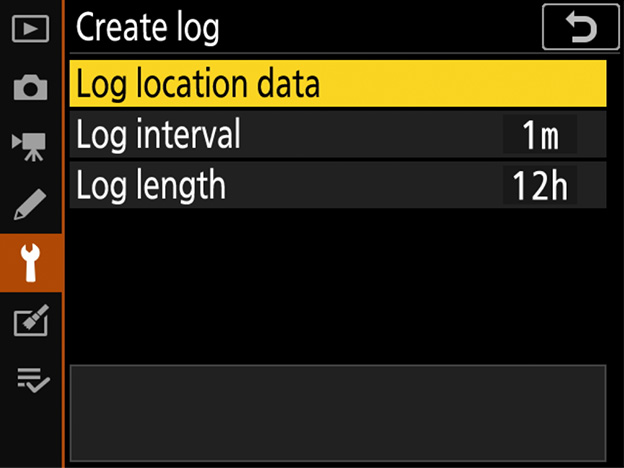
3 Adjust log settings.
In the setup menu, select [Location data (built-in)] > [Create log] and choose the log interval and length.

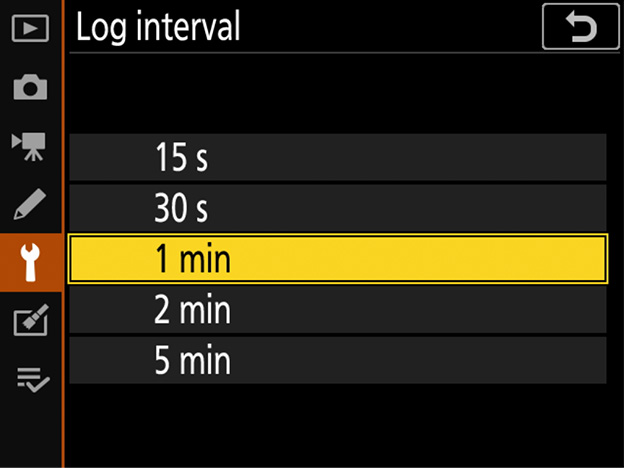
Choose the interval according to your anticipated rate of travel. For example, choose a short interval when travelling by train or helicopter and a long interval when travelling on foot.
The log length and interval cannot be changed once tracking has started. You can however opt to end the current log and create a new file with different settings.
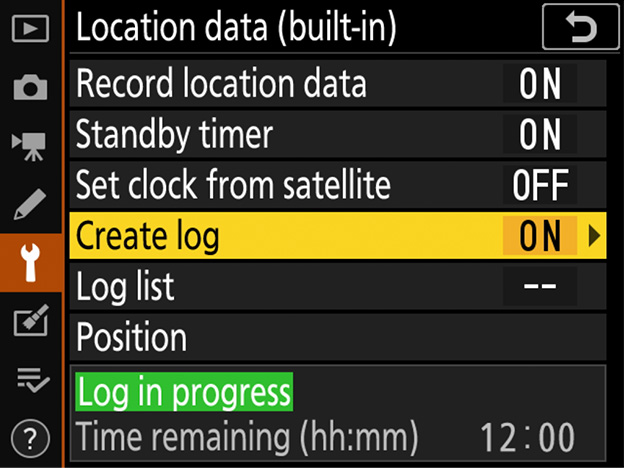
4 Start the log.
After returning to [Location data (built-in)] > [Create log] in the setup menu, highlight [Log location data] and press .
The camera will log its position at the selected interval for the selected time; the time remaining can be viewed by selecting [Location data (built-in)]. To end, pause, or resume recording, highlight [Log location data] and press .
Logs can only be created if the camera clock is set. When tracking is active, the camera continues to monitor its position even when off; tracking will only end before the specified log length is reached if the battery is exhausted or removed or if [Off] is selected for [Location data (built-in)] > [Record location data] in the setup menu. Note, however, that no log entries will be added at times when the camera is unable to acquire location data. To prevent logs ending prematurely, be sure the battery is fully charged before tracking starts.
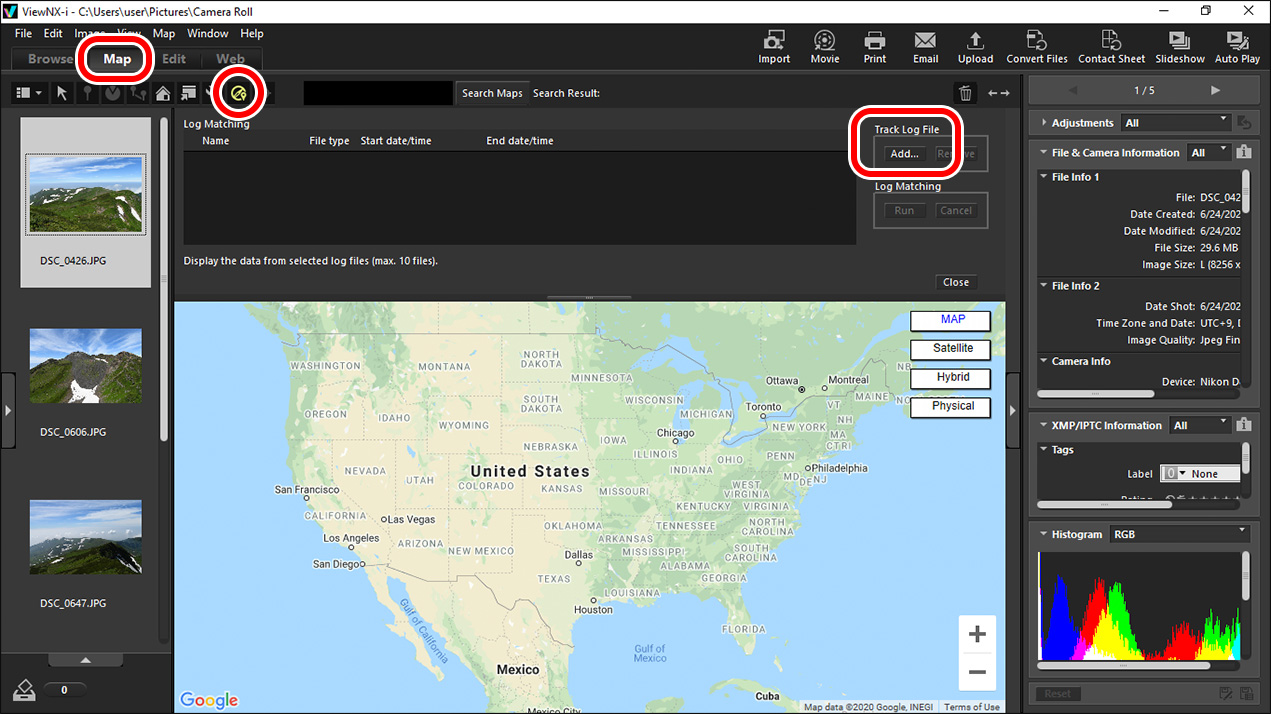
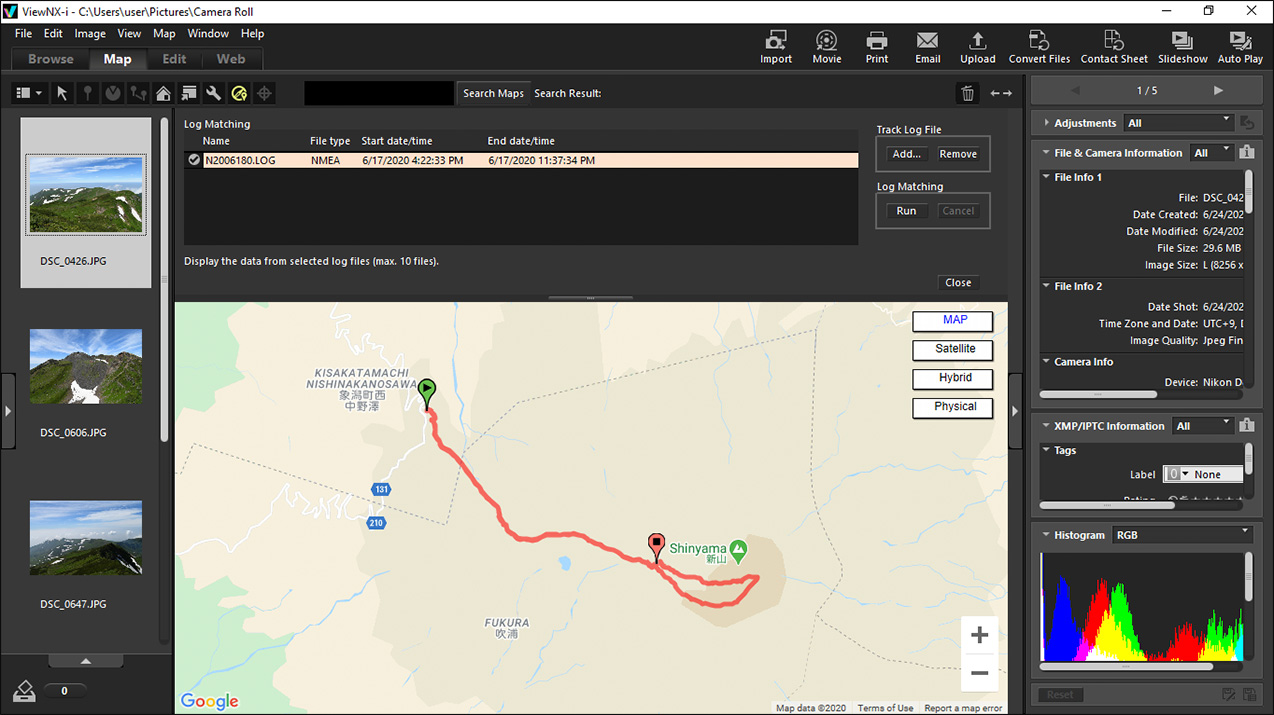
To view tracks on a map, you can copy log files to a computer using a card reader or by other methods and then open them in ViewNX-i. Click the icon in the [Map] tab and then click [Add] under [Track Log File] and choose a log file.

The track will appear on the map. The start () and end () pins mark the start and end of the track.

If you take your D6 on a shoot with a second camera, say a D5, the location data from the D6 can be used to add location data to pictures taken with the D5 based on the time of recording.
1 Choose the folder containing the target pictures.
Under [Folders] in the [Navigation] palette, choose a folder containing pictures to which you want to add location data.
2 Load the log file.
Click the icon in the [Map] tab and then click [Add] under [Track Log File].
Select the log file created with the D6 and click [Open]. The file will be loaded into ViewNX-i and the track will appear on the map.
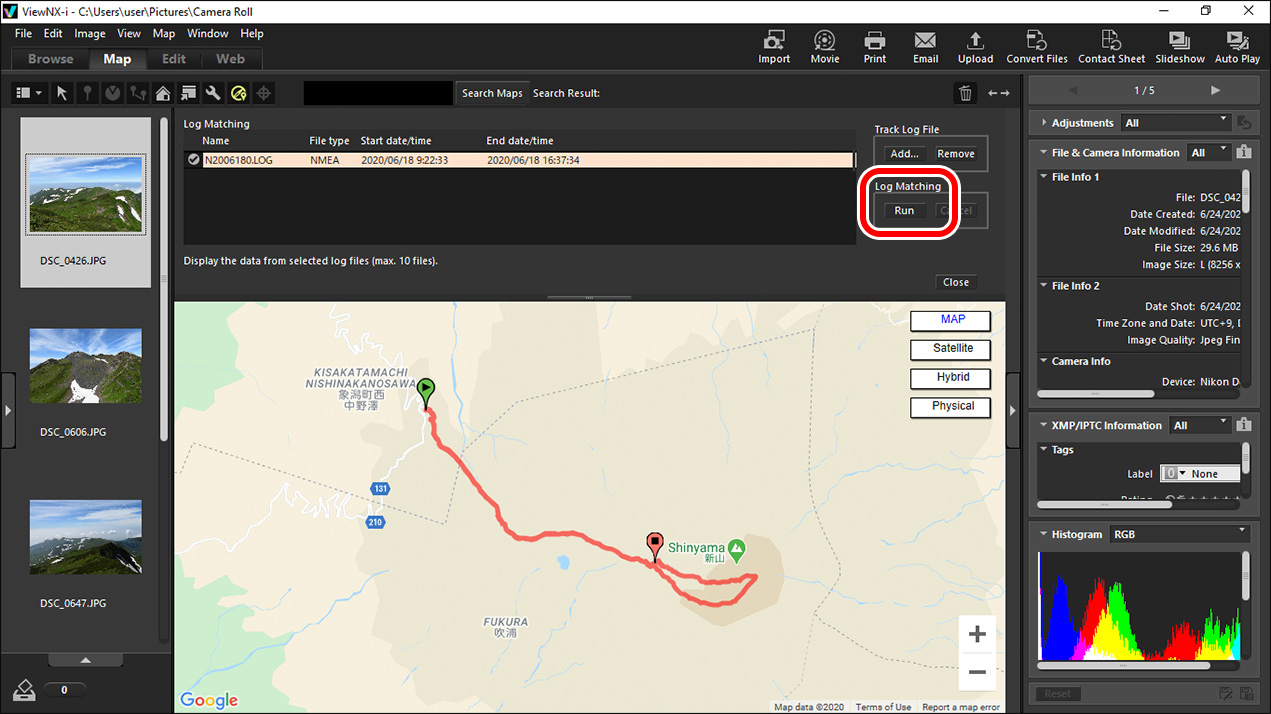
3 Run log matching.
Under [Log Matching], click [Run].
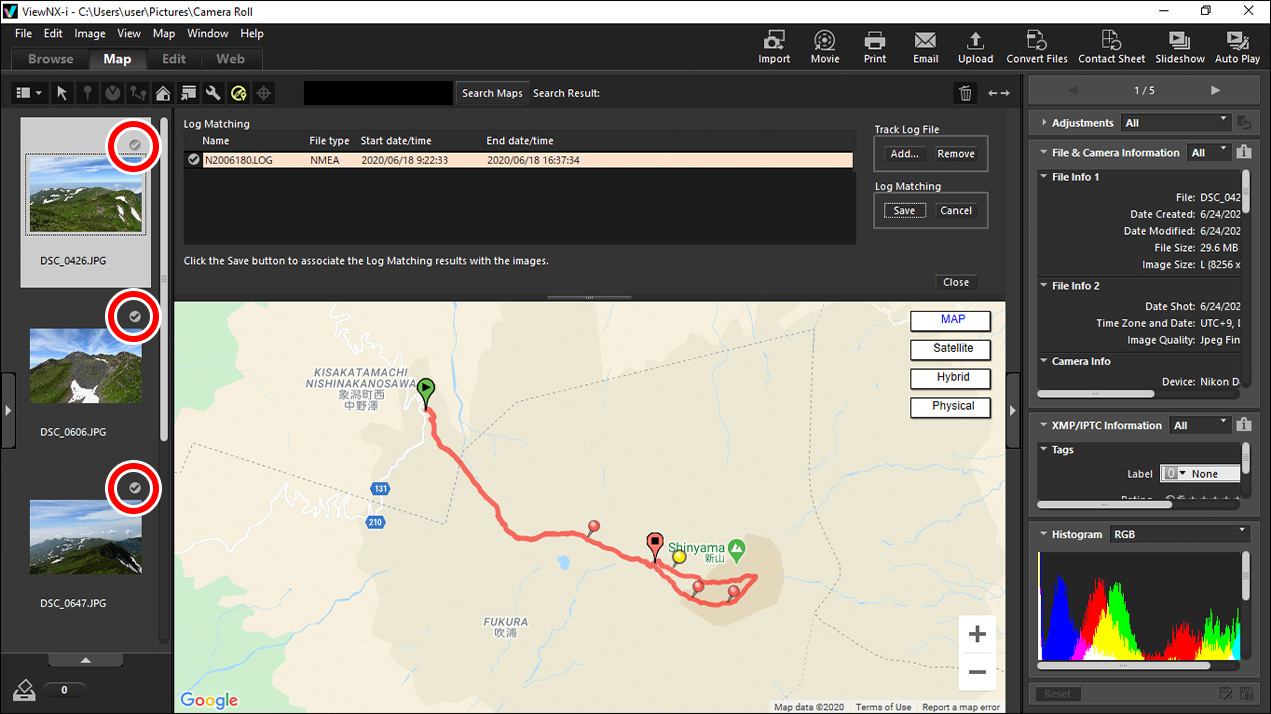
Pictures shot in the time spanned by the log loaded in Step 2 are indicated by check marks () and map pins ( or ). By default, the pins appear at waypoints with times nearest to the times the pictures were taken.
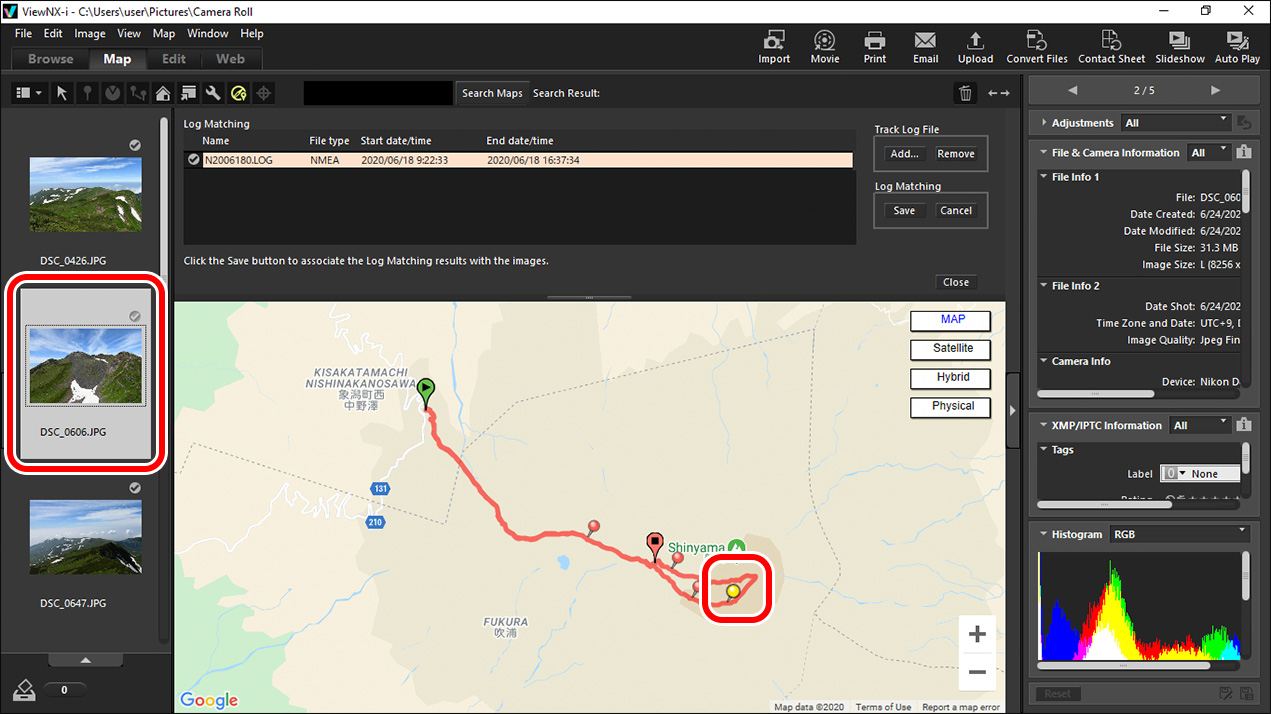
4 Check the matches on the map.
Select pictures in the thumbnail list to view their location on the map. The pin for the selected picture is displayed in yellow ().
Pictures can be removed from the map by clicking the check marks (); the check marks will change to and location data will not be added when the pictures are saved in Step 5.
5 Add the location data to the pictures.
Under [Log matching], click [Save].
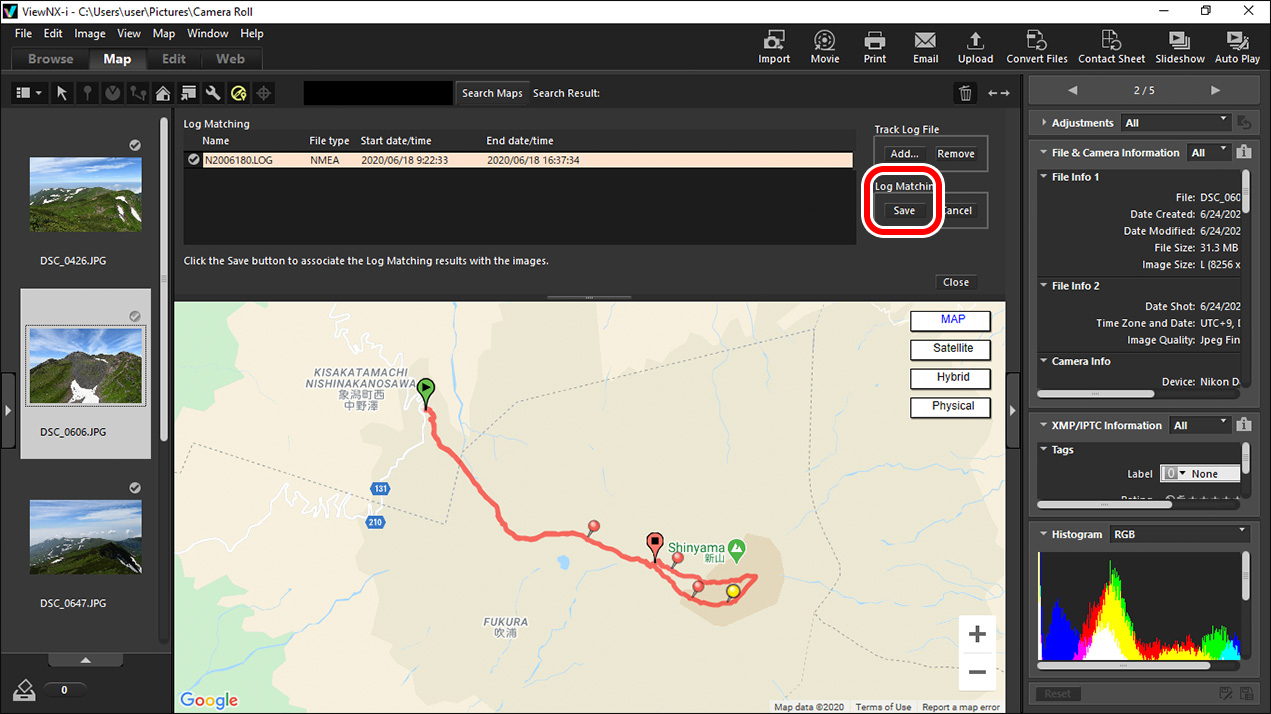
When prompted, click [Yes] to add location data to the selected pictures. Location data icons () will appear on the pictures in the thumbnail list.
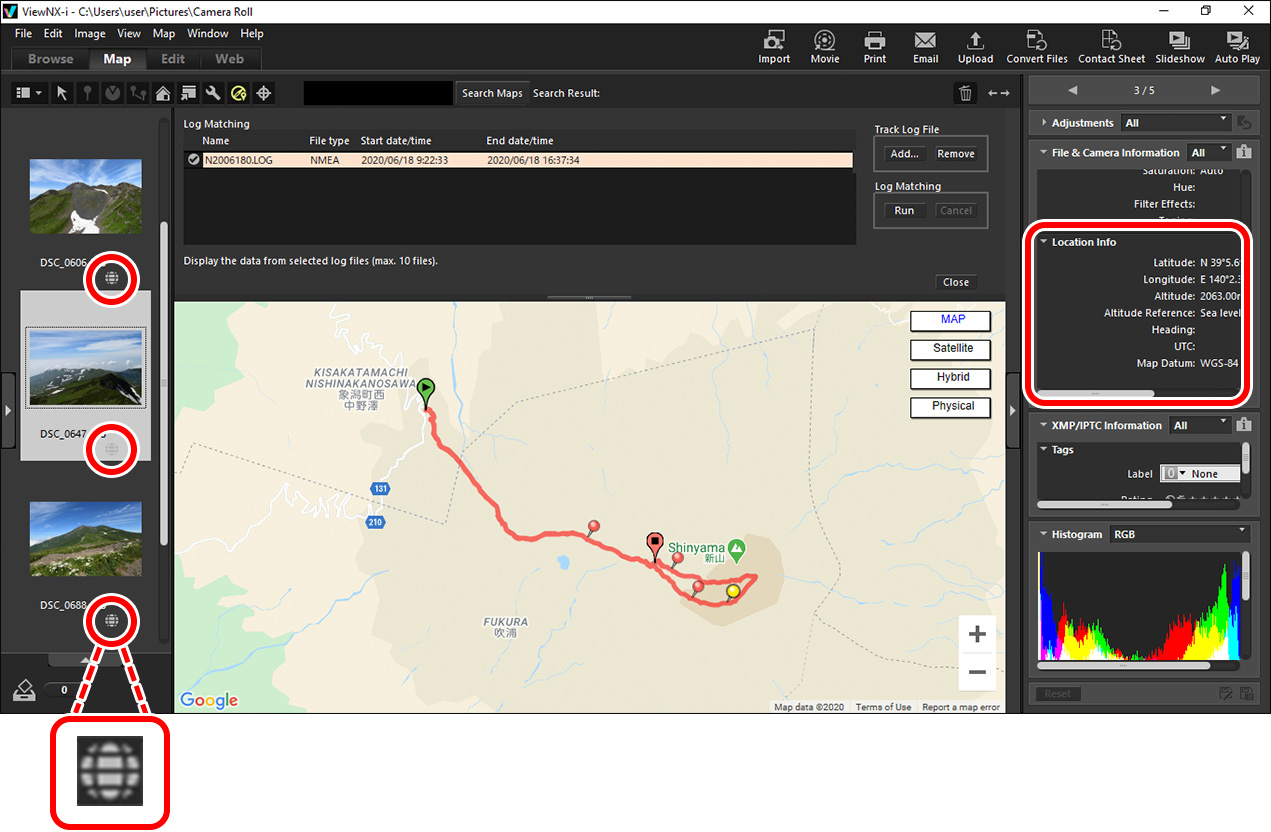
Use ViewNX-i to edit location data while viewing locations on a map. For more information, see ViewNX-i online help.