Auto white balance is recommended with most light sources. If the desired results cannot be achieved with auto white balance, choose an option from the list below or use preset white balance.
Choose from the following options:
|
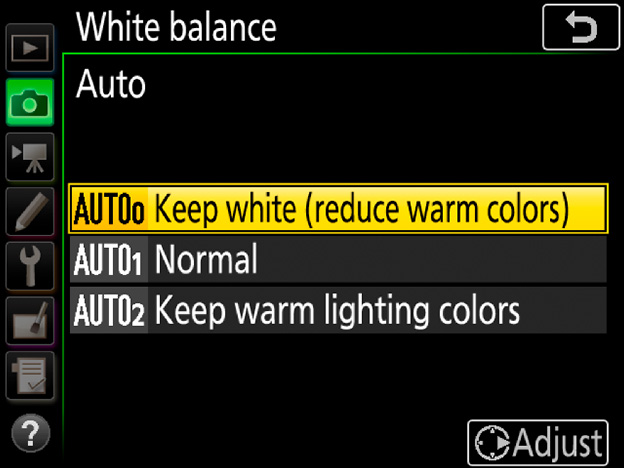
Auto0: Keep white (reduce warm colors) |
White balance is adjusted automatically. Suitable for most light sources; if an optional flash unit is used, white balance is adjusted to match. see this section for more on options. |
|---|---|
|
Natural light auto K * 4500 - 8000 |
White balance is adjusted for natural light, producing colors closer to those seen by the naked eye (see this section). |
|
Incandescent K * 3000 |
Use under incandescent lighting. |
|
Fluorescent |
Use with the light sources below. |
|
Fluorescent: Sodium-vapor lamps K * 2700 |
Sodium vapor lighting (found in sports venues) |
|
Fluorescent: Warm-white fluorescent K * 3000 |
Warm white fluorescent lights |
|
Fluorescent: White fluorescent K * 3700 |
White fluorescent lights |
|
Fluorescent: Cool-white fluorescent K * 4200 |
Cool-white fluorescent lights |
|
Fluorescent: Day white fluorescent K * 5000 |
Daylight white fluorescent lights |
|
Fluorescent: Daylight fluorescent K * 6500 |
Daylight fluorescent lights |
|
Fluorescent: High temp. mercuryvapor K * 7200 |
High color temperature light sources (e.g., mercury-vapor lamps) |
|
Direct sunlight K * 5200 |
Use with subjects lit by direct sunlight. |
|
Flash K * 5400 |
Use with optional flash units. |
|
Cloudy K * 6000 |
Use in daylight under overcast skies. |
|
Shade K * 8000 |
Use in daylight with subjects in the shade. |
|
Choose color temp. K * 2500 - 10,000 |
Choose a color temperature from a list of values. |
|
Preset manual K * - |
Use your subject or light source or an existing photo as a reference (see this section). |
offers a choice of AUTO0 Keep white (reduce warm colors), AUTO1 Normal, and AUTO2 Keep warm lighting colors. The warm cast of incandescent lighting can be eliminated by selecting Keep white (reduce warm colors) or preserved by selecting Keep warm lighting colors.
Adapted as it is to natural light sources, Natural light auto produces better results under natural lighting than comparable auto white balance options. White balance adapts to changes in lighting, producing results close to those seen by the naked eye whether your subject is a sunset or fall colors.

The color temperature chosen for auto white balance can be viewed in the playback photo information display. Use this value as a reference when selecting a value for Choose color temp.
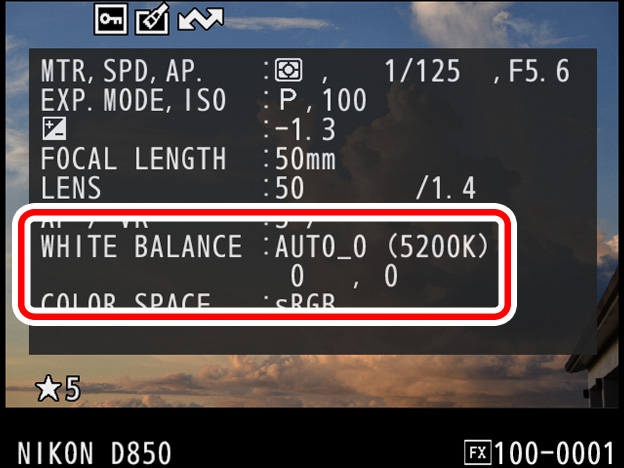
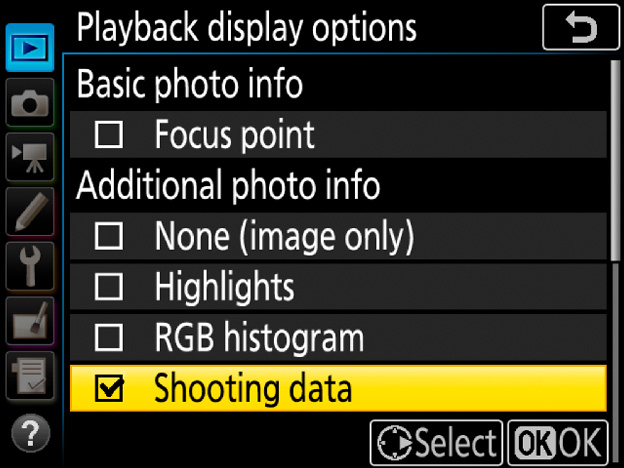
To view color temperature, go to Playback display options in the playback menu and place a check next to Shooting data.
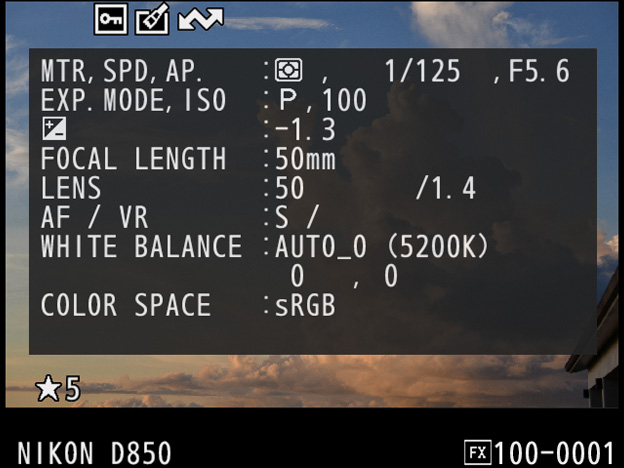
Color temperature and other photo information can then be viewed by pressing during fullframe playback.

The camera does not display the color temperature for photos with white balance set to and On (Mode 2) selected for Silent live view photography (see this section).
In live view, you can measure white balance from any white or grey object in the frame (spot white balance).
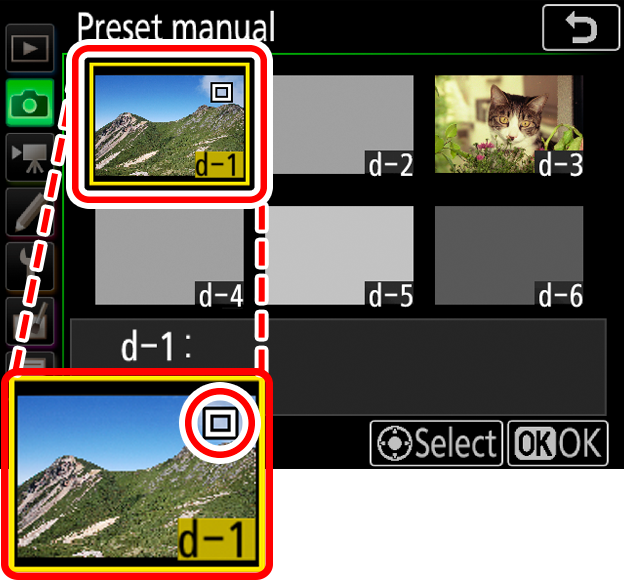
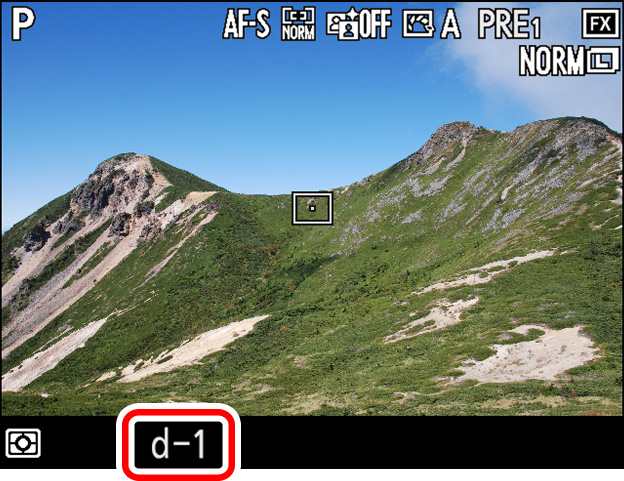
1 Select preset manual white balance.
Press and hold the button and rotate the main command dial until (Preset manual) is displayed in the monitor.
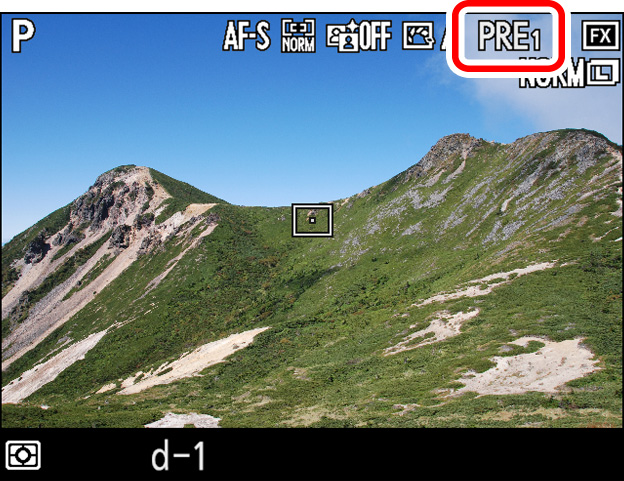
2 Select a preset.
Keeping the button pressed, rotate the sub-command dial until the desired white balance preset (d-1 to d-6) is displayed.
3 Select direct measurement mode.
Release the button briefly and then press it again until the icon starts to flash. A spot white balance target ( ) will be displayed at the selected focus point.
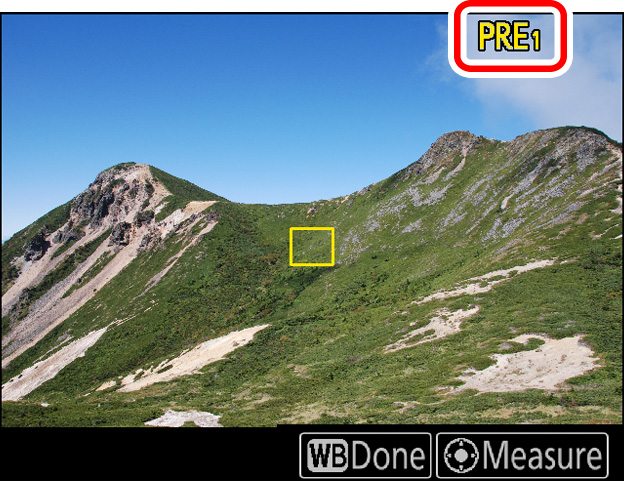
4 Position the target over a white or grey area.
While flashes in the display, use the multi selector to position the target over a white or grey area of the frame. To zoom in for more precise positioning, press the button. You can also measure white balance anywhere in the frame by tapping your subject in the monitor, in which case you can proceed directly to Step 6.
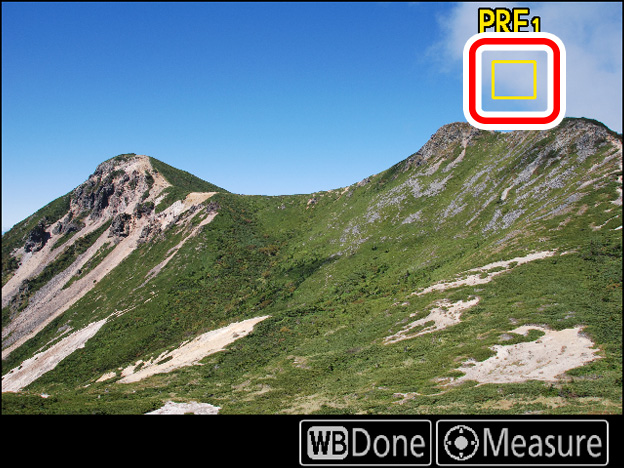
5 Measure white balance.
Press the center of the multi selector or press the shutterrelease button all the way down to measure white balance.
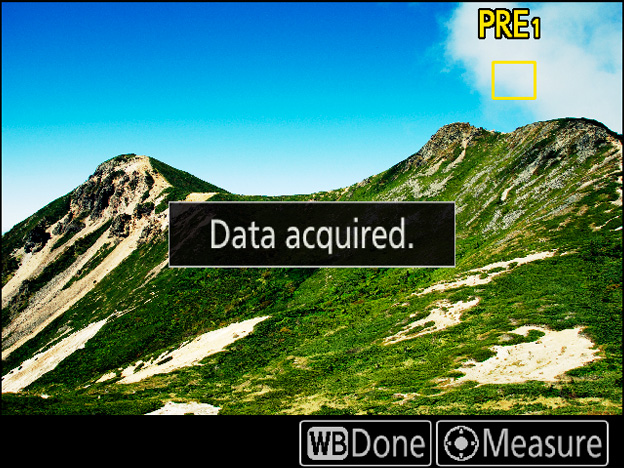
6 Exit direct measurement mode.
Press the button to exit direct measurement mode.
White balance presets d1-d6 can be viewed by selecting Preset manual for White balance in the photo or movie shooting menu. The white balance target is shown on the preset.