Matching Settings to Your Subject – Create unique portraits
Learn how you can use the preset Picture Controls and modify settings to compose distinctive portraits that reflect your creative intention.
Learn how you can use the preset Picture Controls and modify settings to compose distinctive portraits that reflect your creative intention.
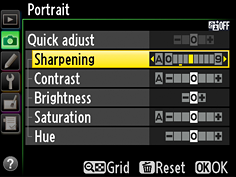
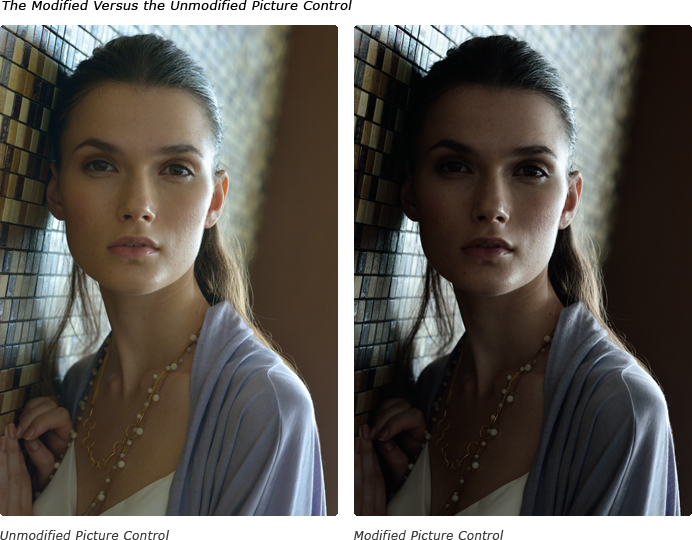
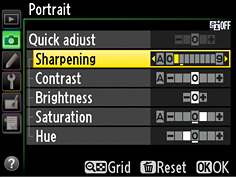
A slight increase in sharpening adds depth by heightening the differences between in- and out-of-focus areas.
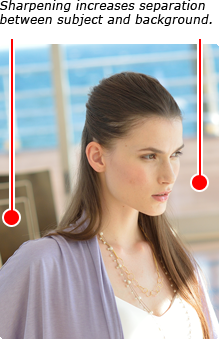
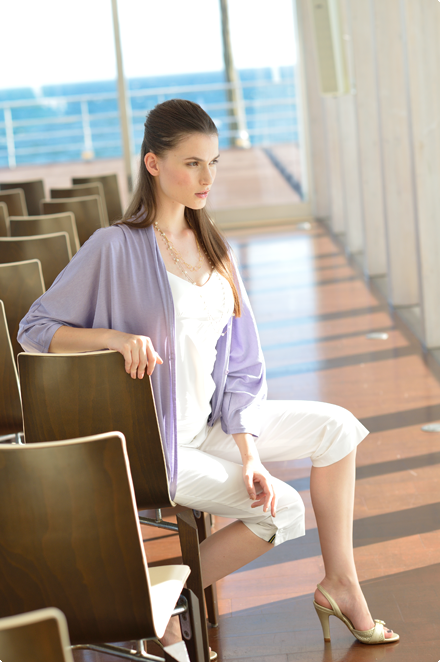
Photo © Daisuke Kumakiri
The photo above was taken using the Portrait Picture Control with Sharpening set to 4. Other parameters are left at default values for a soft effect.
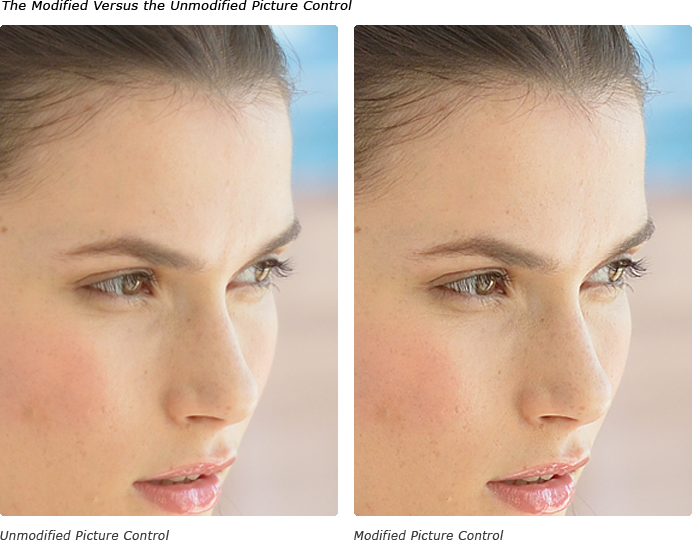
The modified Picture Control sharpens outlines in eyelashes, hair, and other fine details, preventing the subject appearing flat and two-dimensional.
When using a fill-flash in daylight, increase Saturation to avoid washed out colors in areas lit by the flash.
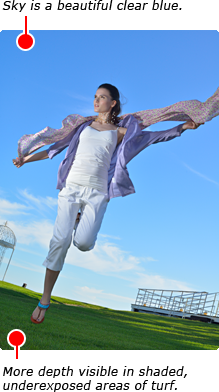
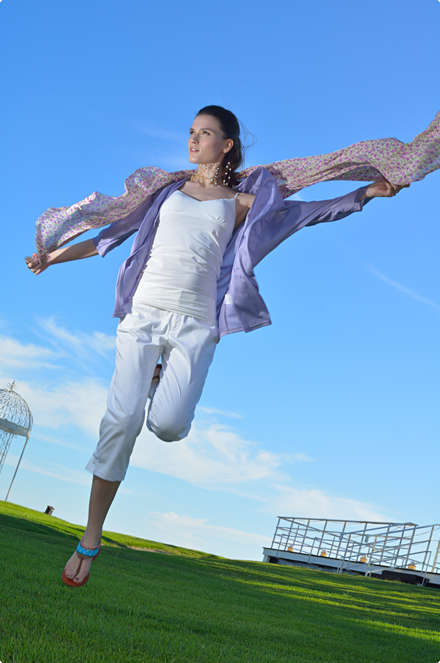
Photo © Daisuke Kumakiri
The photo above was taken using the Portrait Picture Control with Saturation set to +3. Sharpening is left at its default value to suggest motion.

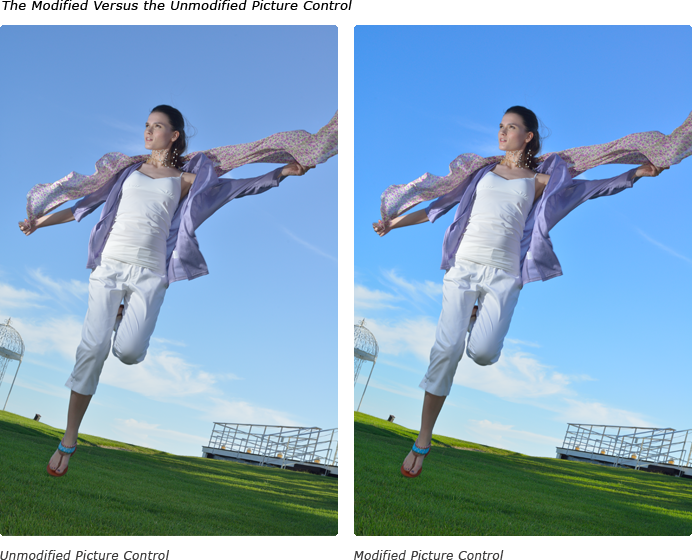
The modified Picture Control makes the sky and grass more vivid for a balanced effect that brings the portrait subject to the fore. The blue of the sky was made still more vivid using the Capture NX 2 LCH editor.
Reducing saturation emphasizes shadows for a still, calm effect in photos taken under low natural light.
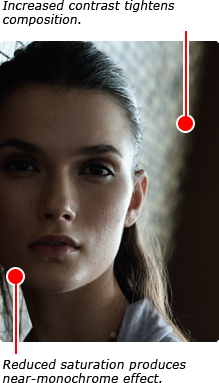
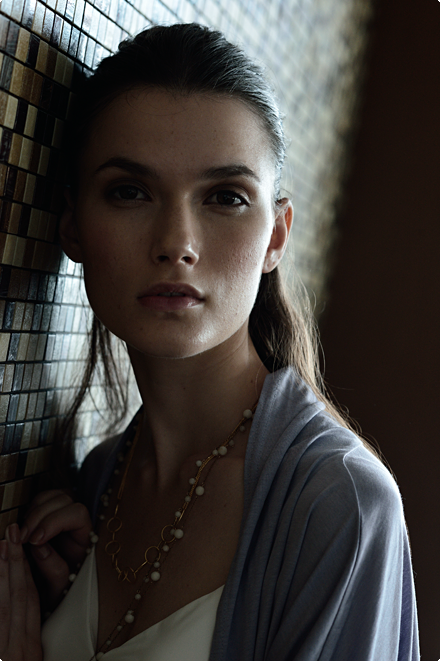
Photo © Daisuke Kumakiri
The photo above was taken using the Vivid Picture Control with Contrast set to +1, Brightness to –1, and Saturation and Hue to –3 for a tighter overall composition.

Where the unmodified Picture Control softens the image, enhancing contrast brings the composition together. It also suggests strength by changing how the viewer interprets the subject’s expression.
Prevent washed-out, flat-looking skin tones for an attractive, healthy look in photos taken under bright studio lights.
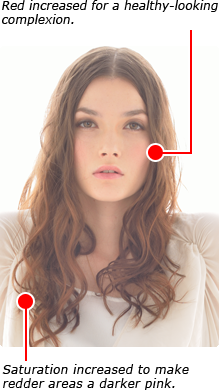
Photo © Daisuke Kumakiri
The photo above was taken using the Portrait Picture Control with Sharpening set to 1, Saturation to +1, and Hue to –1. Contrast is left at its default value for a softer look.
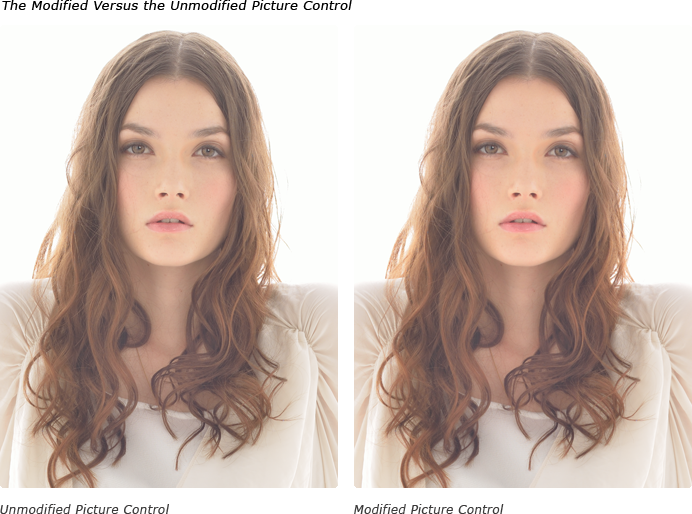
With Hue set to –1, the modified Picture Control enhances reds for a cute, pop-art look, while reducing sharpening softens the image.
To record photos in both color and black-and-white, shoot using the Neutral Picture Control and then experiment with different tints and filters in Capture NX 2.

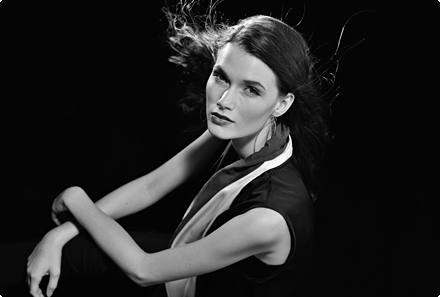
Photo © Daisuke Kumakiri
The photo above was taken using the Neutral Picture Control and then converted to black-and white Monochrome in Capture NX 2 using the Yellow filter, with Contrast set to +1.
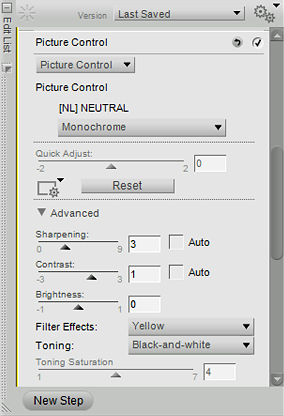
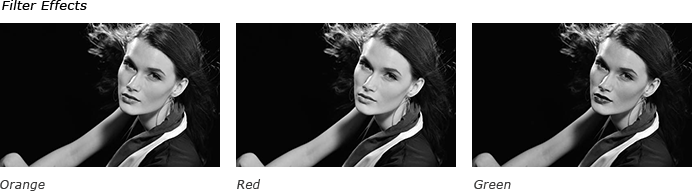
Filter effects change the look of monochrome pictures, particularly lips and skin tones. Choose a filter with attention to skin tone and the shadows in clothing.
"The greatest advantage of the Picture Control system, which enables delicate control over modifications on the images to best reflect the creative intent, is how simple it is to use. While beautiful images can easily be produced with the auto mode of today’s digital cameras, I like to spice things up a little to create original pictures. Picture Control fits the bill. You can choose the preset modes, but you can also be more adventurous by adjusting settings further. When I shot sample portraits for this page, I paid attention to two points. First, I tried to express the feminine softness while maintaining a high-resolution feel to the picture by carefully modifying the sharpness. Second, I intended for the model’s skin to retain its warmth, which is often lost when shooting under bright sunlight or with flash in studios, by controlling the hue and saturation. With a clear idea of the end result in mind, you can enjoy customizing settings and creating your own, unique composition."
Daisuke Kumakiri was born in Shinjuku, Tokyo in 1969. He joined the staff of the Daily Gendai newspaper as a news and sports photographer on graduating from the Photography Department of the Tokyo Polytechnic University, Junior College Department, but has since departed to work freelance. His work ranges from documentaries through portraits to cooking photos and appears in a variety of media, from advertisements to magazines. He also holds photography workshops for elementary school students and the general public. His exhibitions include “Acting: A Year with Actor Kanji Ishimaru” (2010) and “TOKYO ZOO”, the latter featuring works created with the Nikon D800; he has also held workshops on the D600. He was a member of the selection committee for the 2011/2012 Camera Grand Prix, helped judge the 2012 “Bunkyo Highlights Picture Postcard Contest”, serves on the committee for the 2012/2013 JPS Exhibition, and is a member of the Japan Professional Photographers Society.