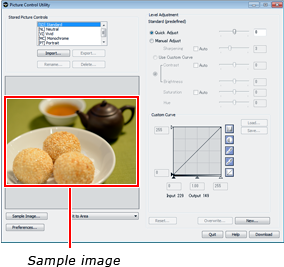
The Picture Control Utility is a computer application used to manage Picture Controls. It also lets you adjust Picture Controls while previewing the effect on a sample image of your choice. The modifications can be saved as custom Picture Controls.
The Picture Control Utility can be launched from ViewNX 2 or Capture NX 2.
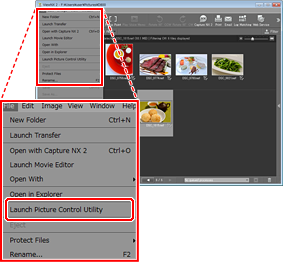
ViewNX 2
Select File > Launch Picture Control Utility. If an NEF (RAW) image is selected when the utility is launched, the selected picture will be used as the sample image.
Capture NX 2
Open an NEF (RAW) file and select Camera Settings > Picture Control in the “Develop” section of the Edit List, then click the ![]() icon and select Launch Picture Control Utility.
icon and select Launch Picture Control Utility.
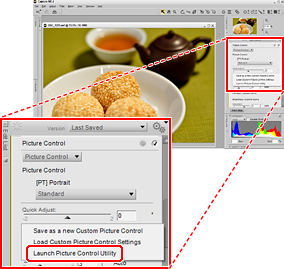
When launched from Capture NX 2, the Picture Control Utility displays a default sample image; to choose a different image, click Sample Image and select an NEF (RAW) file. Note that the effects of Active D-Lighting are not visible in the sample image, and that NEF (RAW) images edited and saved in Capture NX or Capture NX 2 can not be used.
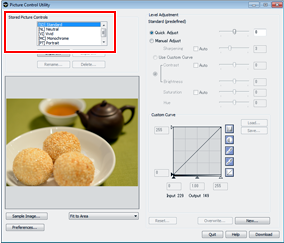
Choose a preset Picture Control or a custom Picture Control imported from the camera or created in Capture NX 2.
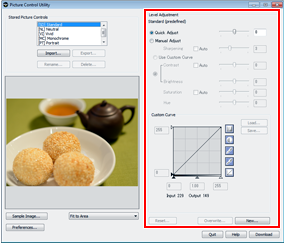
Adjust settings as described in “Level Adjustment," below, while viewing the effect on the sample image. To abandon any changes and start over from default settings, click Reset.
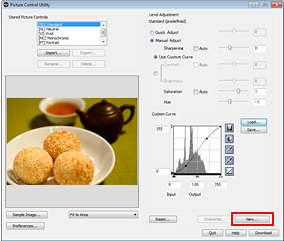
To save the custom Picture Control under a new name, click New.
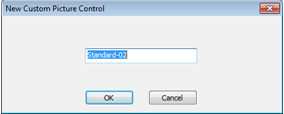
The dialog at right will be displayed; name the new control (names may be up to 18 characters long) and click OK. The new control will be added to the Picture Control list.
To save a custom Picture Control under its existing name, click Overwrite.
The Picture Control Utility can be used to adjust Picture Control parameters or create custom tone curves. To adjust Picture Control parameters, enter values in the text boxes or select Auto to let the camera adjust the parameter automatically according to the type of scene.
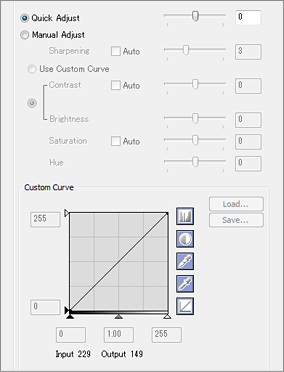
| Quick Adjust | Adjust the effect of the selected Picture Control by applying simultaneous adjustments to sharpening, contrast, and saturation. Not available with [NL] Neutral, [MC] Monochrome, or custom Picture Controls. |
|---|---|
| Manual Adjust | Adjust Picture Control parameters manually. Not available when Quick Adjust is selected. |
| Sharpening | Control the sharpness of outlines. Move the slider left to soften outlines, right to sharpen outlines. |
| Use Custom Curve | Adjust contrast and brightness using a custom tone curve. Not available when Contrast/Brightness is selected. |
| Contrast/Brightness | Adjust contrast and brightness using the sliders. Not available when Use Custom Curve is selected. |
| Saturation | Control the vividness of colors. Not available when a monochrome Picture Control is selected. |
| Hue | Adjust hue. Not available when a monochrome Picture Control is selected. |
| Filter Effects | Choose a filter effect from the menu (monochrome Picture Controls only). |
| Toning | Choose a tint from the menu and adjust its saturation with the slider (monochrome Picture Controls only). |
| Custom Curve | Edit the custom tone curve to adjust contrast and brightness. Click Save to save the curve, or Load to import a previously saved curve. |
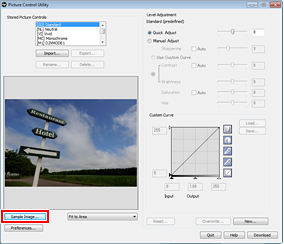
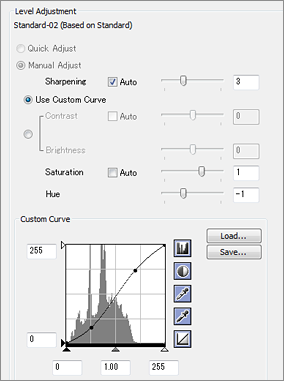
The following picture was taken using a high-contrast custom tone curve created with the Picture Control Utility.
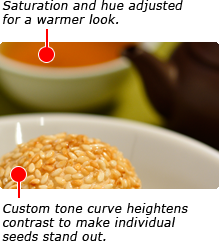

Photo © Noriko Yamaguchi
The photo above was taken with the Standard Picture Control, using the “S”-shaped custom tone curve shown at right for heightened contrast. In addition, Sharpening was set to Auto, Saturation to +1, and Hue to –1.

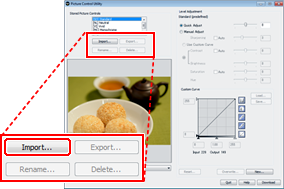
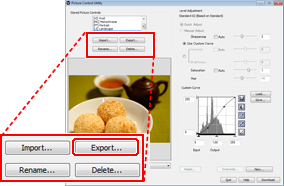
The Picture Control Utility can be used to import custom Picture Controls created on the camera or to export custom Picture Controls from the computer to the camera memory card.
Custom Picture Controls created on a D800/D800E camera can be imported into the Picture Control Utility. Before proceeding, use the camera to copy custom Picture Controls to a memory card as described in "Sharing Custom Picture Controls" in Using Picture Controls section, then turn the camera off, remove the memory card and insert it in a computer card slot or in a card reader connected to the computer.
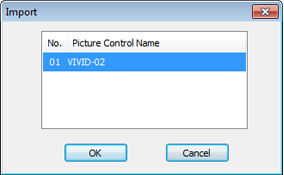
In the Picture Control Utility, click Import to import custom Picture Controls from the memory card.
The Picture Control Utility will display a list of the custom Picture Controls on the memory card; select a control and click OK. The selected control will be added to the Picture Control list in the Picture Control Utility.
Follow the steps below to save Custom Picture Controls to a memory card. The card can then be inserted into a camera and the Picture Controls copied as described in "Sharing Custom Picture Controls" in Using Picture Controls section.
Insert the card in a computer card slot or in a card reader connected to the computer. Be sure to use only cards that have been formatted in the camera.
Select a custom Picture Control in the Picture Control Utility and click Export.
If the computer detects more than one memory card, a card selection dialog will be displayed; highlight a card and click OK. A list of custom Picture Control slots will be displayed; select a slot and click OK.
