Learn the techniques used to take the photo below.

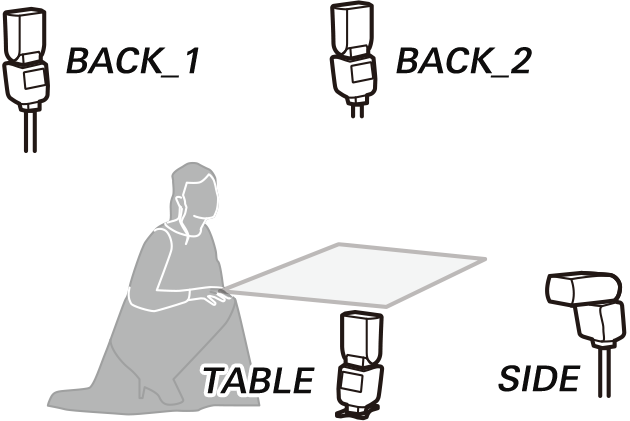
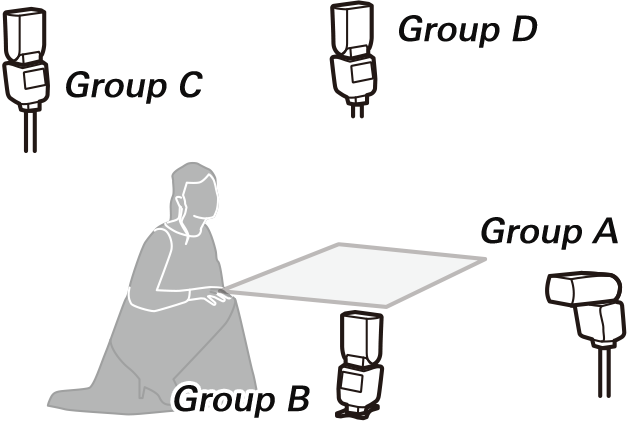
The subject was lit by flash units placed under and beside the table at her feet. Two more units were used to light the room in the background.

The procedure for taking this photo is detailed below. Steps marked "Try Me" are recommended but optional. Before proceeding, establish a connection between the camera and remote flash unit as described in "Connecting to Remote Flash Units".
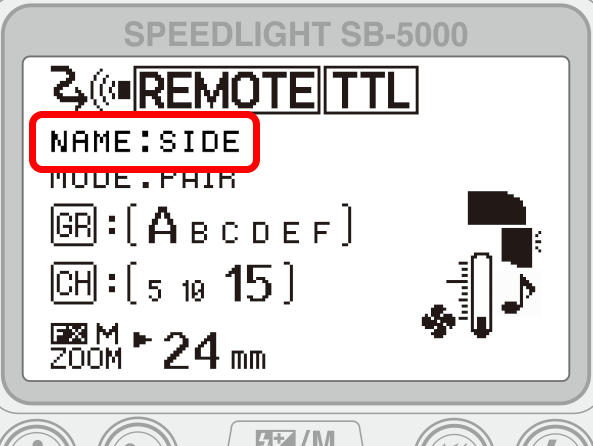
SB‑5000 flash units can be named, making it easier to check their status (see this section). Here we will name the units according to their positions: "SIDE" for the unit beside the subject, "TABLE" for the unit under the table, and "BACK_1" and "BACK_2" for units in the room behind the subject. Use the controls on each unit to enter its name as described below.
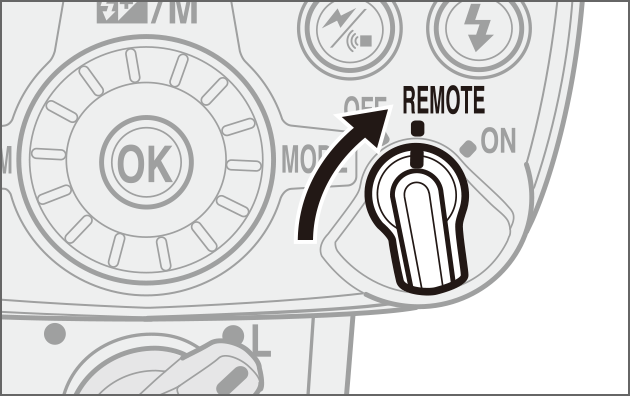
1 Select remote mode.
Rotate the power switch to REMOTE.
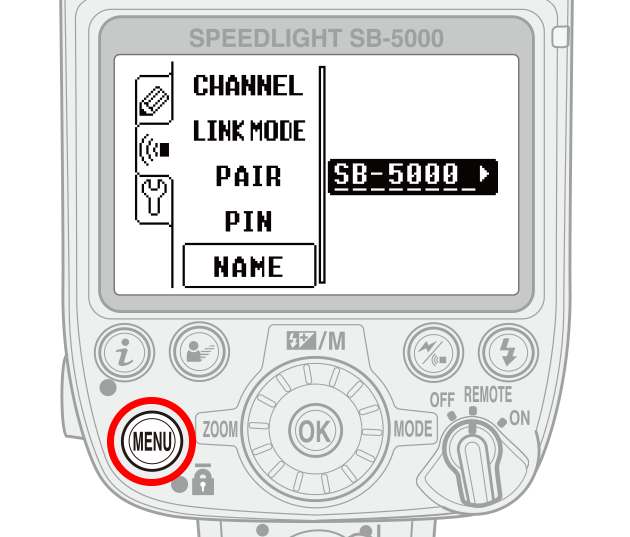
2 Select NAME.
Press the MENU button, highlight NAME in the "wireless item" tab, and press OK. The current name will be highlighted; press OK to change the name.
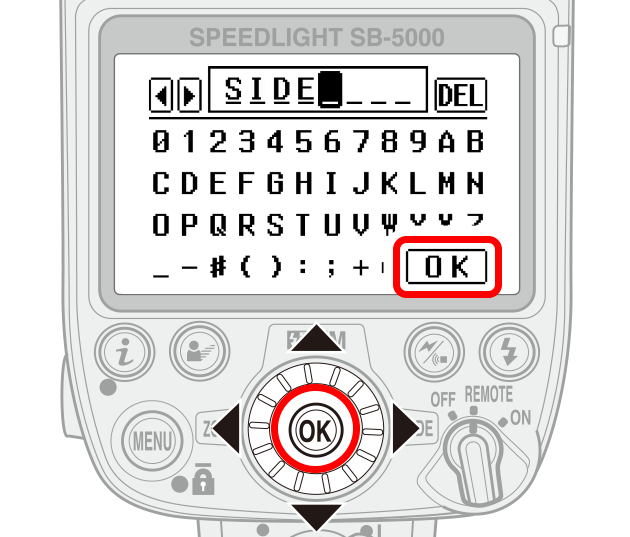
3 Enter a name.
Highlight letters using the rotary multi selector and press OK to enter the highlighted character. Flash names can be up to 8 characters long. Highlight OK and press the OK button to exit when entry is complete.
Viewing Flash Unit Names
The flash unit name is listed at the top of the flash display.
Use the controls on each flash unit to place it in a group as described below. This allows settings for each group, including flash mode and flash output, to be adjusted using camera controls.
1 Select remote mode.
Rotate the power switch to REMOTE.
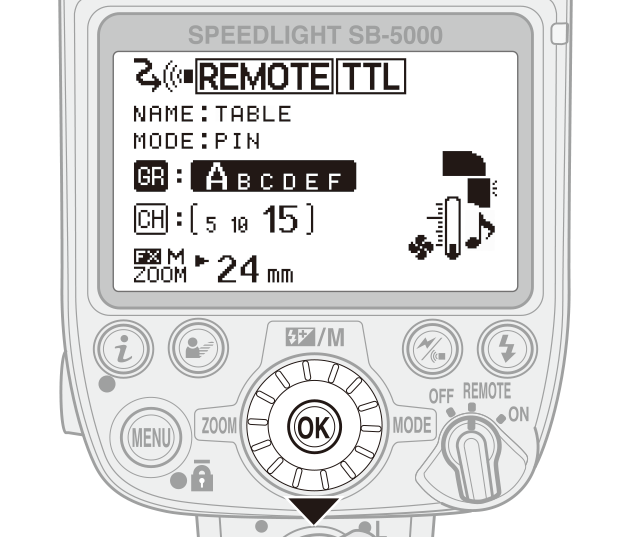
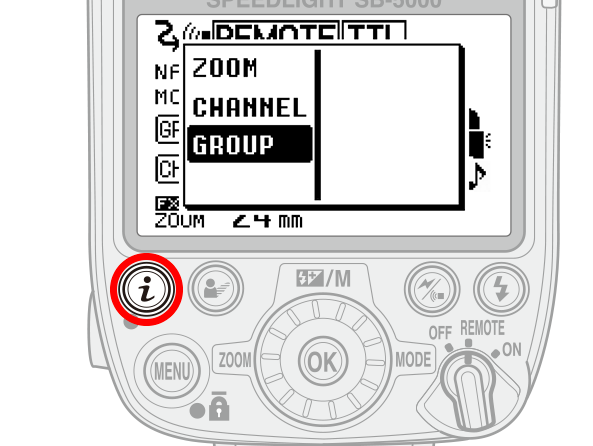
2 Highlight the group list.
Press the rotary multi selector to highlight the group list.
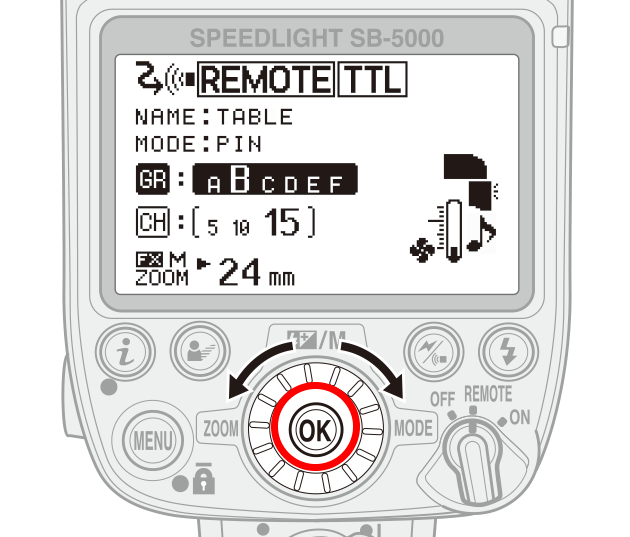
3 Choose a group.
Rotate the rotary multi selector to choose a group and press OK.
The -Button Menu
Settings such as the group and channel can also be adjusted by pressing the button and selecting the desired option in the -button menu.
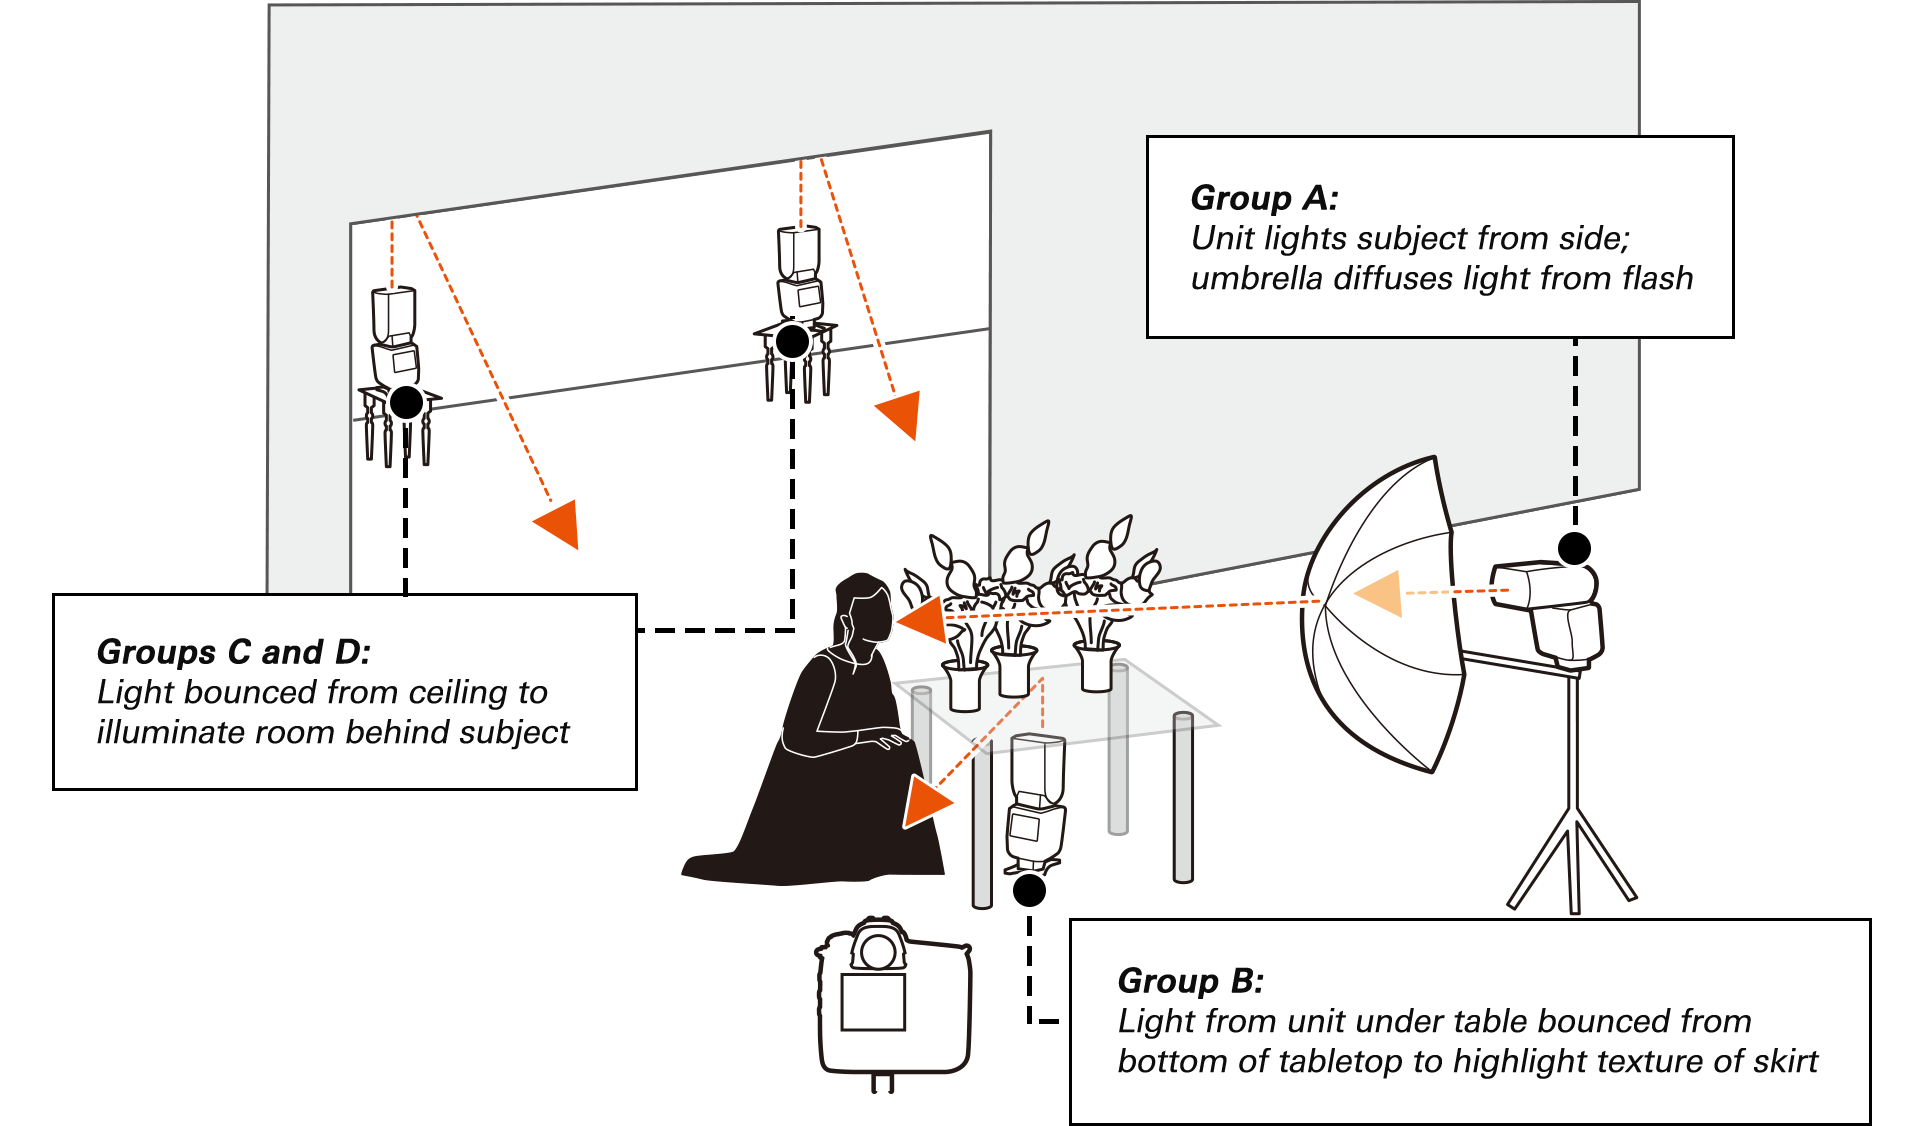
The flash units in this example were positioned as follows:
Test-fire the remote flash units to ensure that they are functioning correctly.
1 Display flash info.
Press the camera button twice to display flash info.
2 HighlightTest flash in the -button menu.
Press the button and highlightTest flash.
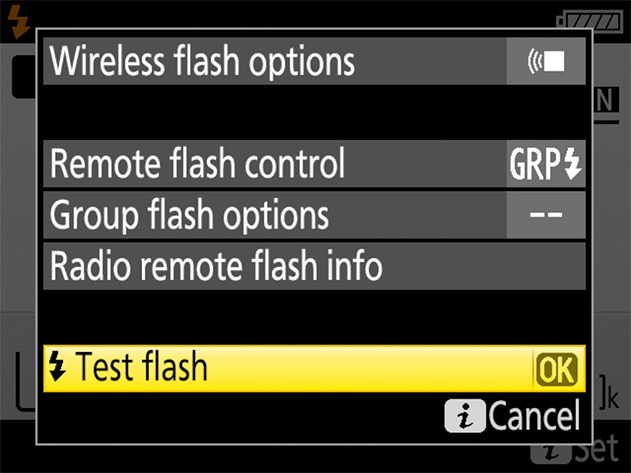
3 Test-fire the flash units.
Press to test-fire the flash units in order by group, starting from Group A. Units in groups that are disabled will also fire.

Remote flash settings such as flash control mode and flash level are adjusted using camera controls, sparing you having to walk between units after placing them.
1 Display flash info.
Press the camera button twice to display flash info.

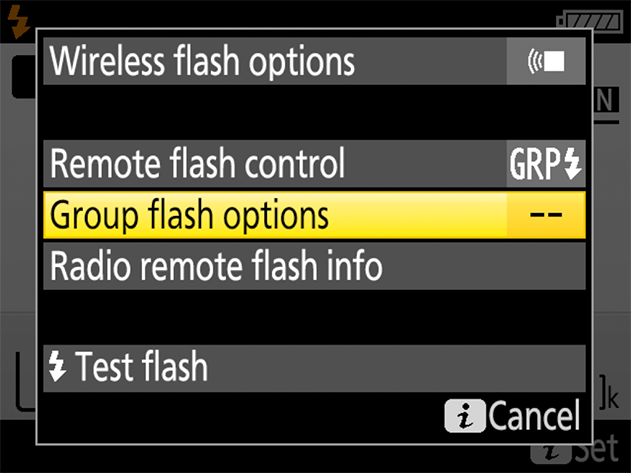
2 Select Remote flash control in the -button menu.
Press the button, highlight Remote flash control, and press .

3 Select Group flash.
The photo in this example was taken using group flash control. Highlight Group flash and press to return to the -button menu.

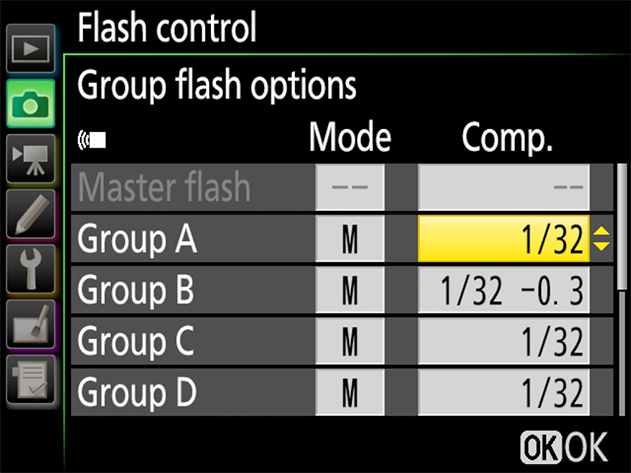
4 Select Group flash options.
Highlight Group flash options and press .
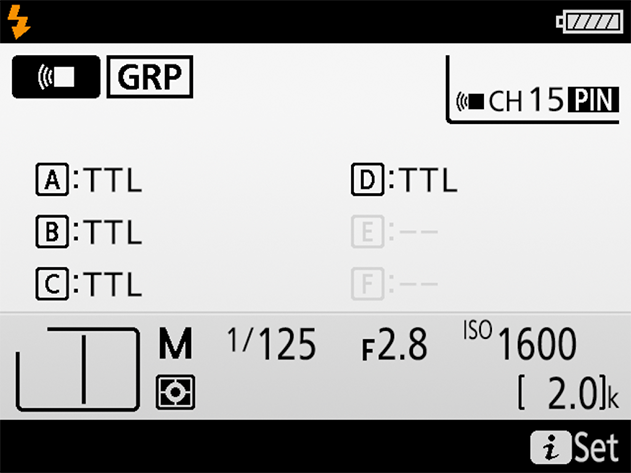
5 Adjust flash settings.
Use the multi selector to choose the flash control mode and flash level for the units in each group. Press or to highlight items and or to change, and then press when settings are complete. The settings used for the photo in the current example are shown in the illustration.
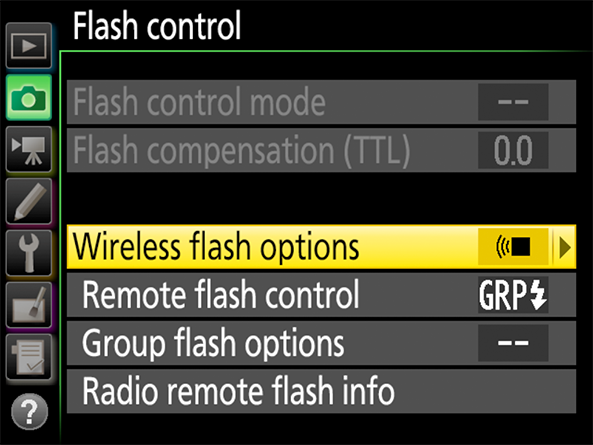
The Photo Shooting Menu
During live view or whenever you are unable to access the -button menu, you can adjust flash settings using the Flash control option in the photo shooting menu. You can also add Flash control to My Menu for quick access.
When the remote flash units are ready to fire, their flashready lights will turn on and flash-ready indicators will appear in the following camera displays:
•The viewfinder and flash info display:
A flash-ready indicator () appears in the viewfinder and flash info display when all remote flash units are ready to fire. If the indicator is not displayed, one or more of the units may be unable to fire normally.


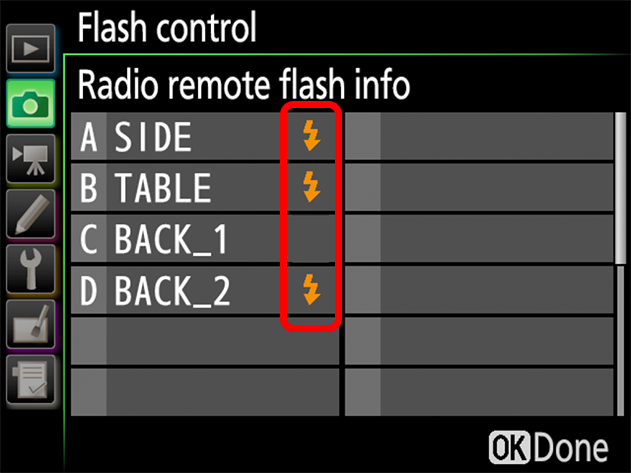
•The radio remote flash info display:
To list the status of each remote flash unit separately, select Flash control > Radio remote flash info in the photo shooting menu or the menu displayed by pressing the button in the flash info display. Units not marked by a flash ready indicator may be unable to fire normally.
Use modeling illumination to test the effects of current flash placement and settings on light levels and shadows.
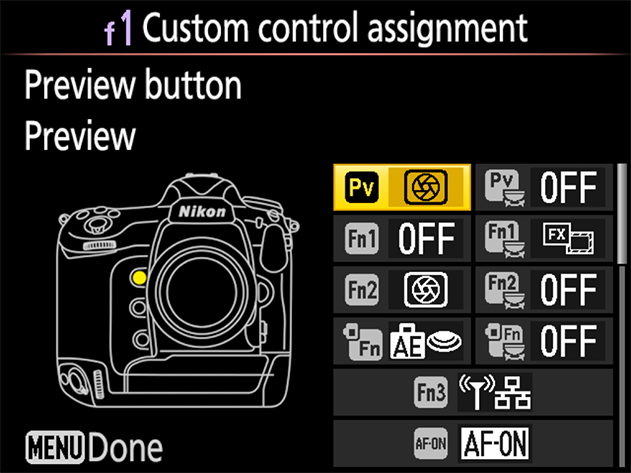
After confirming that all units are ready to fire, press the button to which Preview has been assigned using Custom Setting f1 (Custom control assignment). The remote flash units will light for about a second to show the light balance that would be achieved if they were fired at current settings. Adjust flash placement, output, and other settings until the desired results are achieved.
Modeling Illumination
Modeling illumination is not available during live view or if Off is selected for Custom Setting e5 (Modeling flash).