Technical Solutions | Z 9 TIPS
DaVinci Resolve: Editing procedure for N-RAW
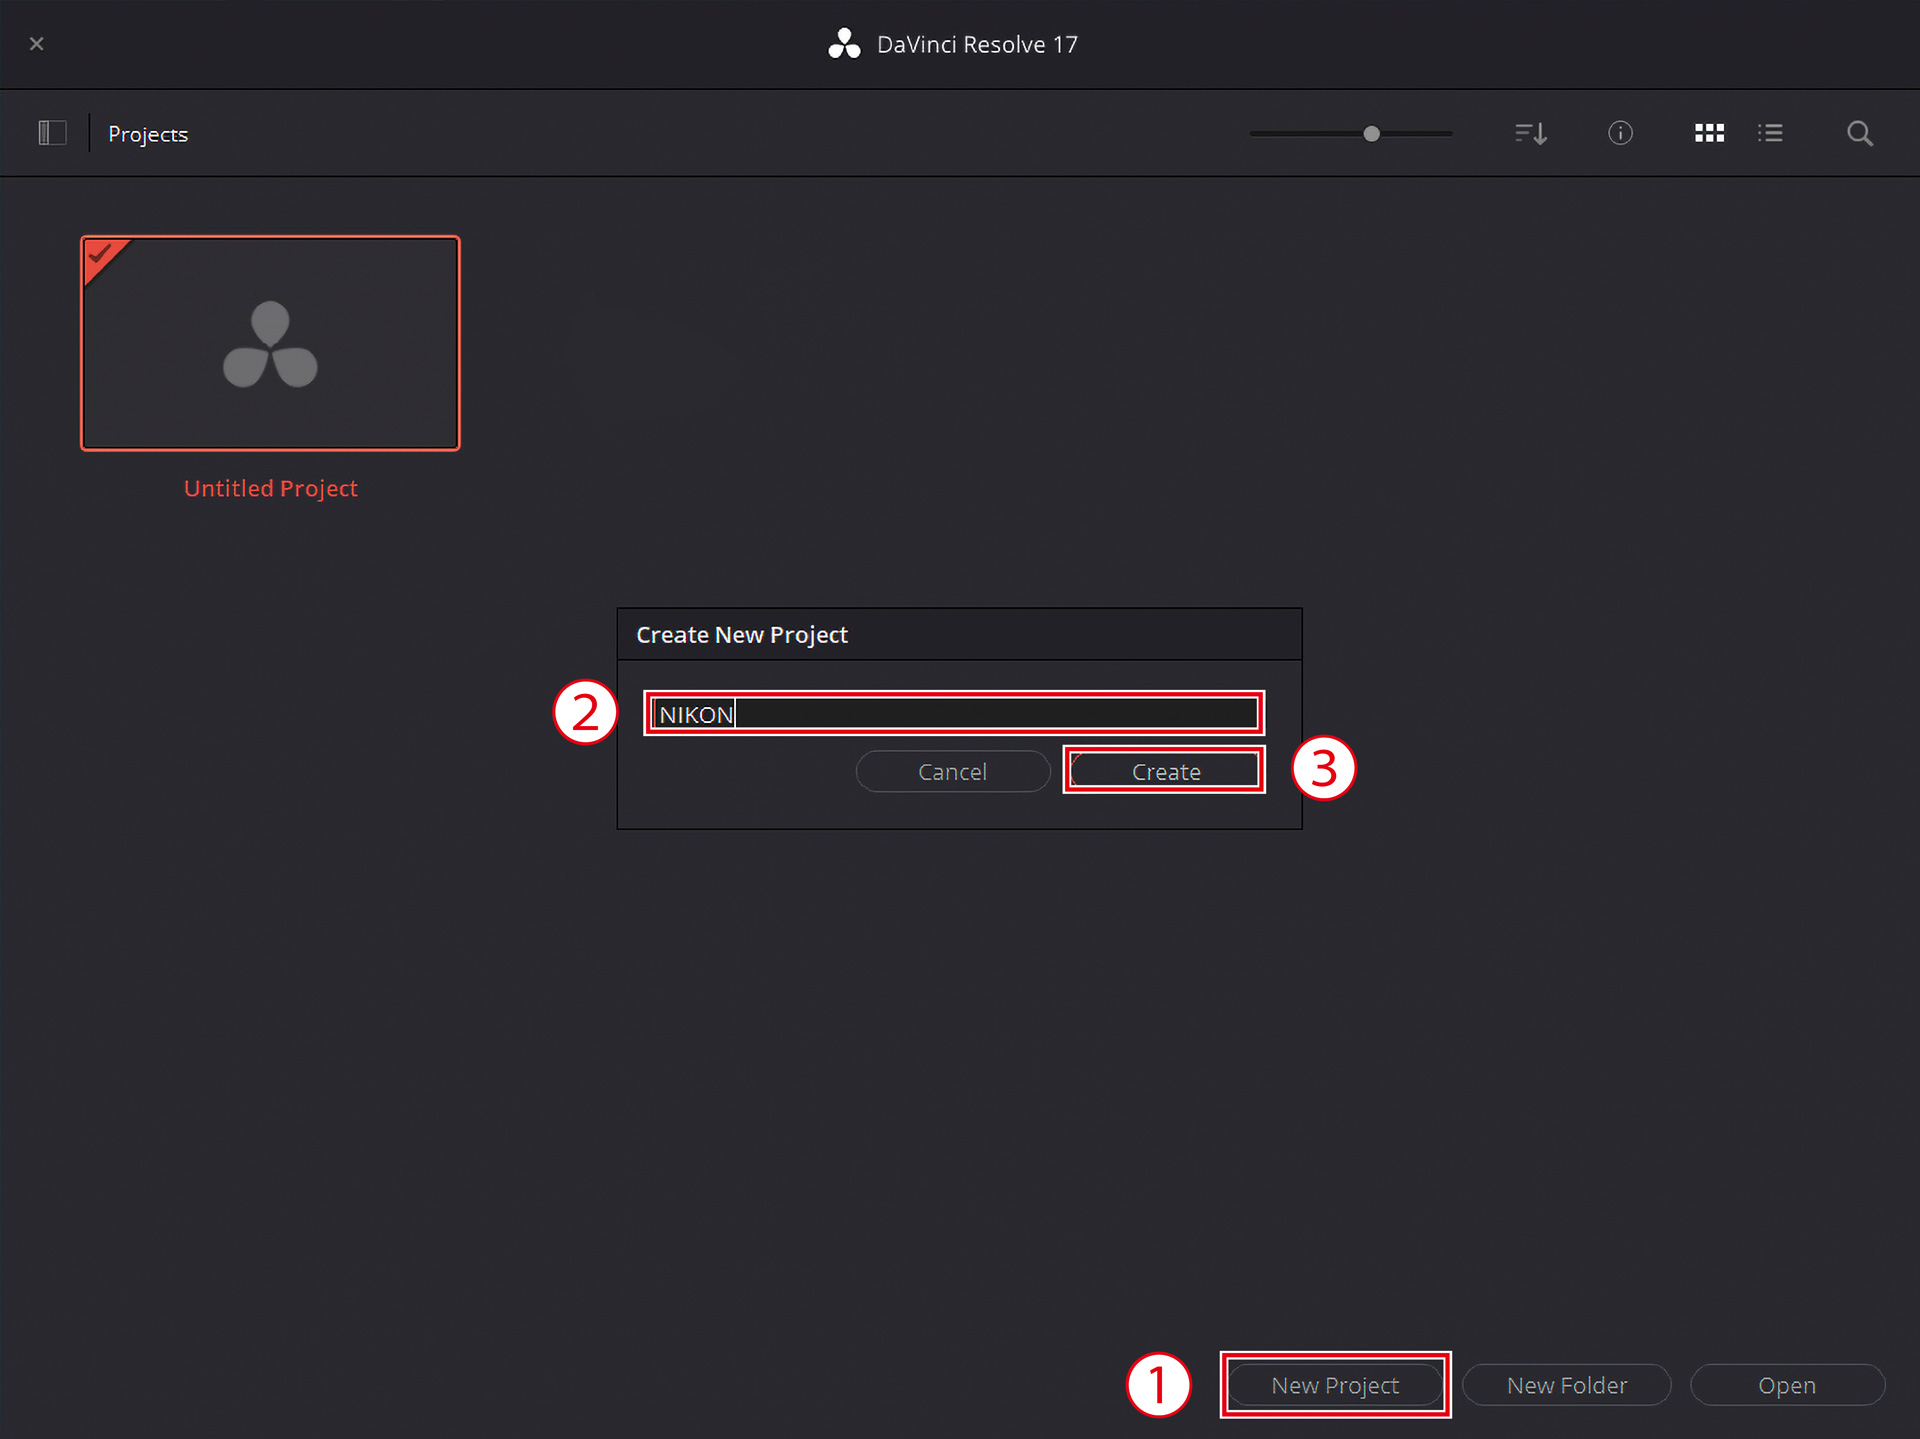
1. Create a new project
- The following procedure explains how to create a video that can be viewed in Rec.709 Gamma 2.4 using N-RAW data recorded in 8K/60p, tone mode N-Log, as a typical example.
- Paid version of DaVinci Resolve 17.4.6 or later is required for editing work including rendering.
- Please download and install DaVinci Resolve from the URL below.
https://www.blackmagicdesign.com/products/davinciresolve
Note: This URL is as of June, 2022.
- Select New Project at the bottom of the screen
- Name the new project
- Select Create to create a new project
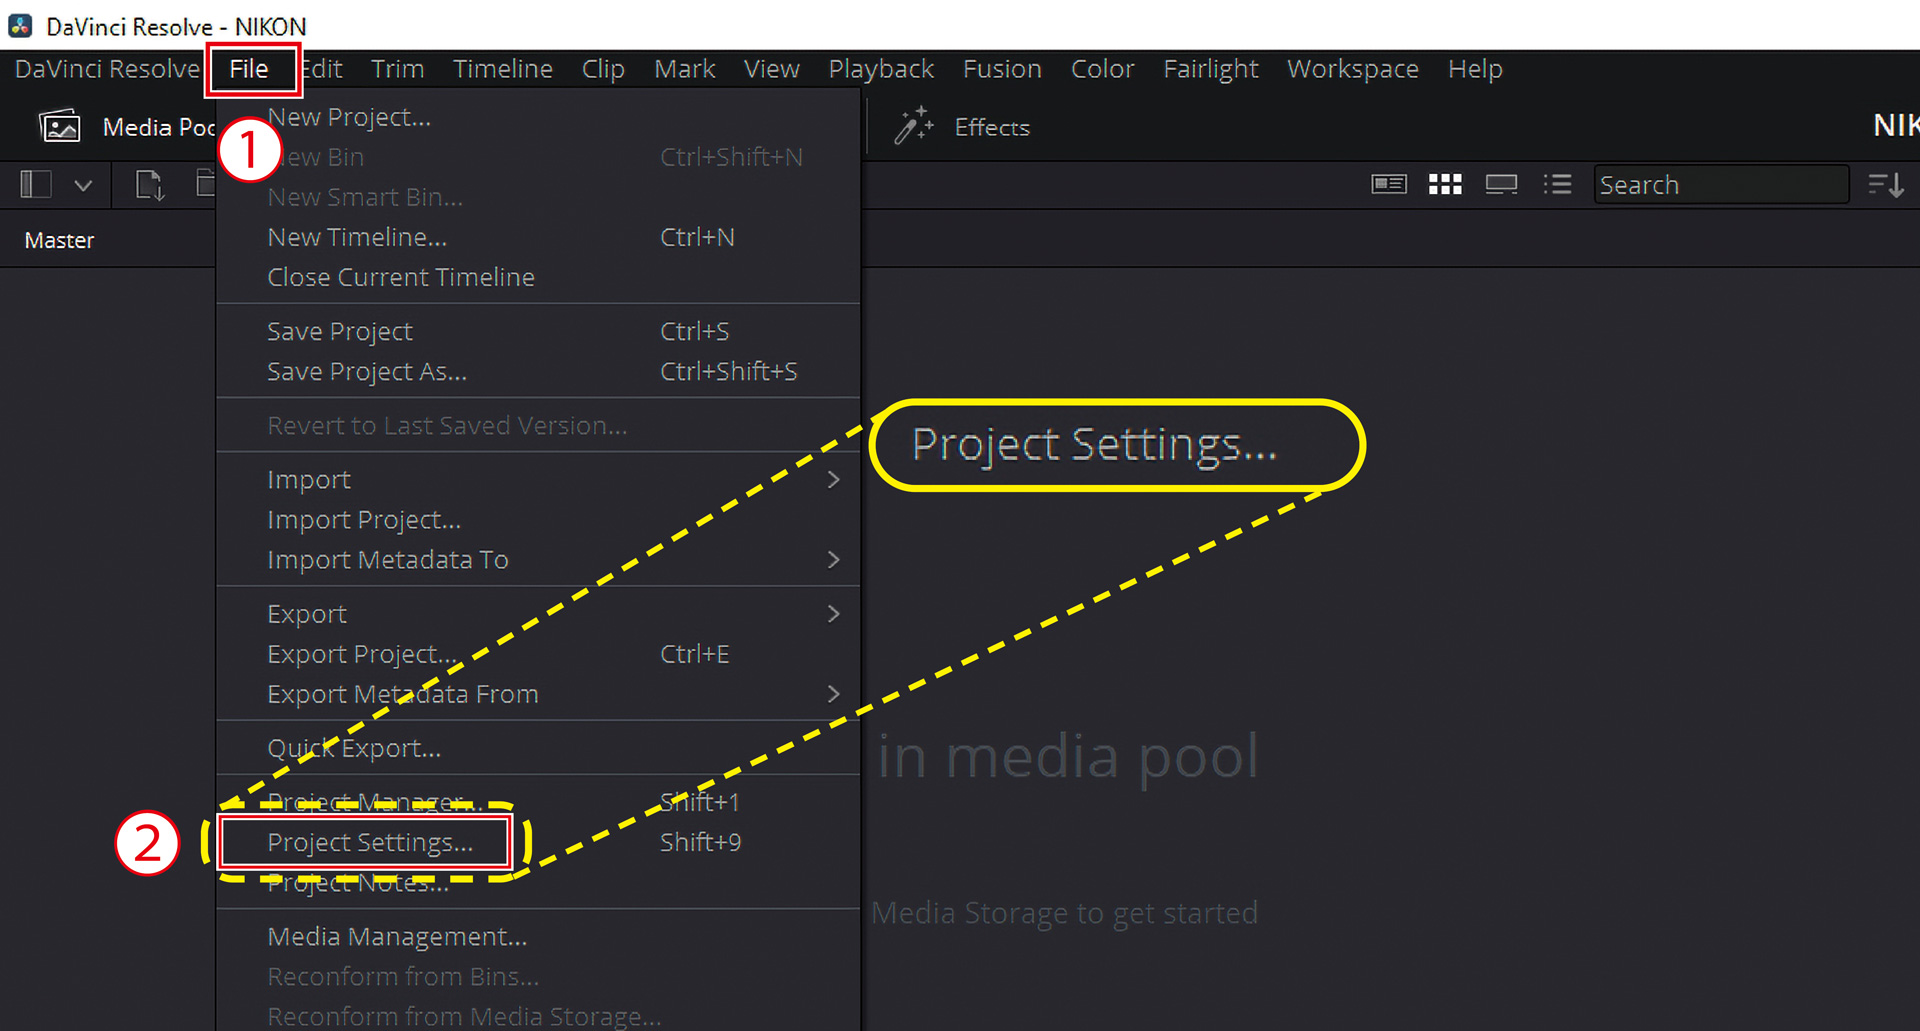
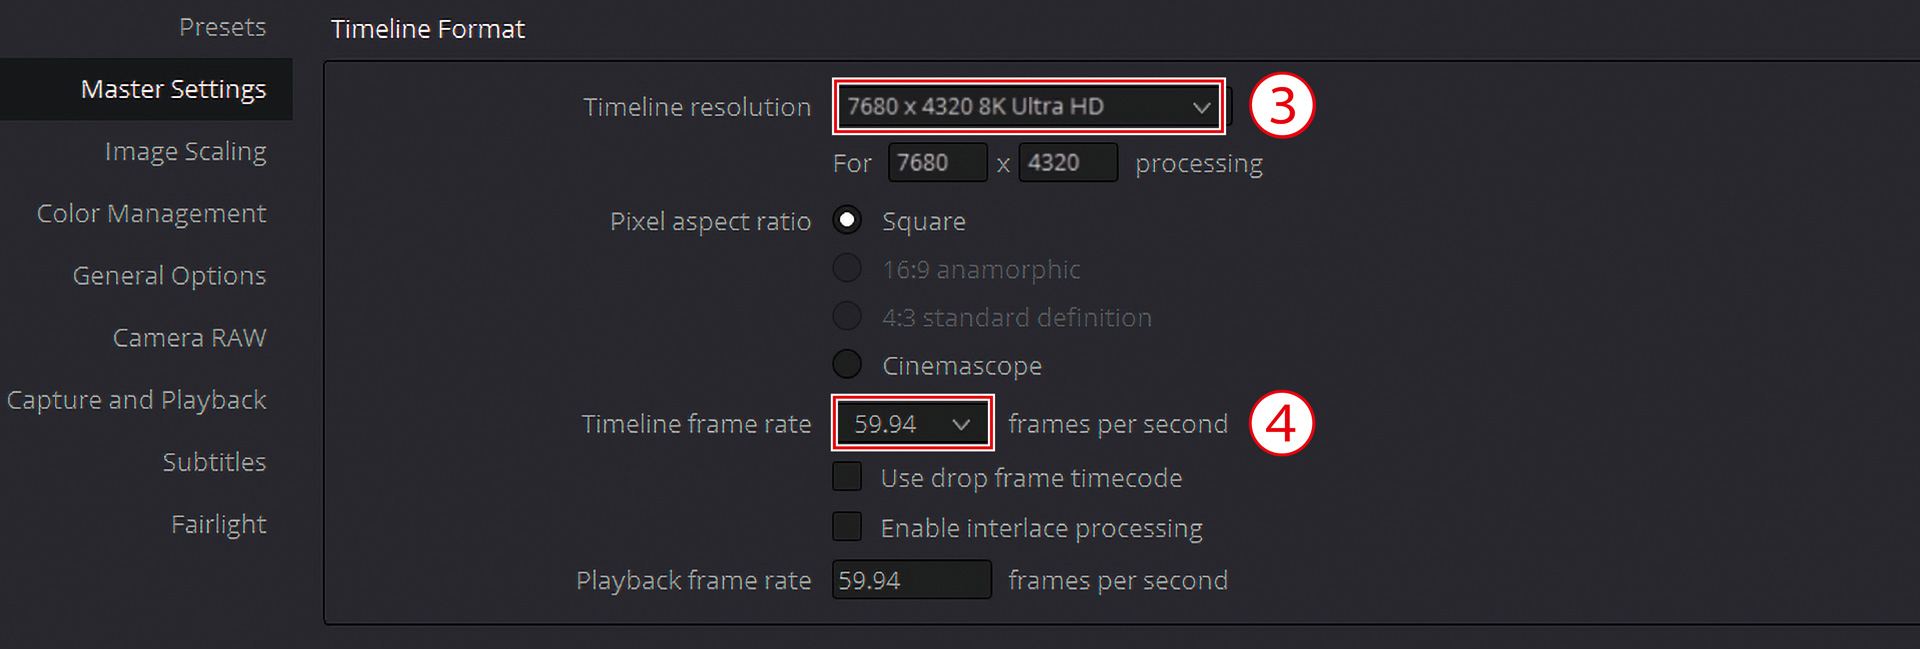
2. Set the master settings for the project you created
- Select File on the menu bar
- Select Project Settings
- Select Timeline resolution > 7680 x 4320 8K Ultra HD
- Select Timeline frame rate > 59.94
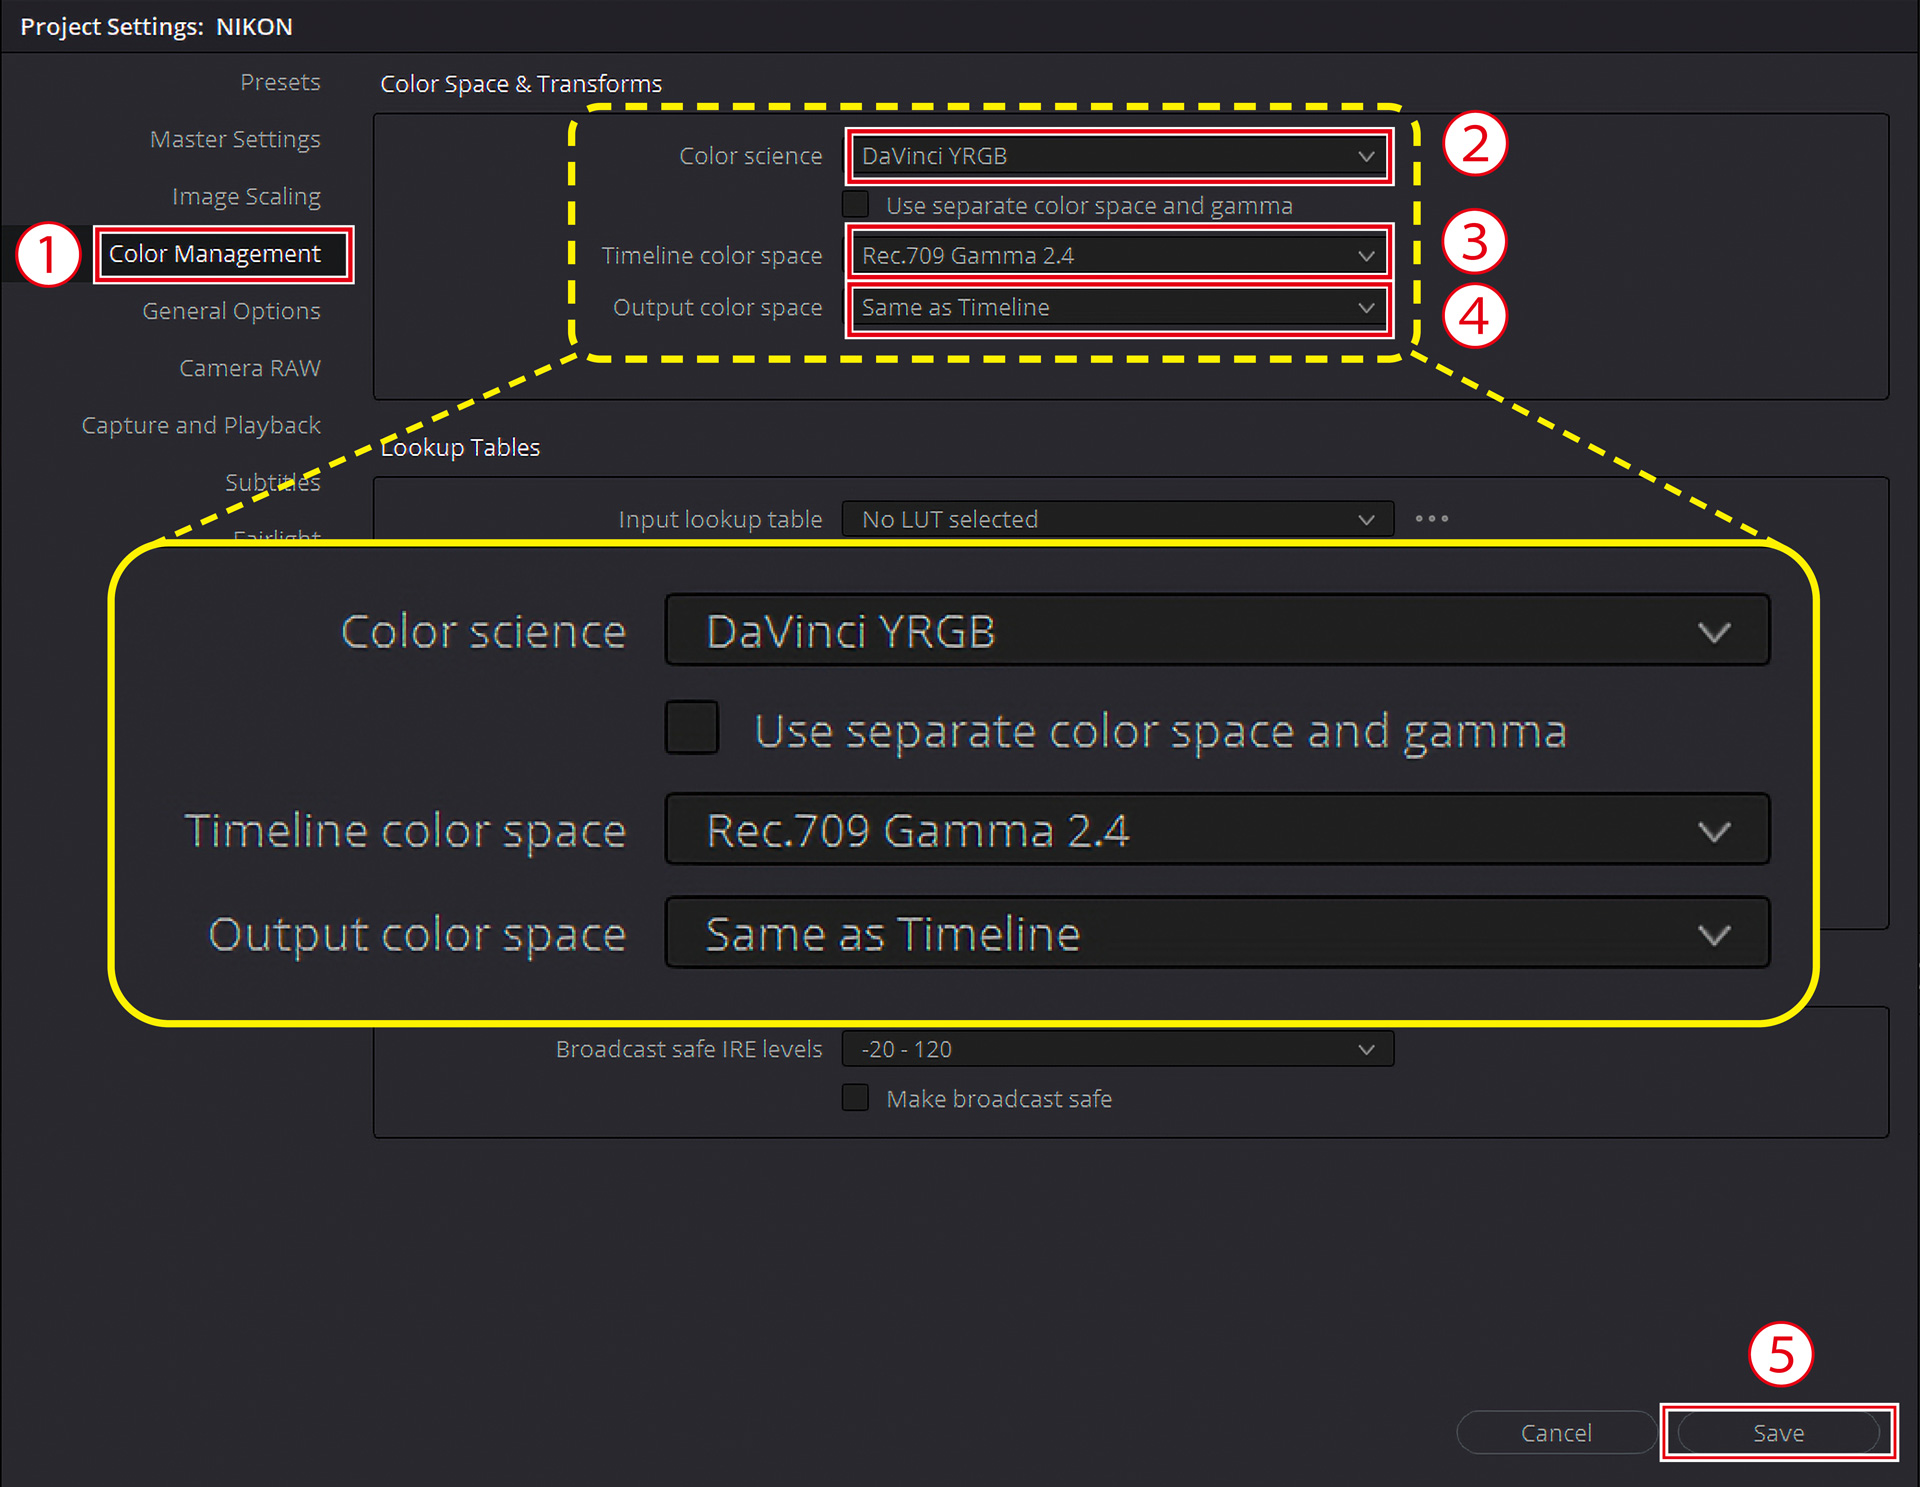
3. Check the color management settings
- Select Color Management in the project settings
- Confirm that Color science is set to the default setting of DaVinci YRGB
- Confirm that Timeline color space is set to the default setting of Rec.709 Gamma 2.4
- Confirm that Output color space is set to the default setting of Same as Timeline
- Save the project settings
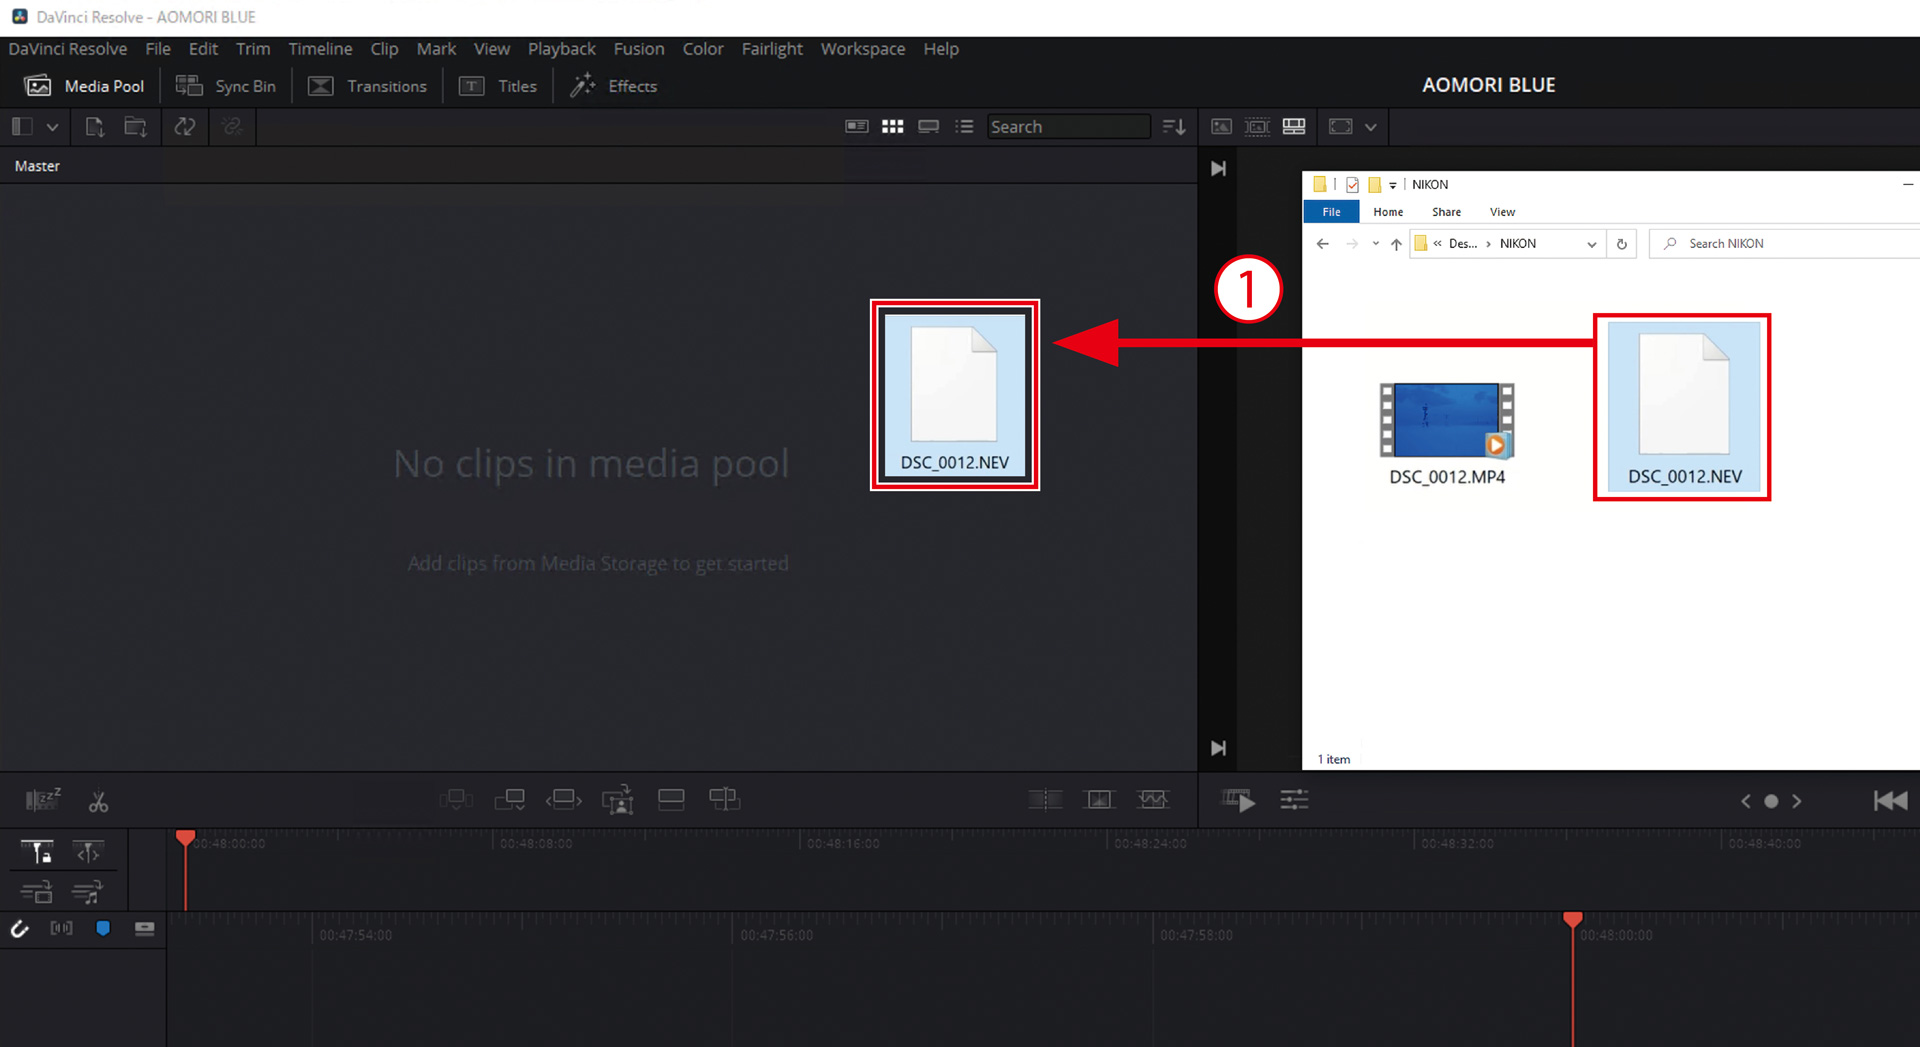
4. Import the data recorded in 8K/60p N-RAW
- Open the folder where the data is stored and drag-and-drop to the media pool
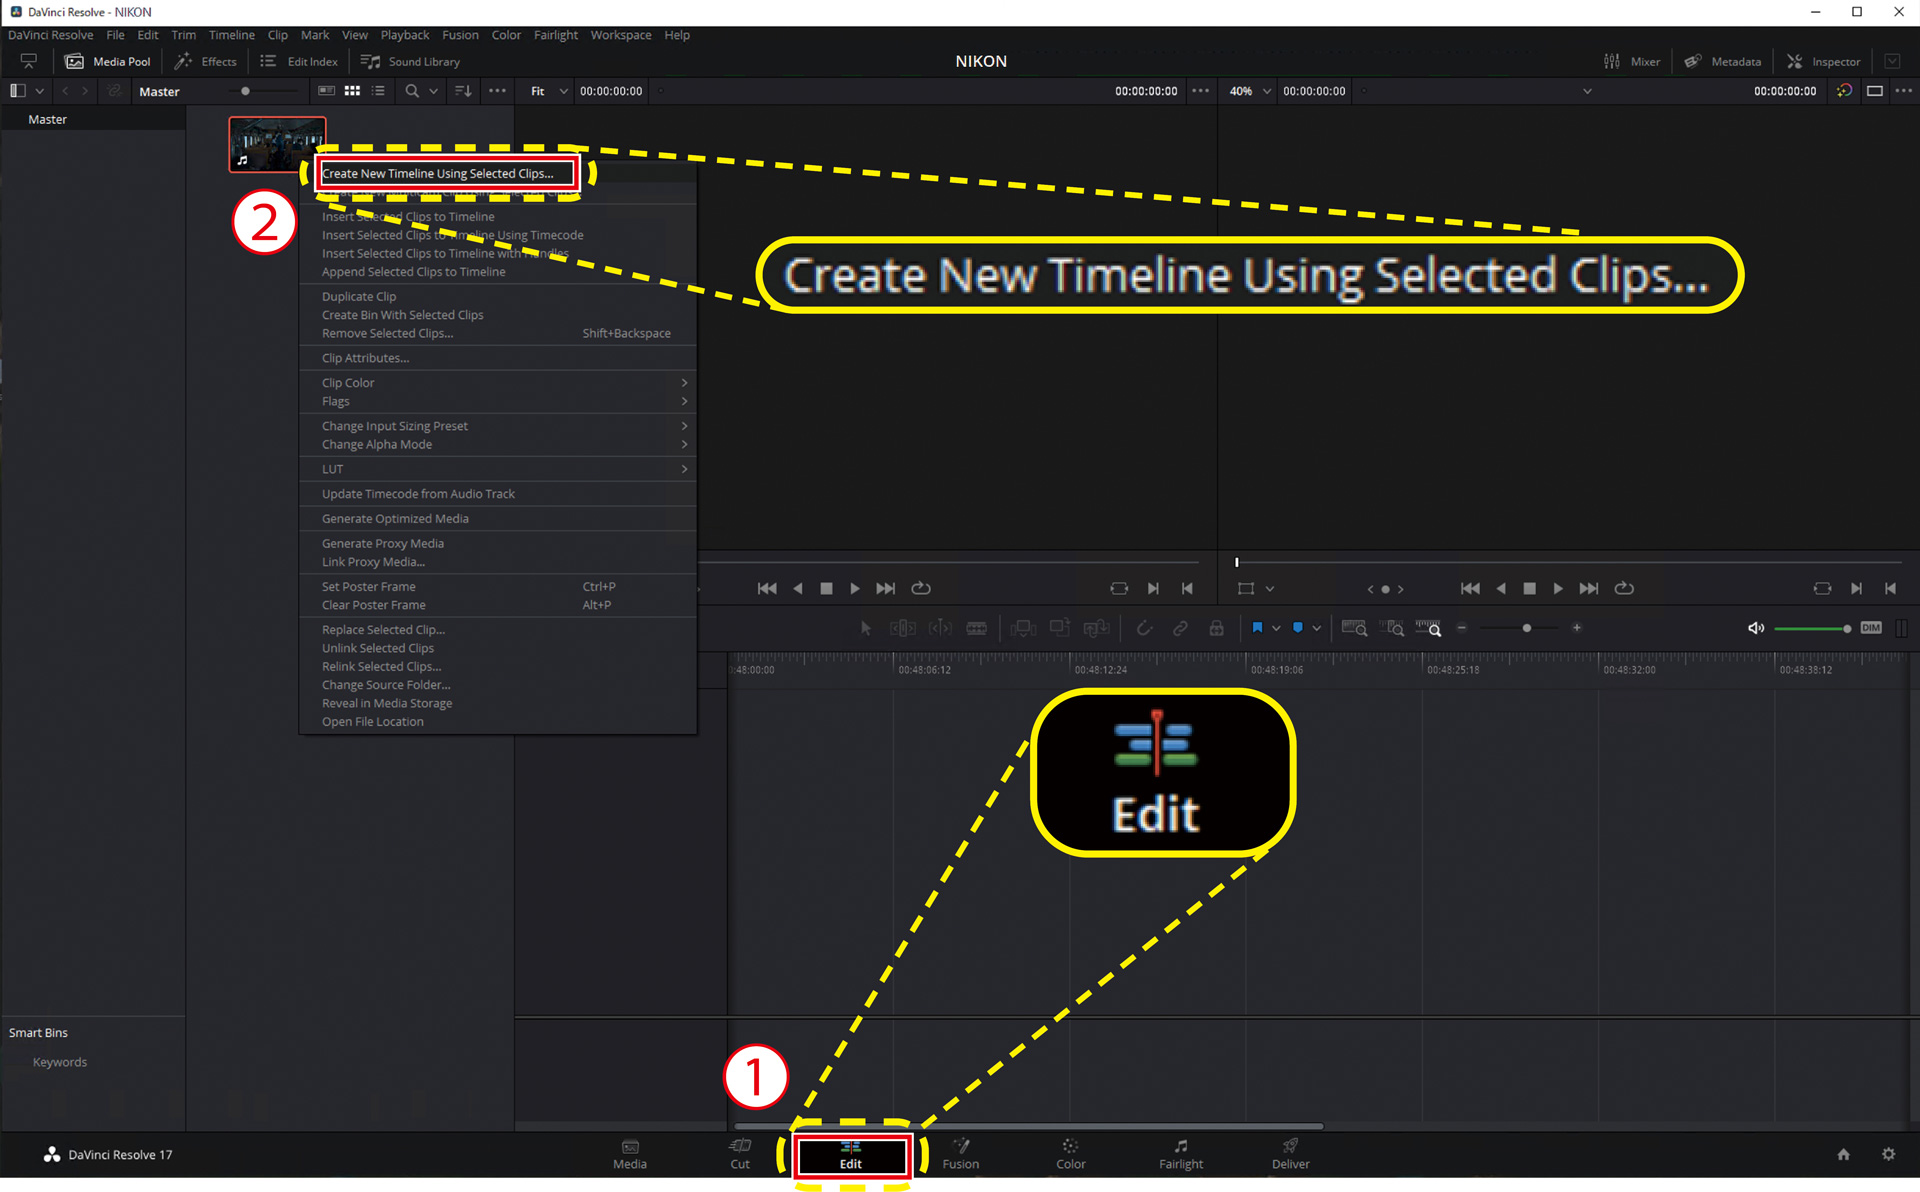
5. Edit the video
- Select the Edit tab at the bottom of the screen to move to the edit page
- Right-click the data and select Create New Timeline Using Selected Clips
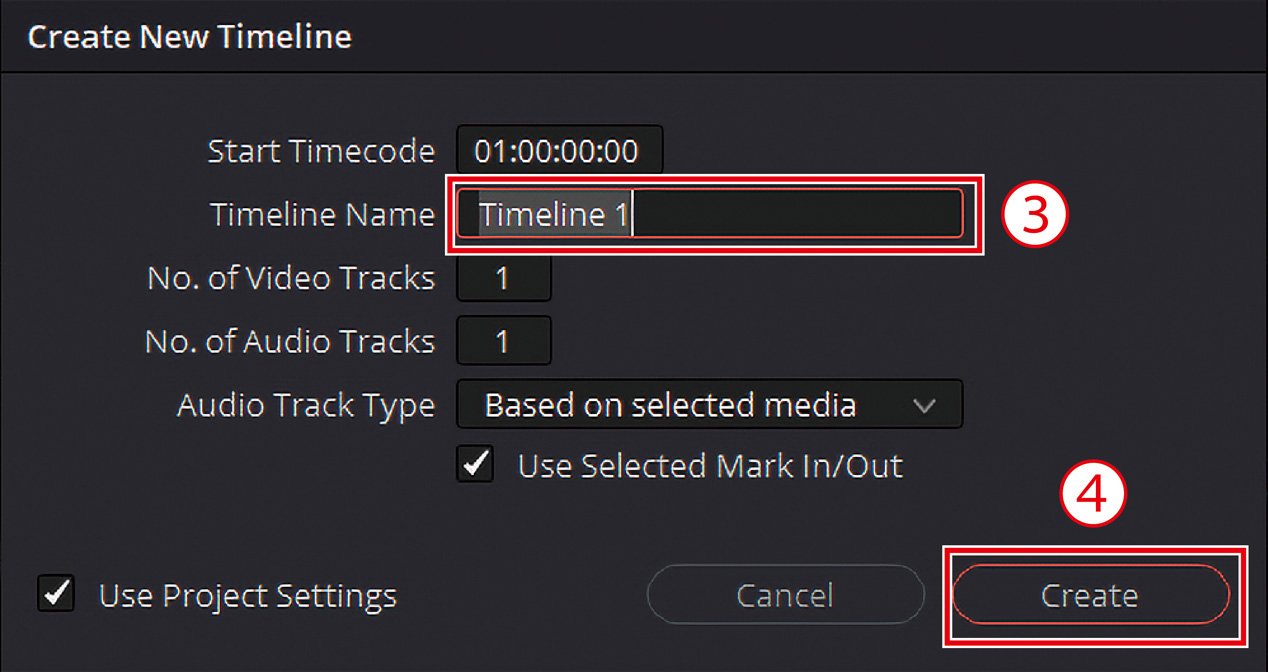
- Name the timeline
- Select Create
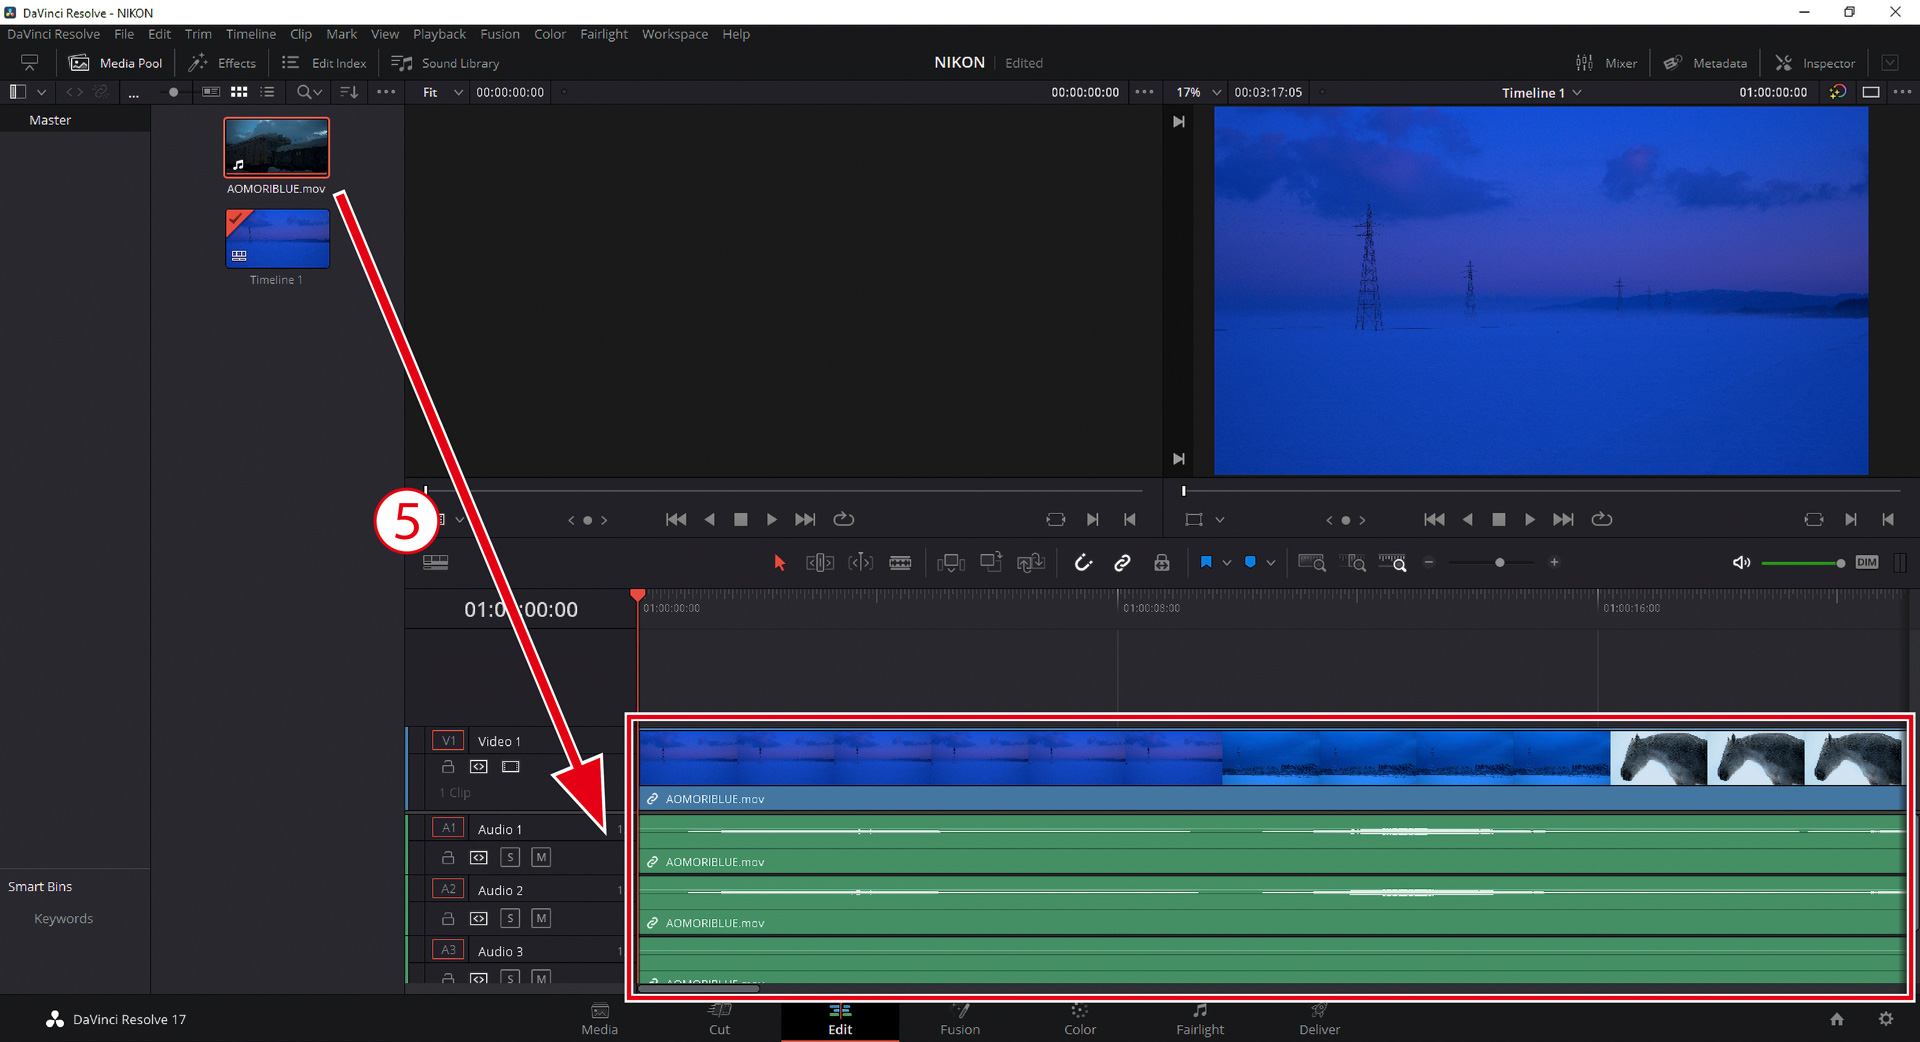
- Drag-and-drop the N-RAW data to the timeline
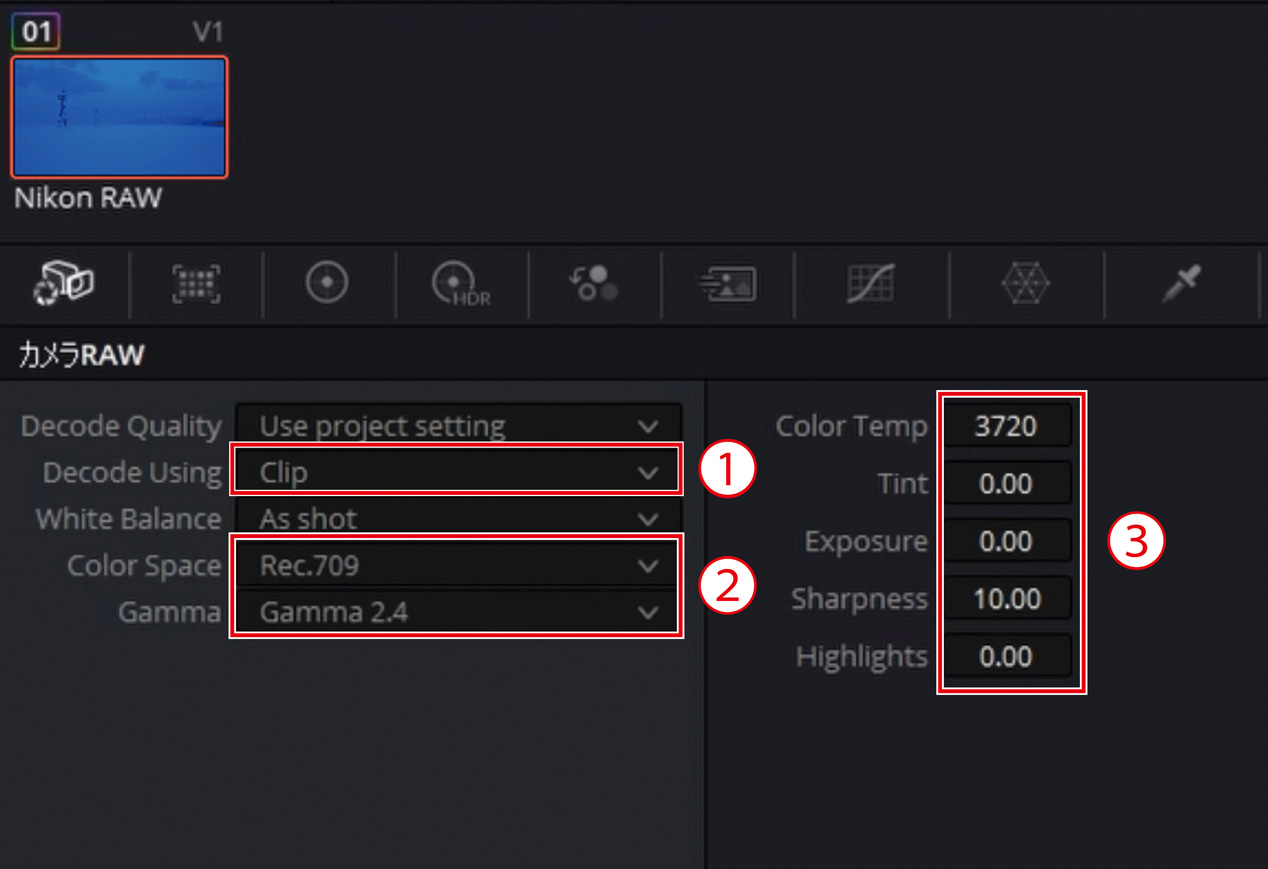
6. Change the color space and gamma of the recorded data according to the timeline color space and output color space
Conversion pattern 1: Convert from the camera RAW
- Select Decode Using > Clip to allow Color Space and Gamma to be changed for each clip
- Set Color Space to Rec.709 and Gamma to Gamma 2.4
- Change the color temperature and exposure as you would when editing RAW stills
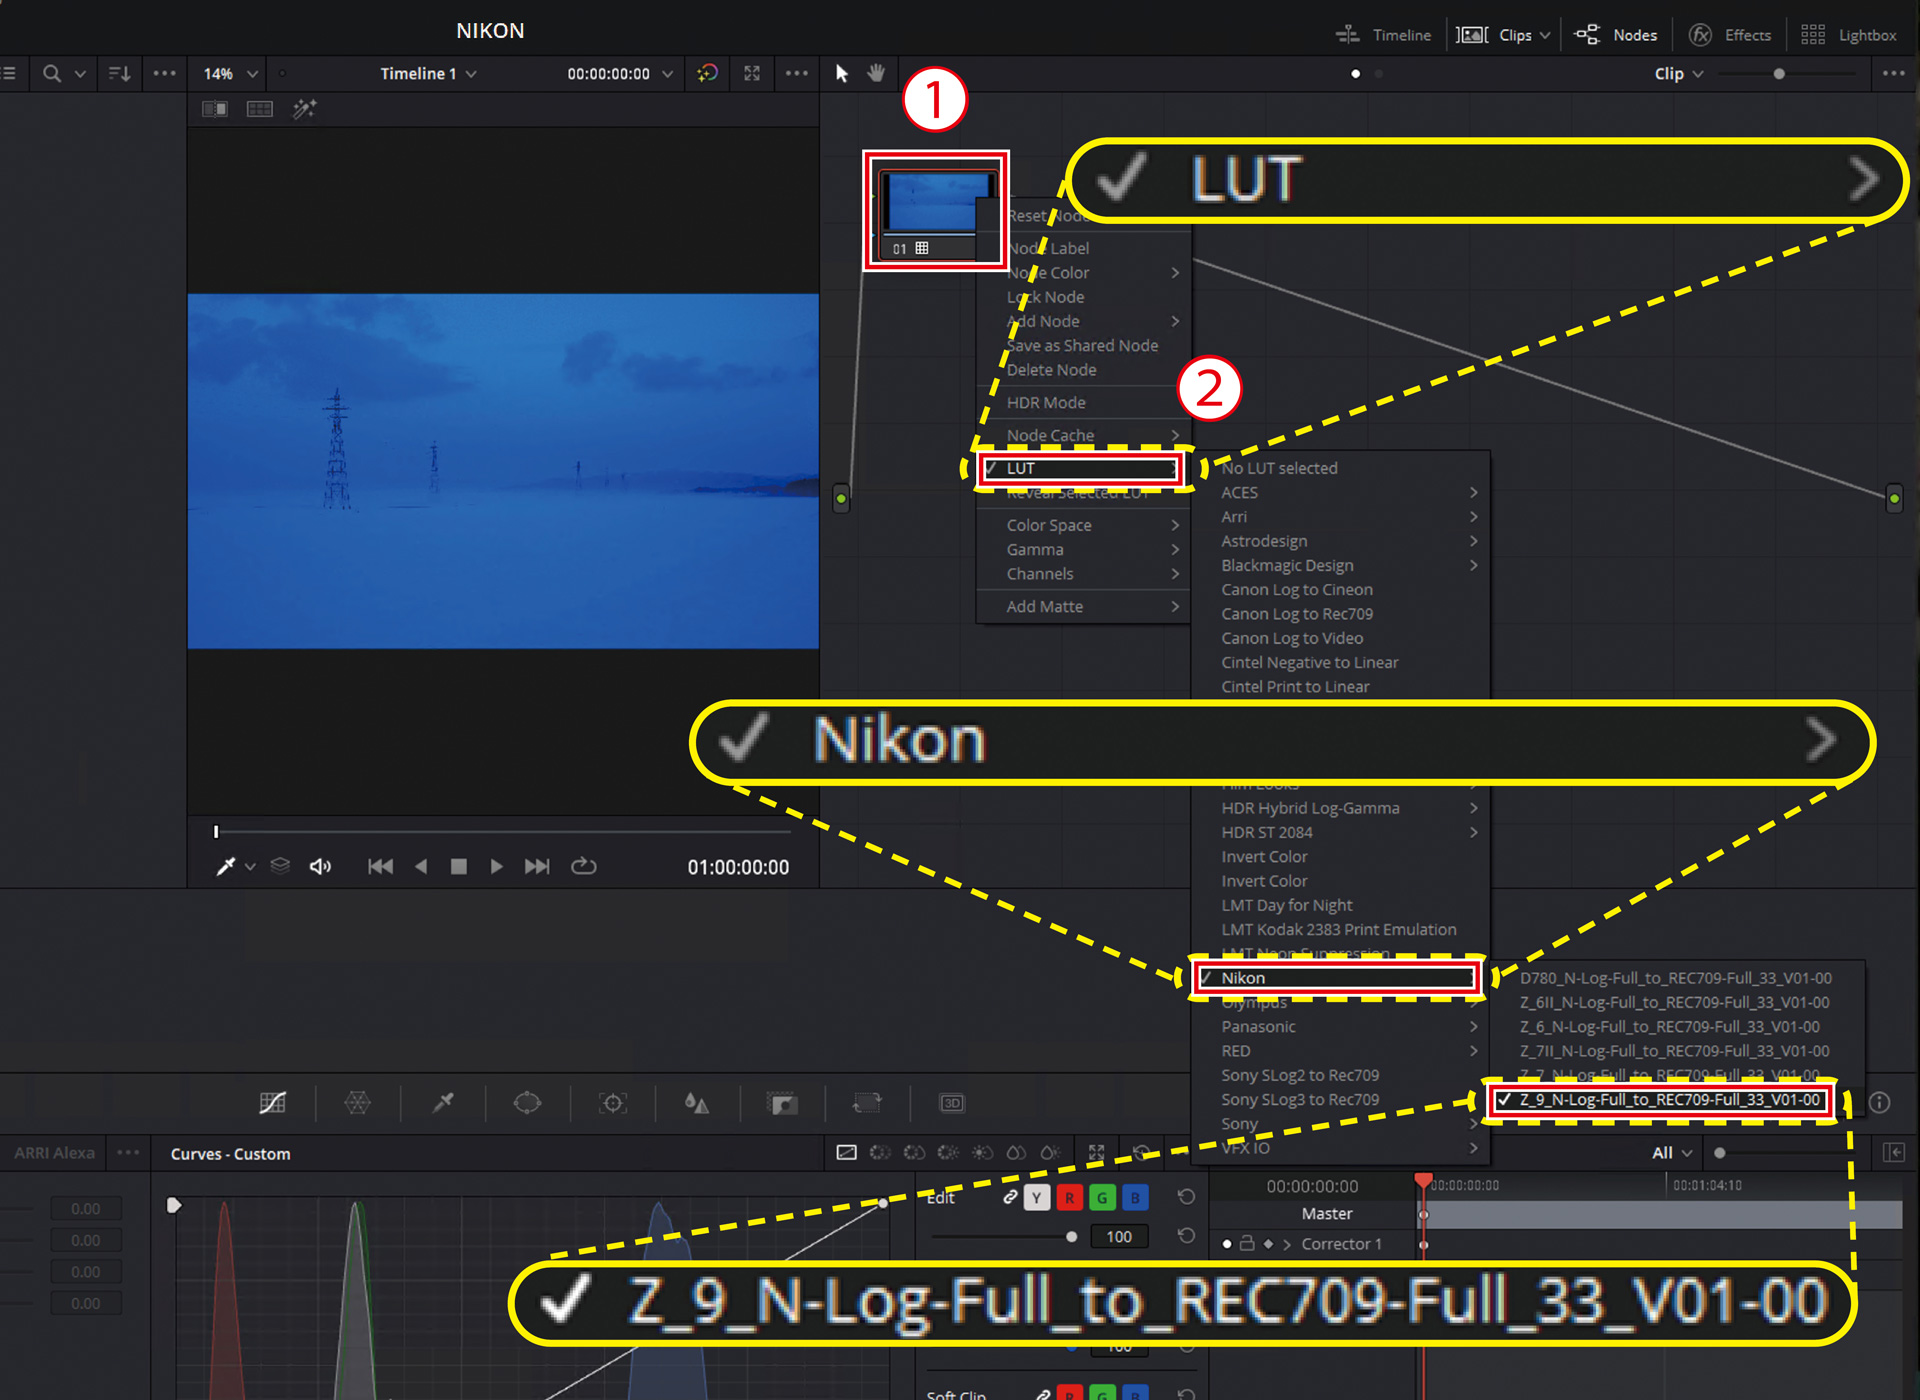
Conversion pattern 2: Use N-Log 3D LUT
- It is assumed that the N-Log 3D LUT provided by Nikon is registered with DaVinci Resolve.
- Right-click the image displayed in the Node editor at the top right
- Select LUT > Nikon > Z_9_N-Log-Full_to_REC709-Full_33_V01-00
- As with pattern 1, changing Clip from Project, which is the default setting for Decode Using, allows you to change Color Space and Gamma for each clip, and adjust the color temperature as well
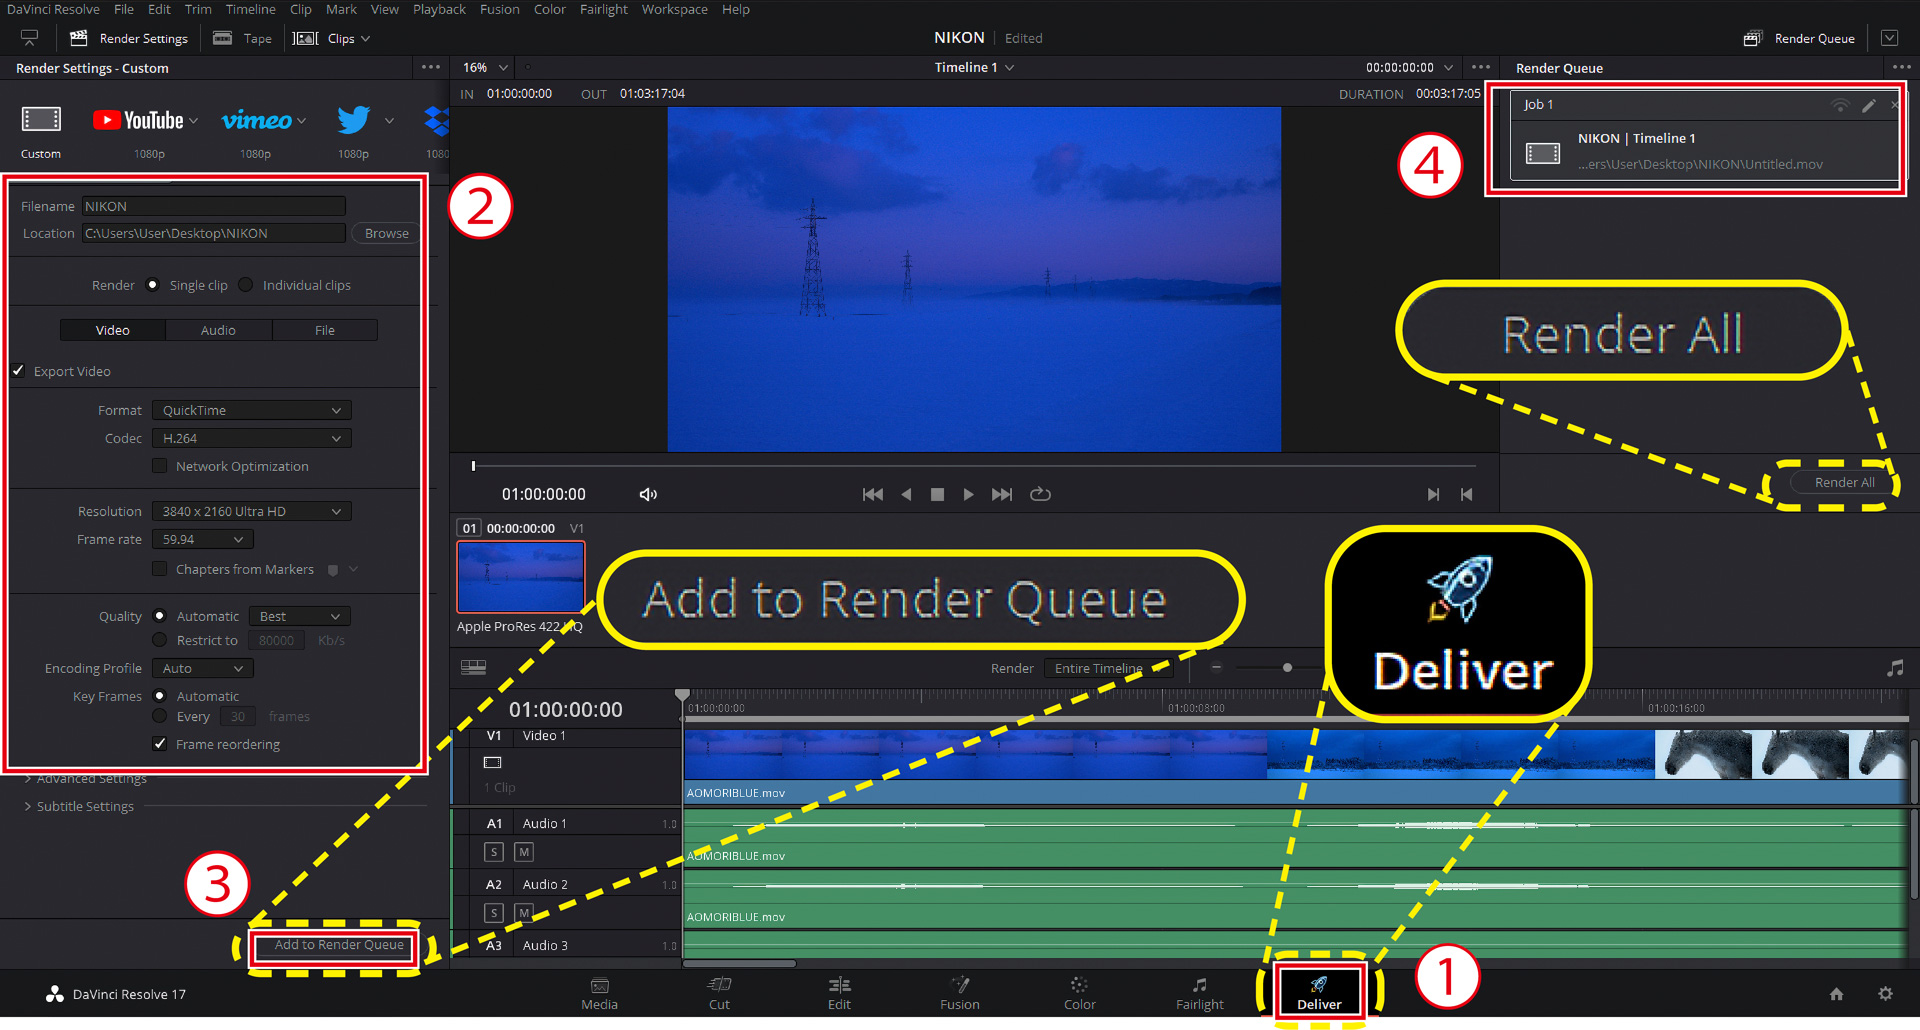
7. Export the data
- Select the Deliver tab at the bottom right of the screen
- Type the file name in the Render Settings
- Scroll down and confirm that the resolution and frame rate of the timeline is the same as the project. When the setting is finished, select Add to Render Queue
- When the job is added to the Render Queue, select the objective job and select Render All