Technical Solutions | Z 9 TIPS
EDIUS X Pro: Editing procedure for N-RAW
1. Create a new project
- The following procedure explains how to create a video that can be viewed in SDR using N-RAW data recorded in 8K/60p, tone mode N-Log, as a typical example.
- Paid version of EDIUS X Pro 10.32 or later is required for editing work including rendering.
- Please download and install EDIUS X Pro from the URL below.
https://www.ediusworld.com/products/index.html
Note: This URL is as of June, 2022.
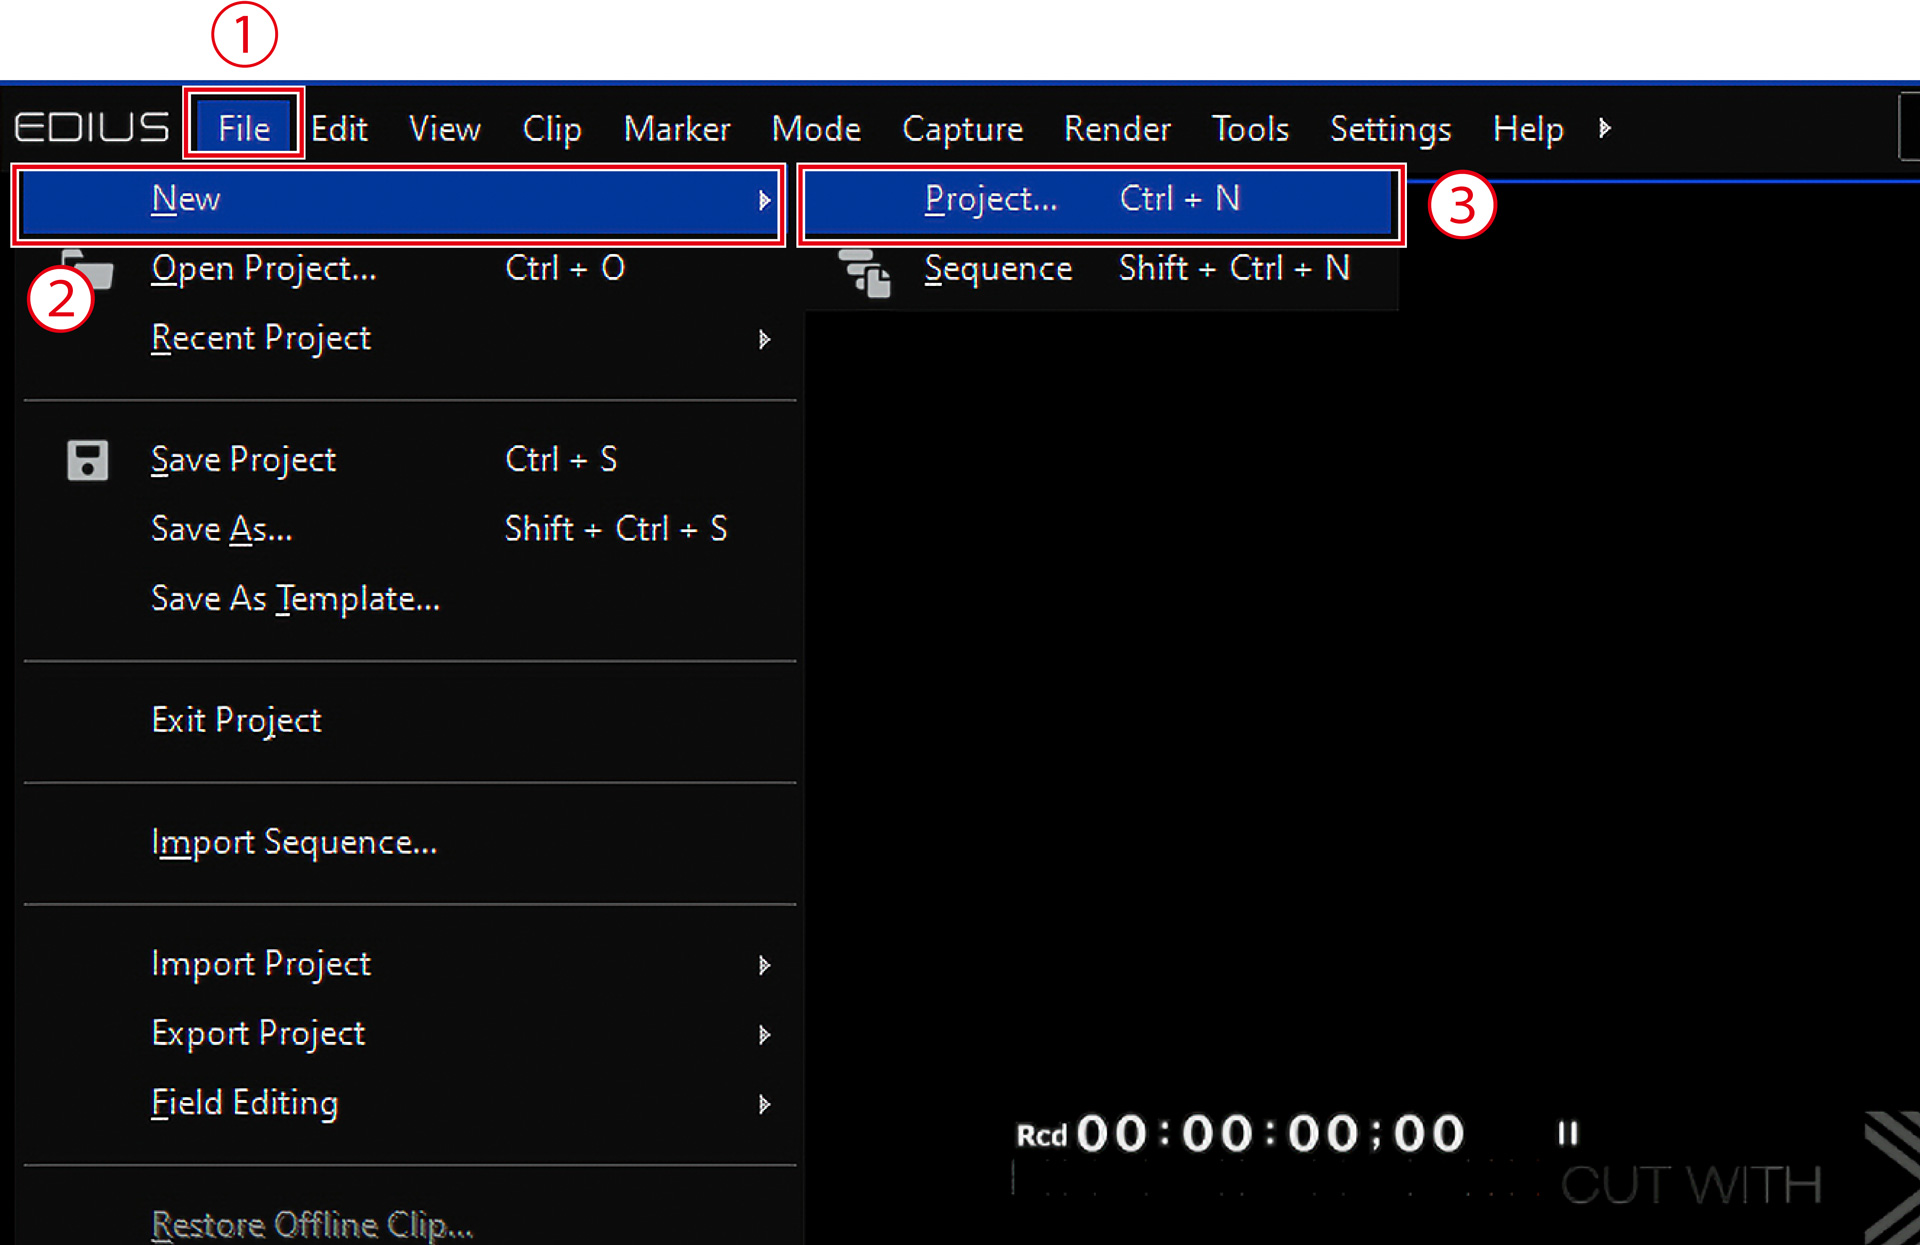
- Select File on the menu bar
- Select New
- Select Project to create a new project
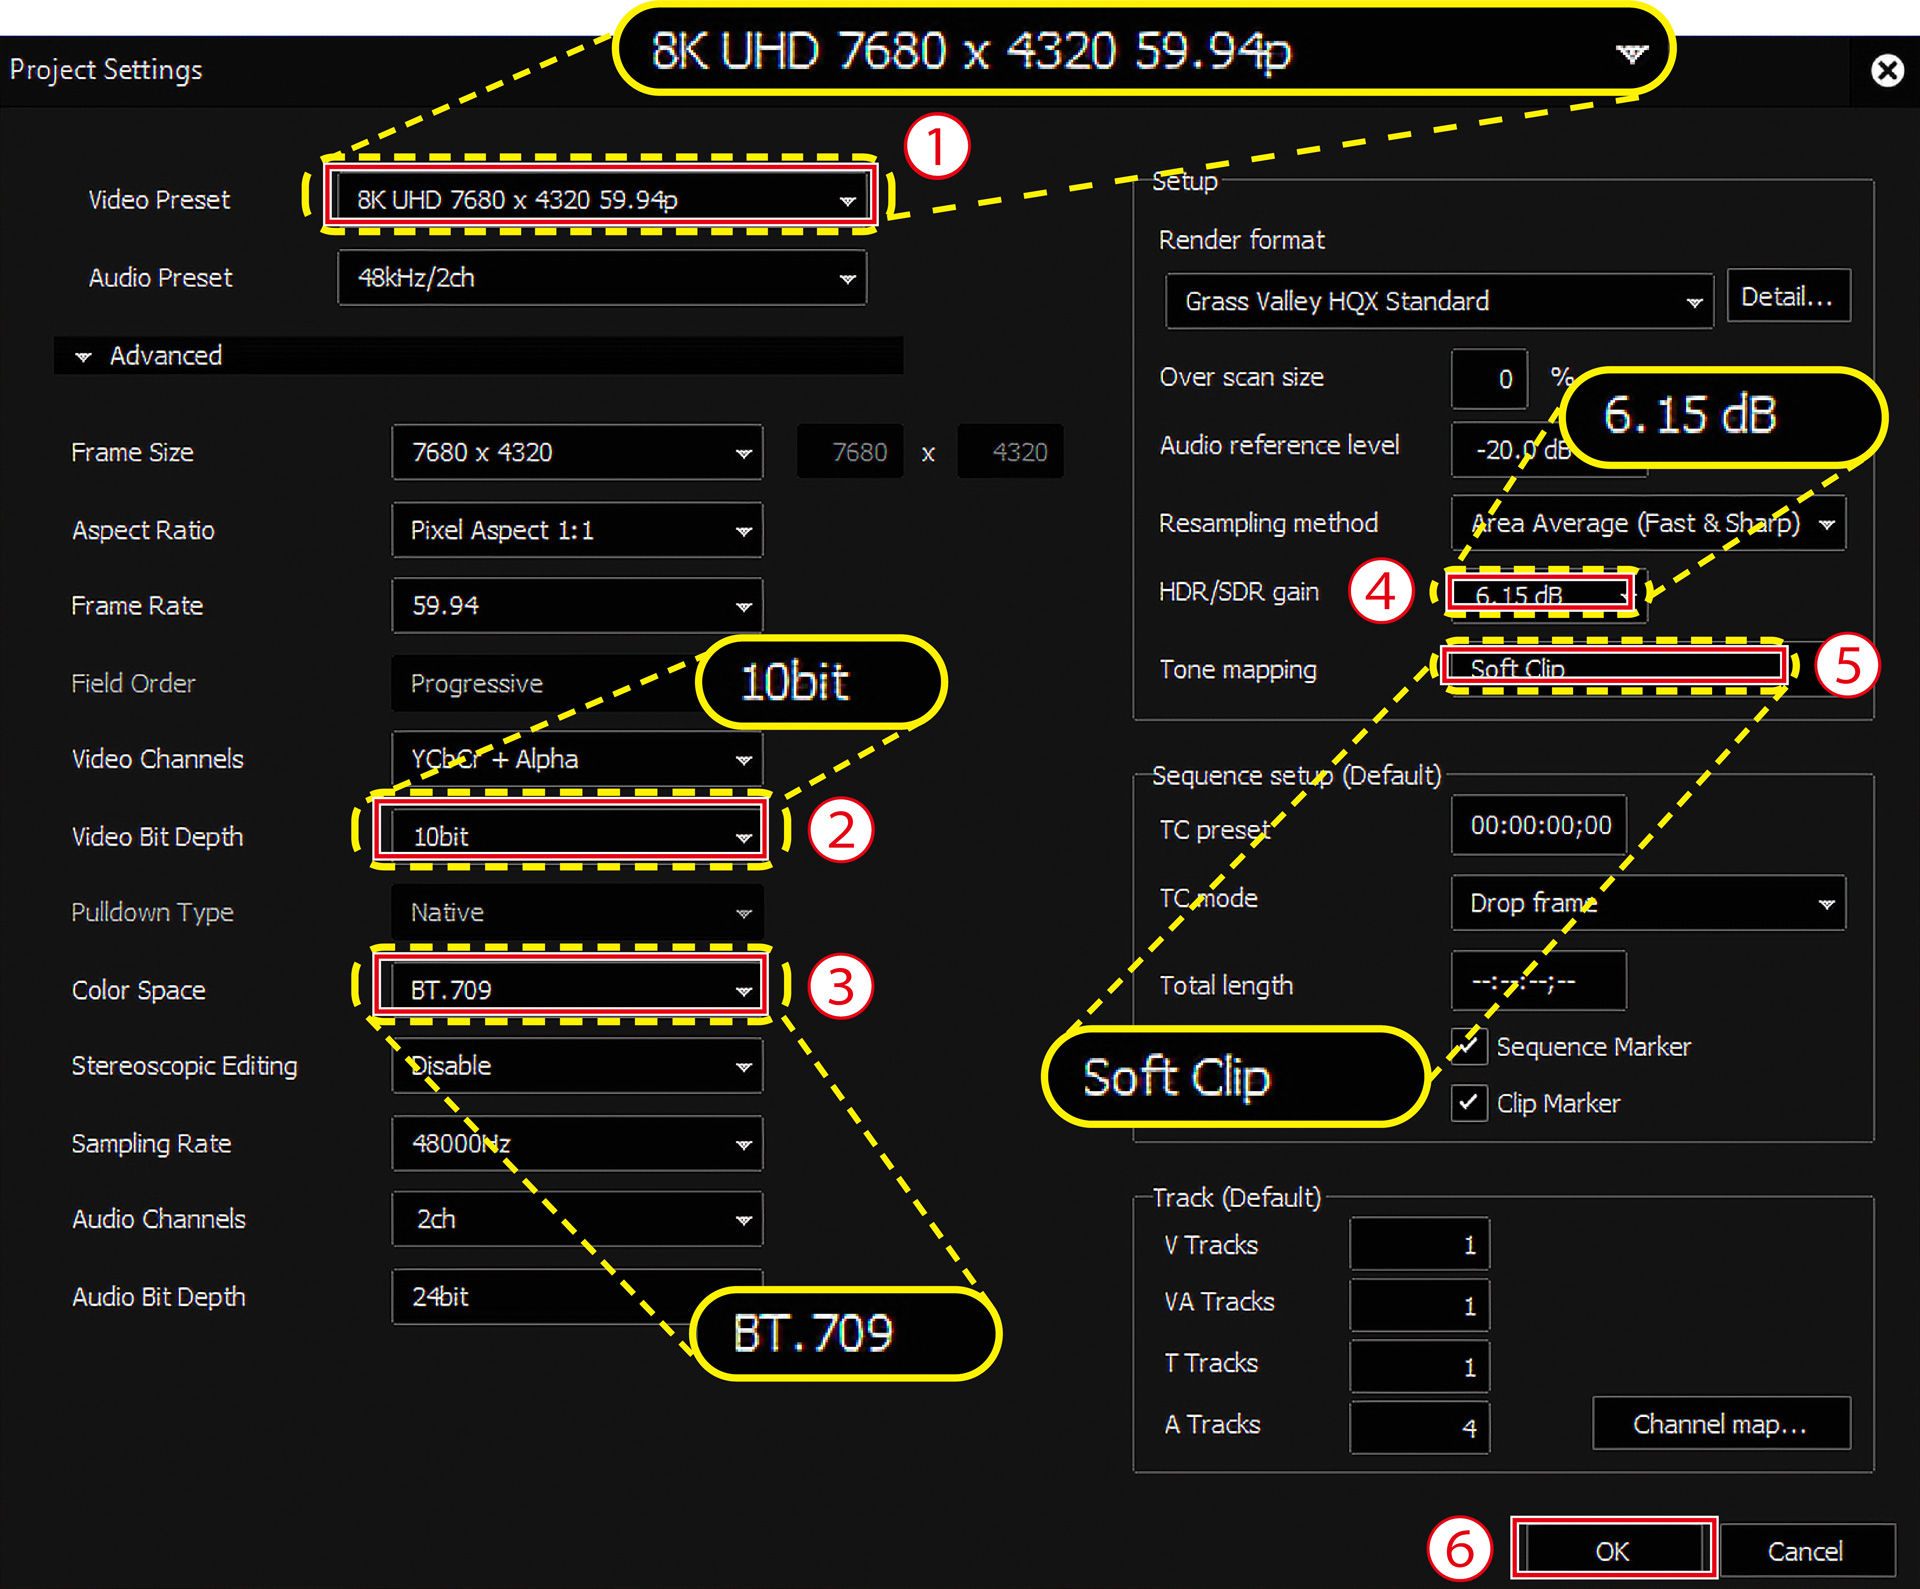
3. Change the detailed settings of the project
- Select Video Preset > 8K UHD 7680 x 4320 59.94p
- Select Video Bit Depth > 10bit
- Select Color Space > BT.709
- Confirm that HDR/SDR gain is set to the default setting of 6.15 dB
- Confirm that Tone mapping is set to the default setting of Soft Clip
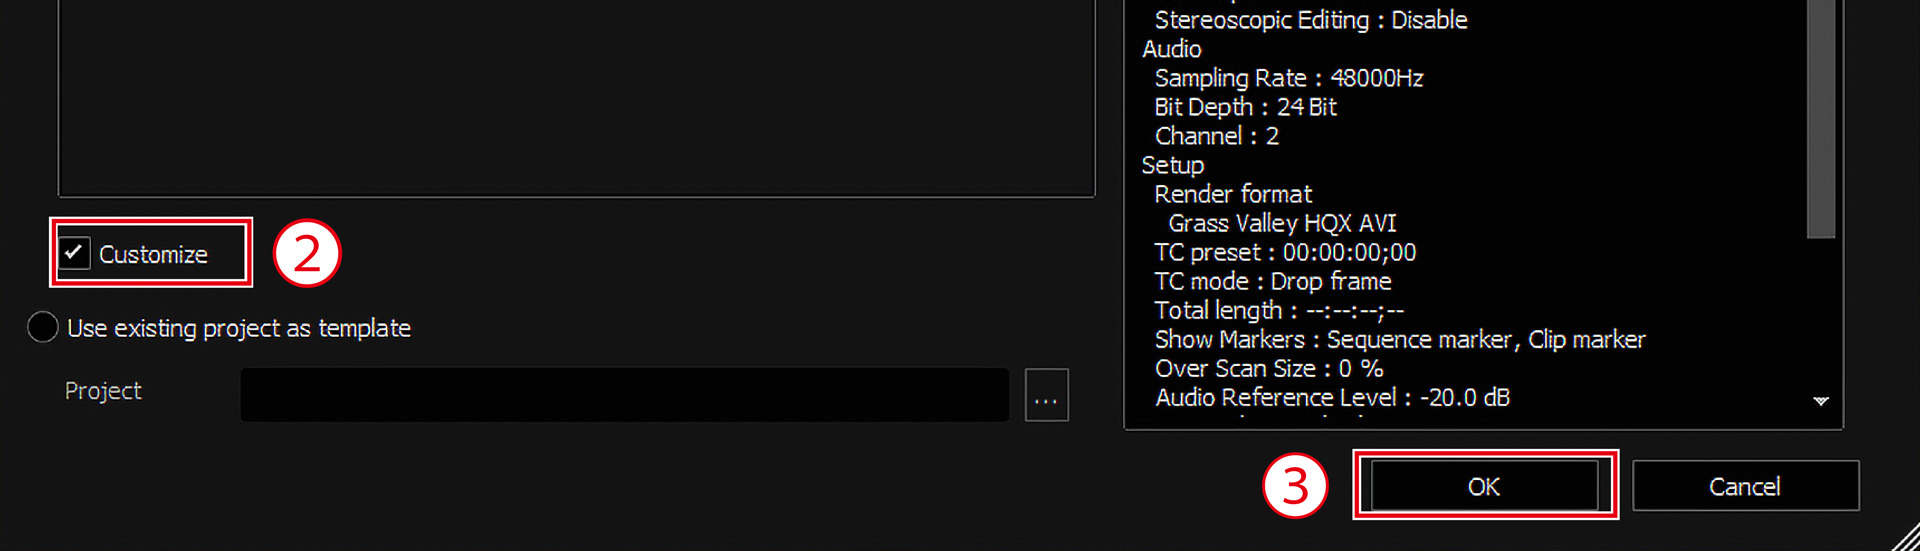
- Select OK
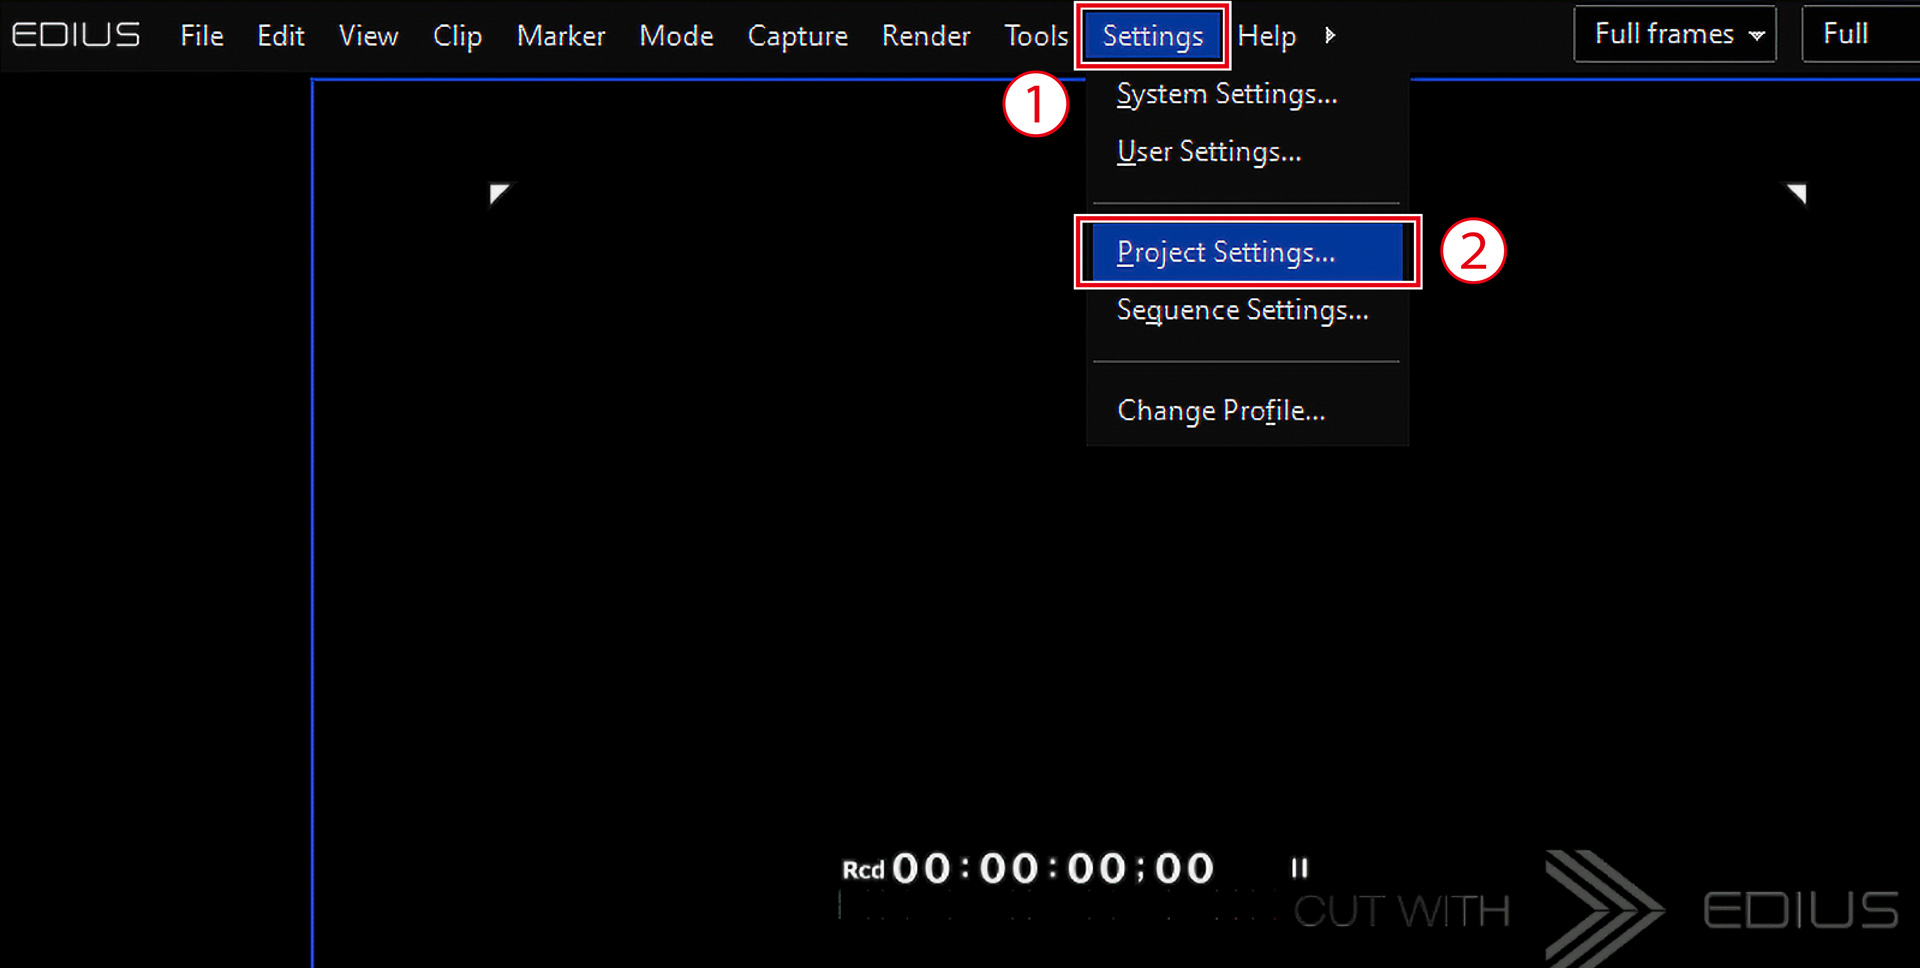
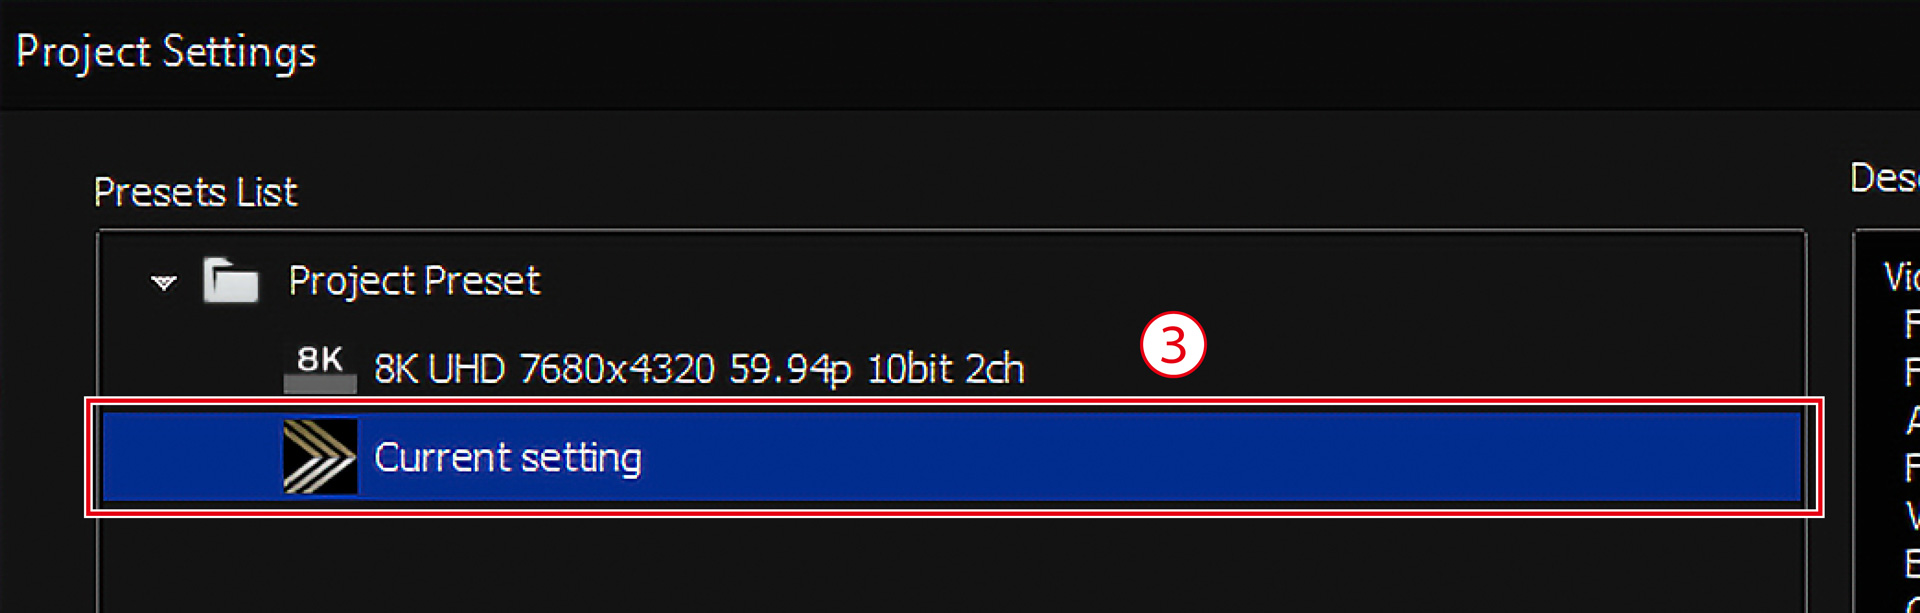
* You can also change the settings of projects that you have previously finished.
- Select Settings on the menu bar
- Select Project Settings
- Change the settings from Current setting
4. Import the data recorded in 8K/60p N-RAW
- Proxy files need to be imported at the same time, assuming editing utilizing the EDIUS proxy mode.
- Editing RAW videos of 8K/60p requires high CPU processing power. Therefore, the EDIUS proxy mode is recommended for editing.
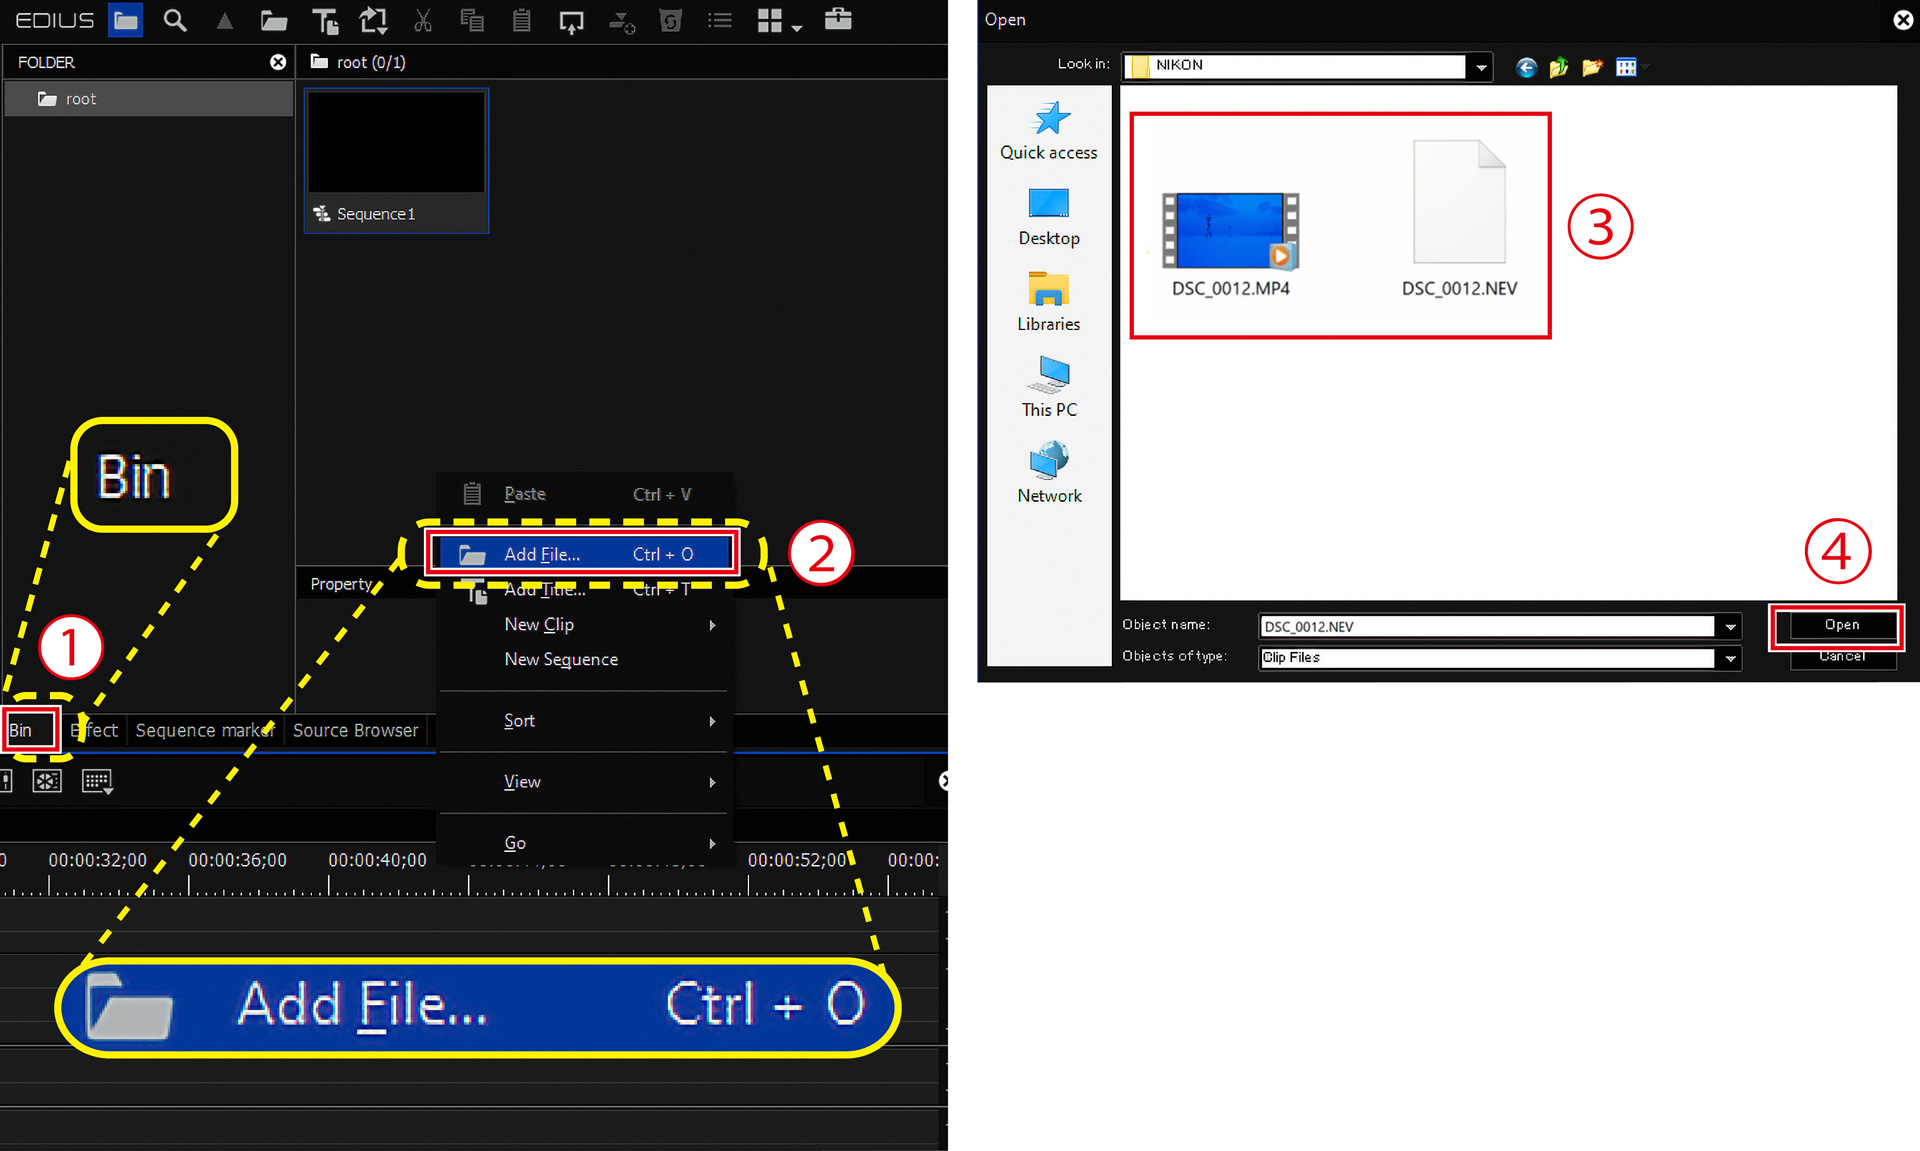
- Right-click any empty space in the Bin panel at the top right where you manage imported clips
- Select Add File
- When you record RAW videos with the Z 9, both N-RAW and proxy files are generated in the same folder. Select the proxy file as well as the N-RAW file
- Select Open
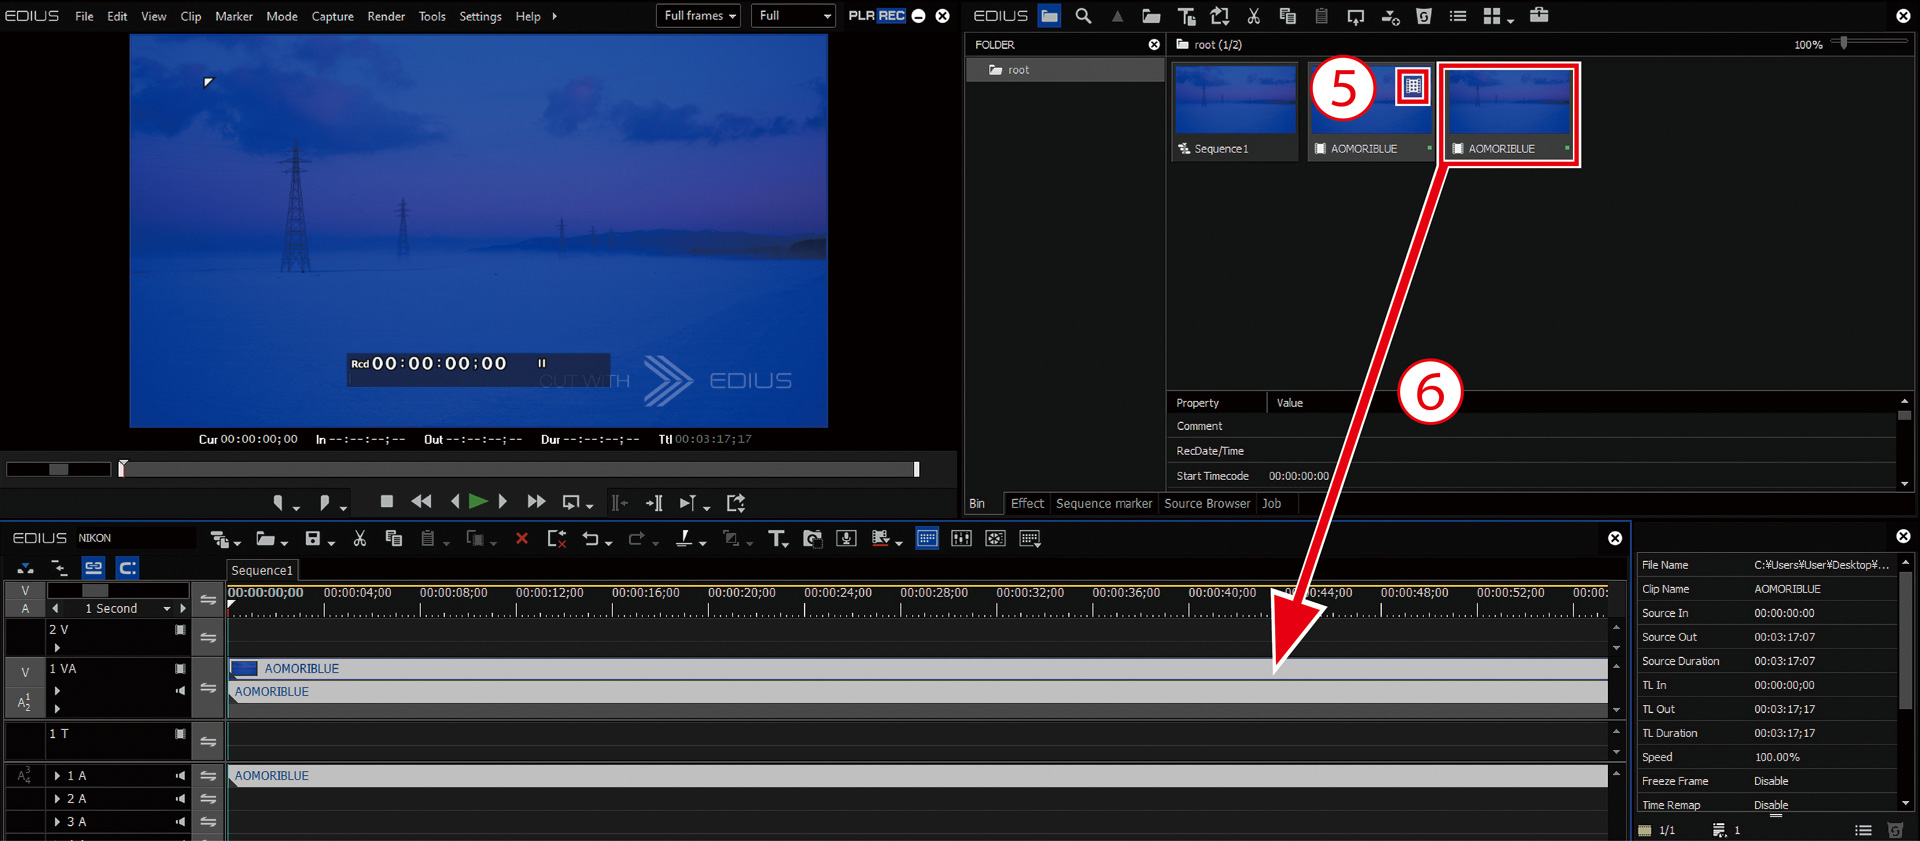
- When the proxy file that is paired with the N-RAW file is imported to EDIUS, a temporary editing clip mark appears at the top right corner on the image displayed in the Bin panel
- Drag-and-drop the N-RAW file to the timeline
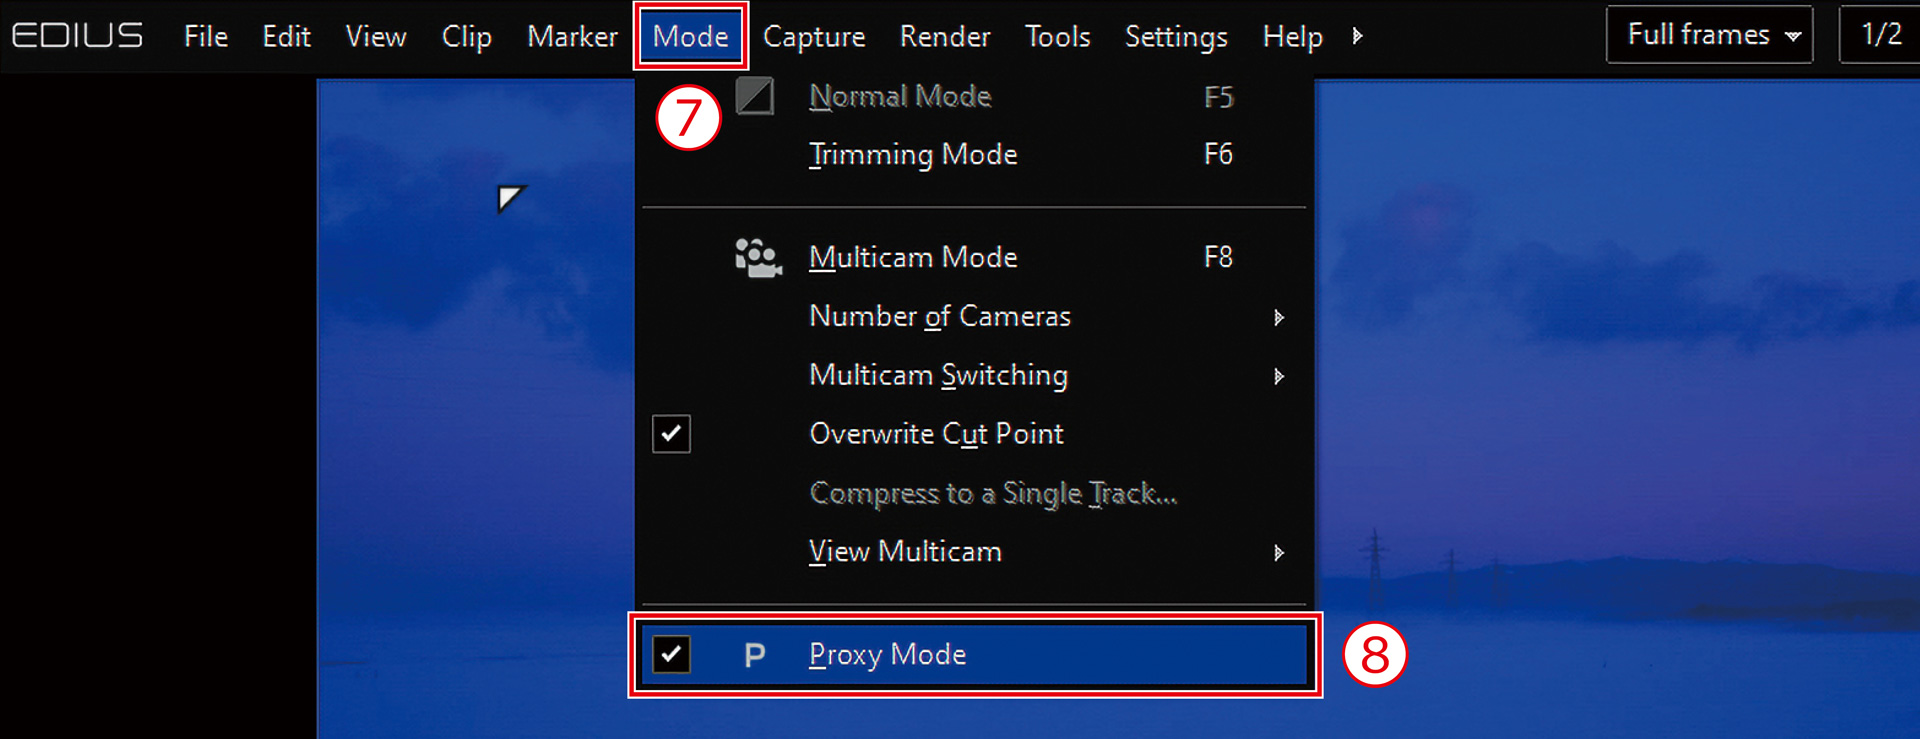
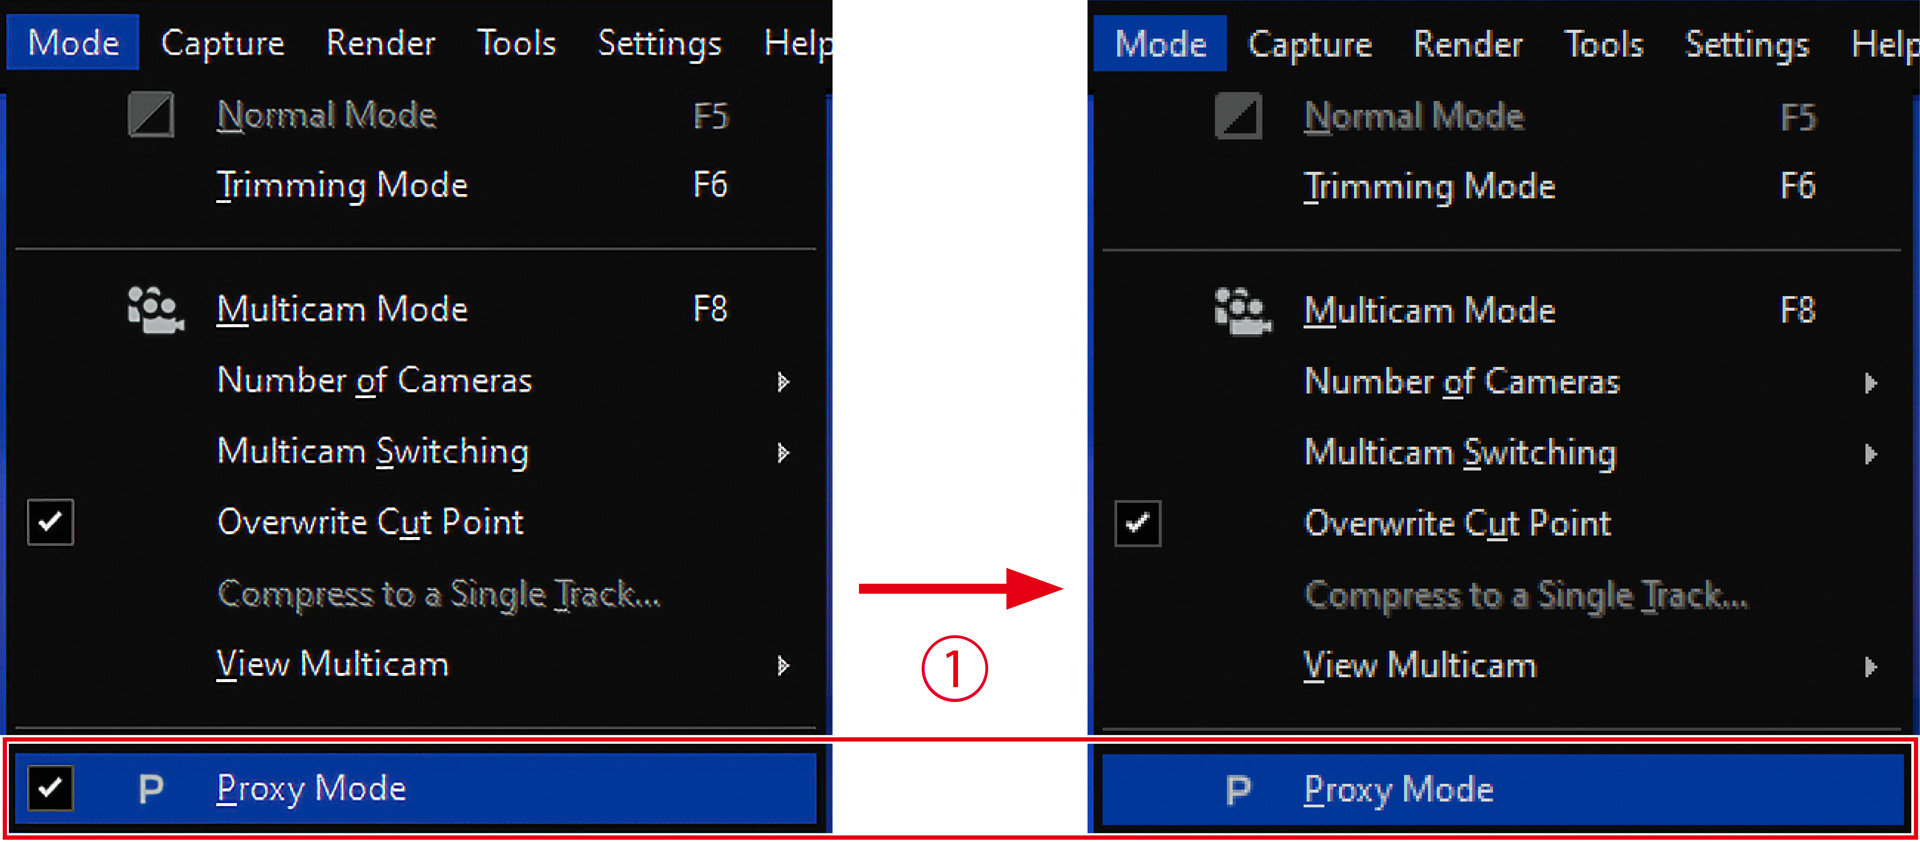
- Select Mode on the menu bar
- Select Proxy Mode
* When the display of the clip shows a grid-like display appearing on the timeline, the system has switched from the original N-RAW to a proxy-handling state.
5. Convert the color space and gamma of the recorded data according to the project settings
- As previously set up, it is assumed that the video will be viewed in SDR and color space BT.709.
- When N-RAW data is imported to EDIUS, it is decoded as N-Log, so that color space is set to rec.2020 and the gamma is set to N-Log.
Conversion pattern 1: Convert from the effect
For the conversion, apply color grading to the clip recorded in Log format and use the primary color correction that allows you to adjust brightness and color.
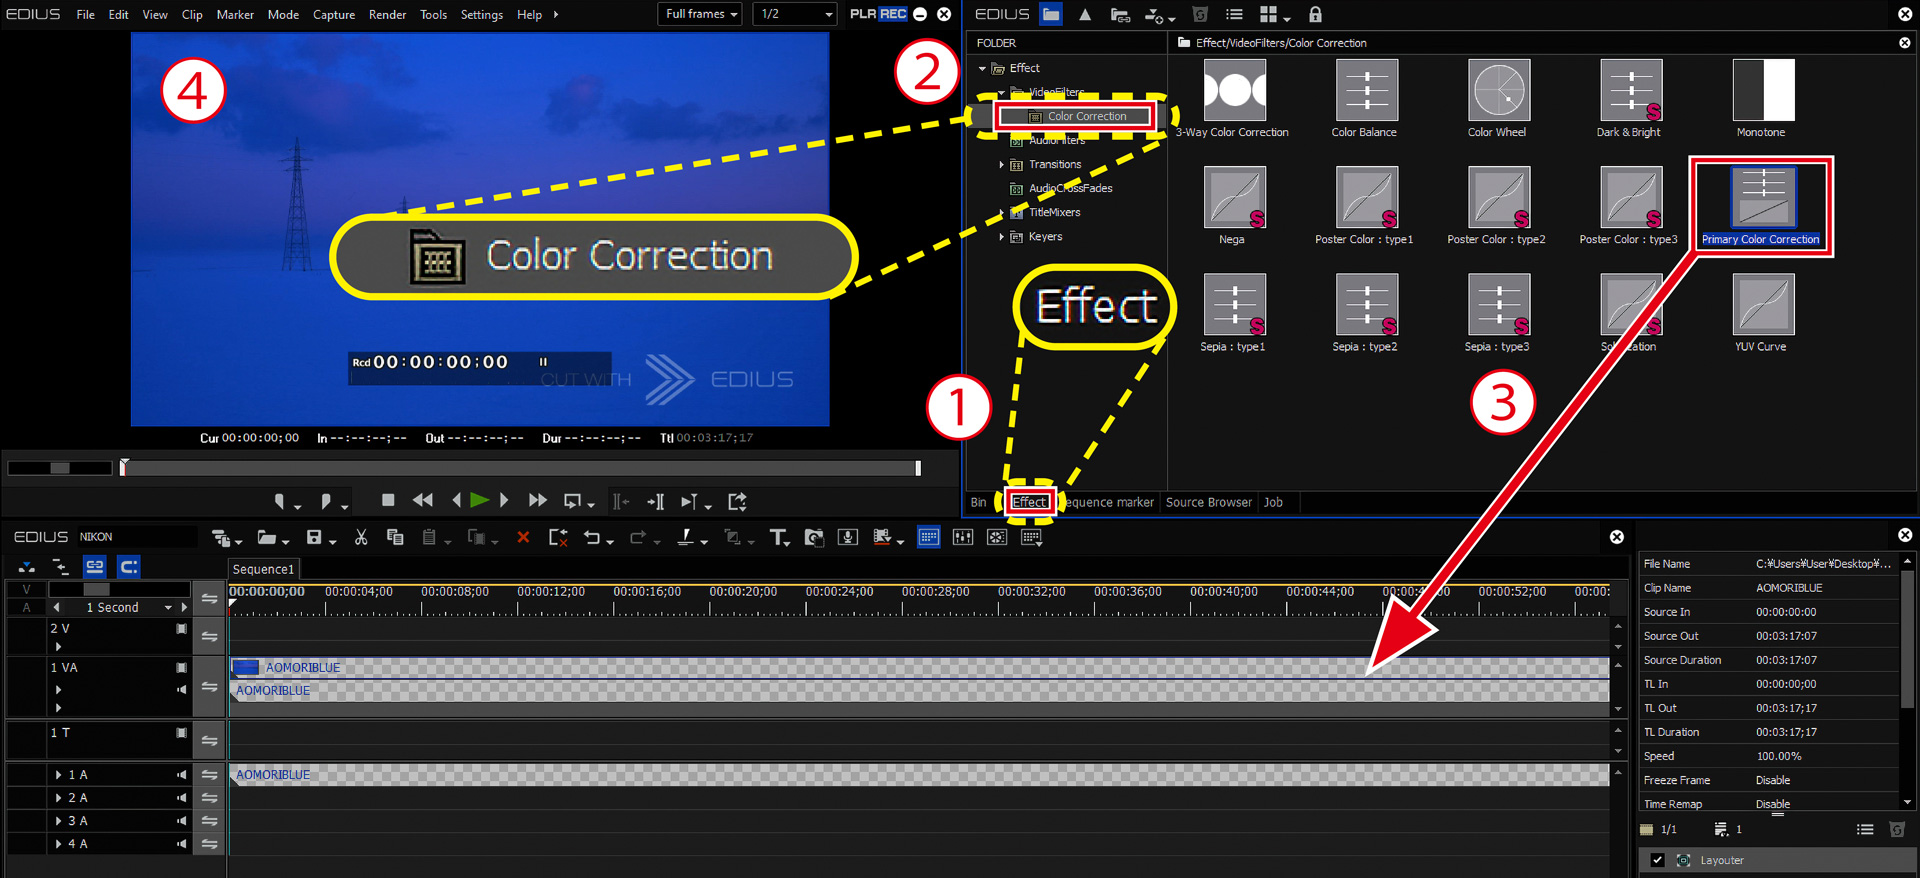
- Change the tab of the panel at the top right from Bin to Effect
- Select Video Filters > Color Correction
- Open the folder, select Primary Color Correction, and drag and drop the effect to the clip in the timeline
- Confirm that the display of the preview window changes
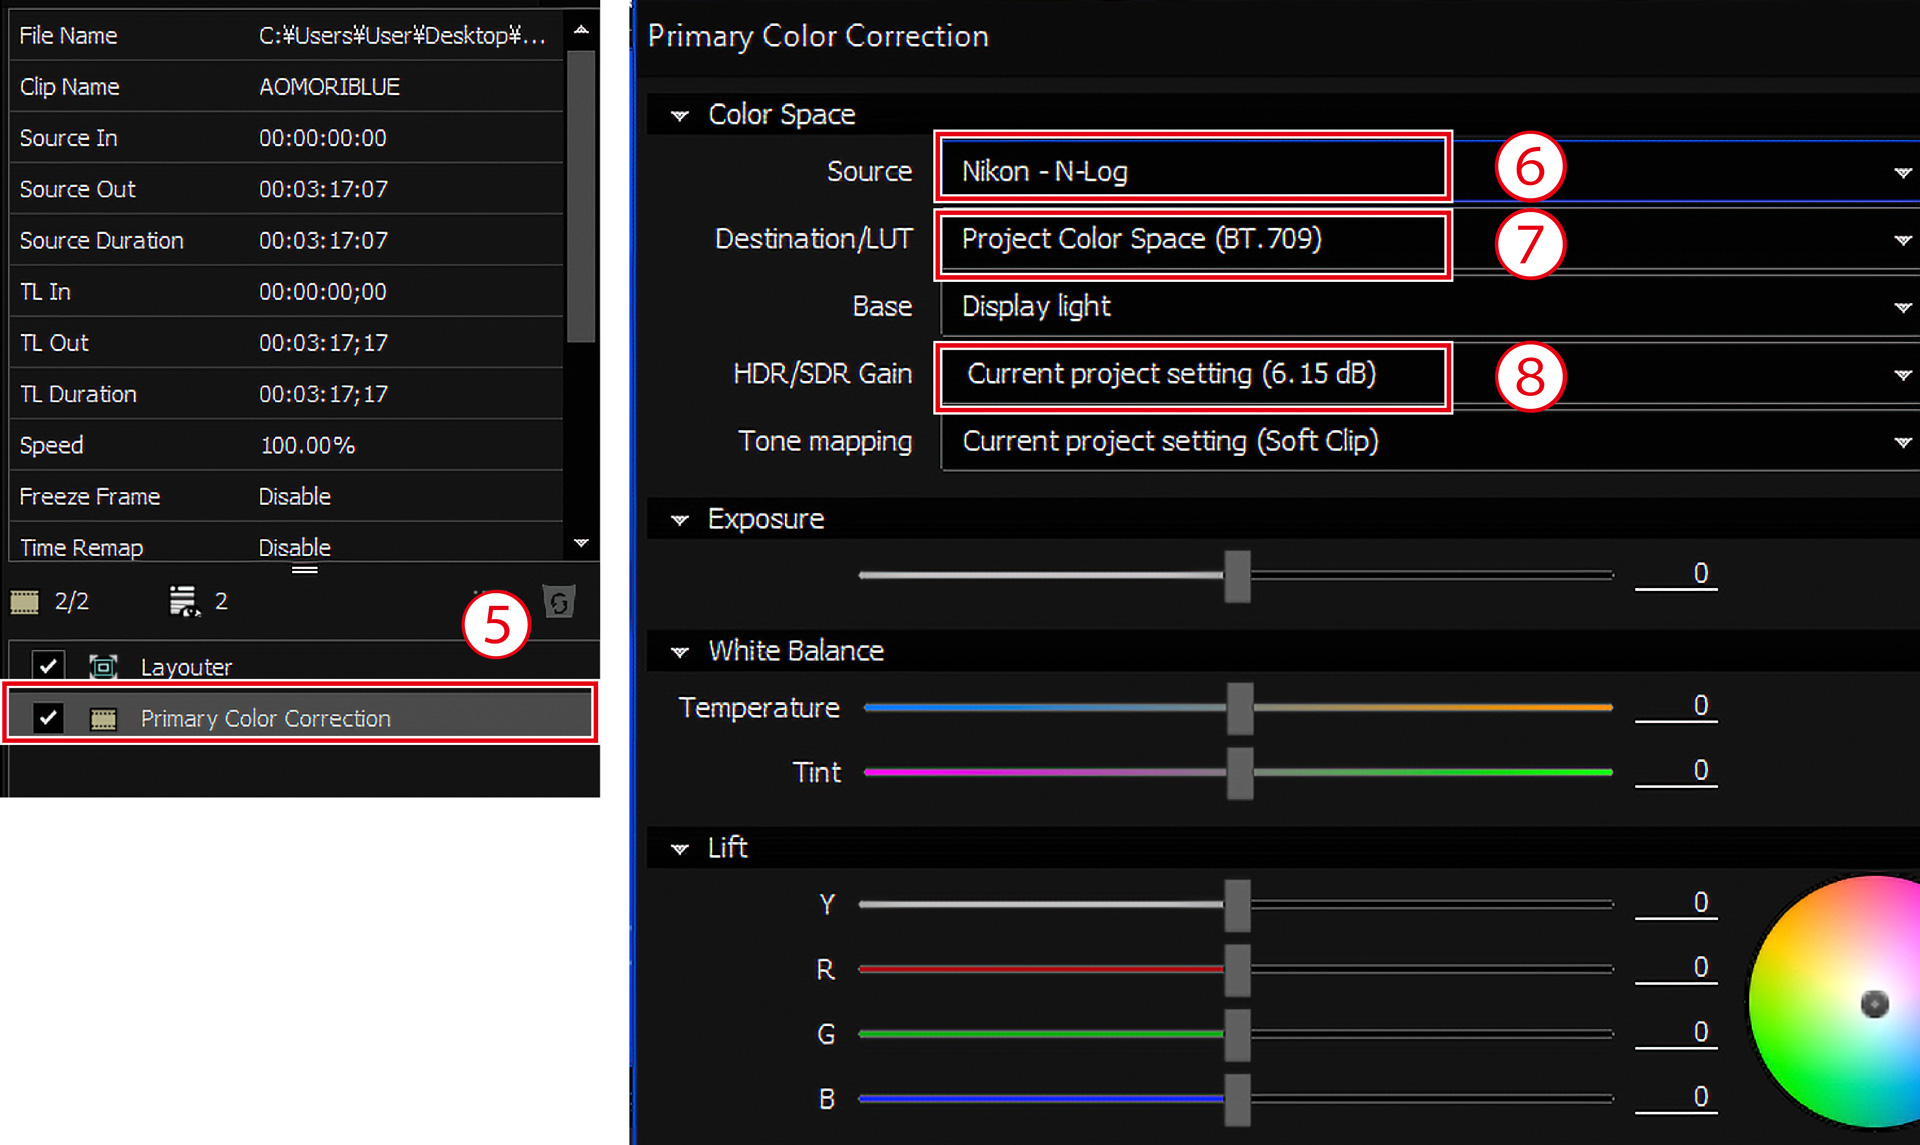
- Double-click the Primary Color Correction in the Information panel to open the Primary Color Correction
- Confirm that Color Space > Source is set to N-log
- Confirm that Destination/LUT is set to Project Color Space (BT.709)
- Confirm that HDR/SDR Gain is the same as the project settings, and that N-Log (decoded from N-RAW) as source file is converted to SDR BT.709
Conversion pattern 2: Use N-Log 3D LUT
- It is assumed that the 3D-LUT provided by Nikon is registered with EDIUS.
- Select Destination/LUT > Z_9_N-Log-Full_to_REC709-Full_33_V01-00(Full/Video)
- Select OK
6. Export the video in the timeline
- It can be assumed that an actual workflow has editing and color grading before the following steps, however, this manual omits the explanation.
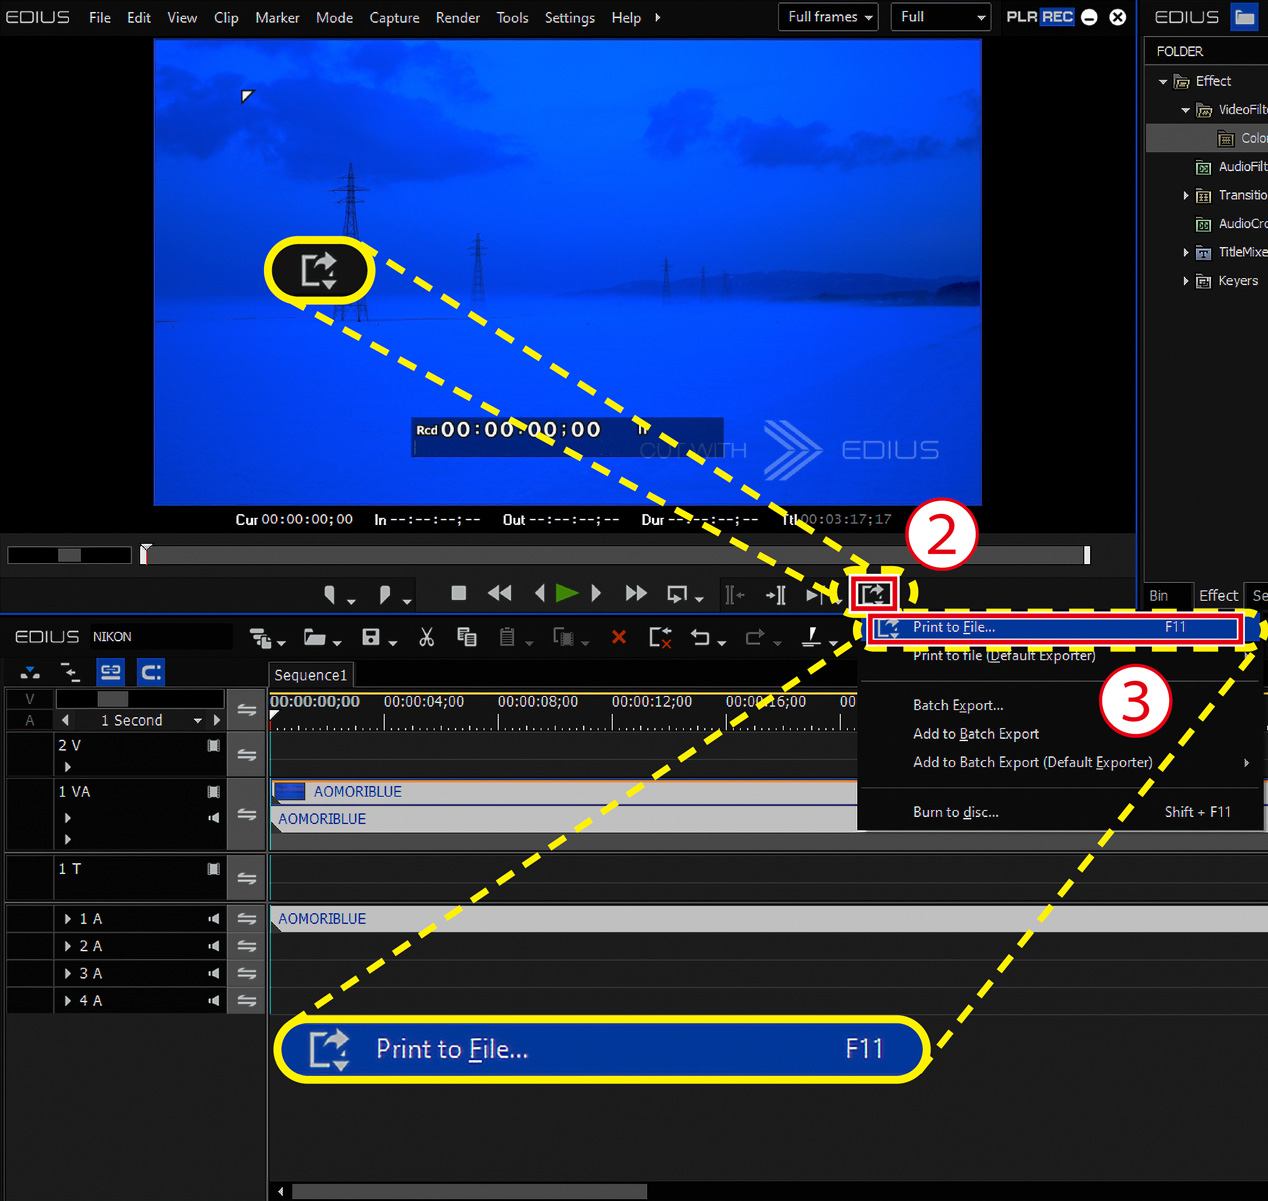
- Select Mode on the menu bar and uncheck Proxy Mode
- Select Export at the bottom of the preview window
- Select Print to File
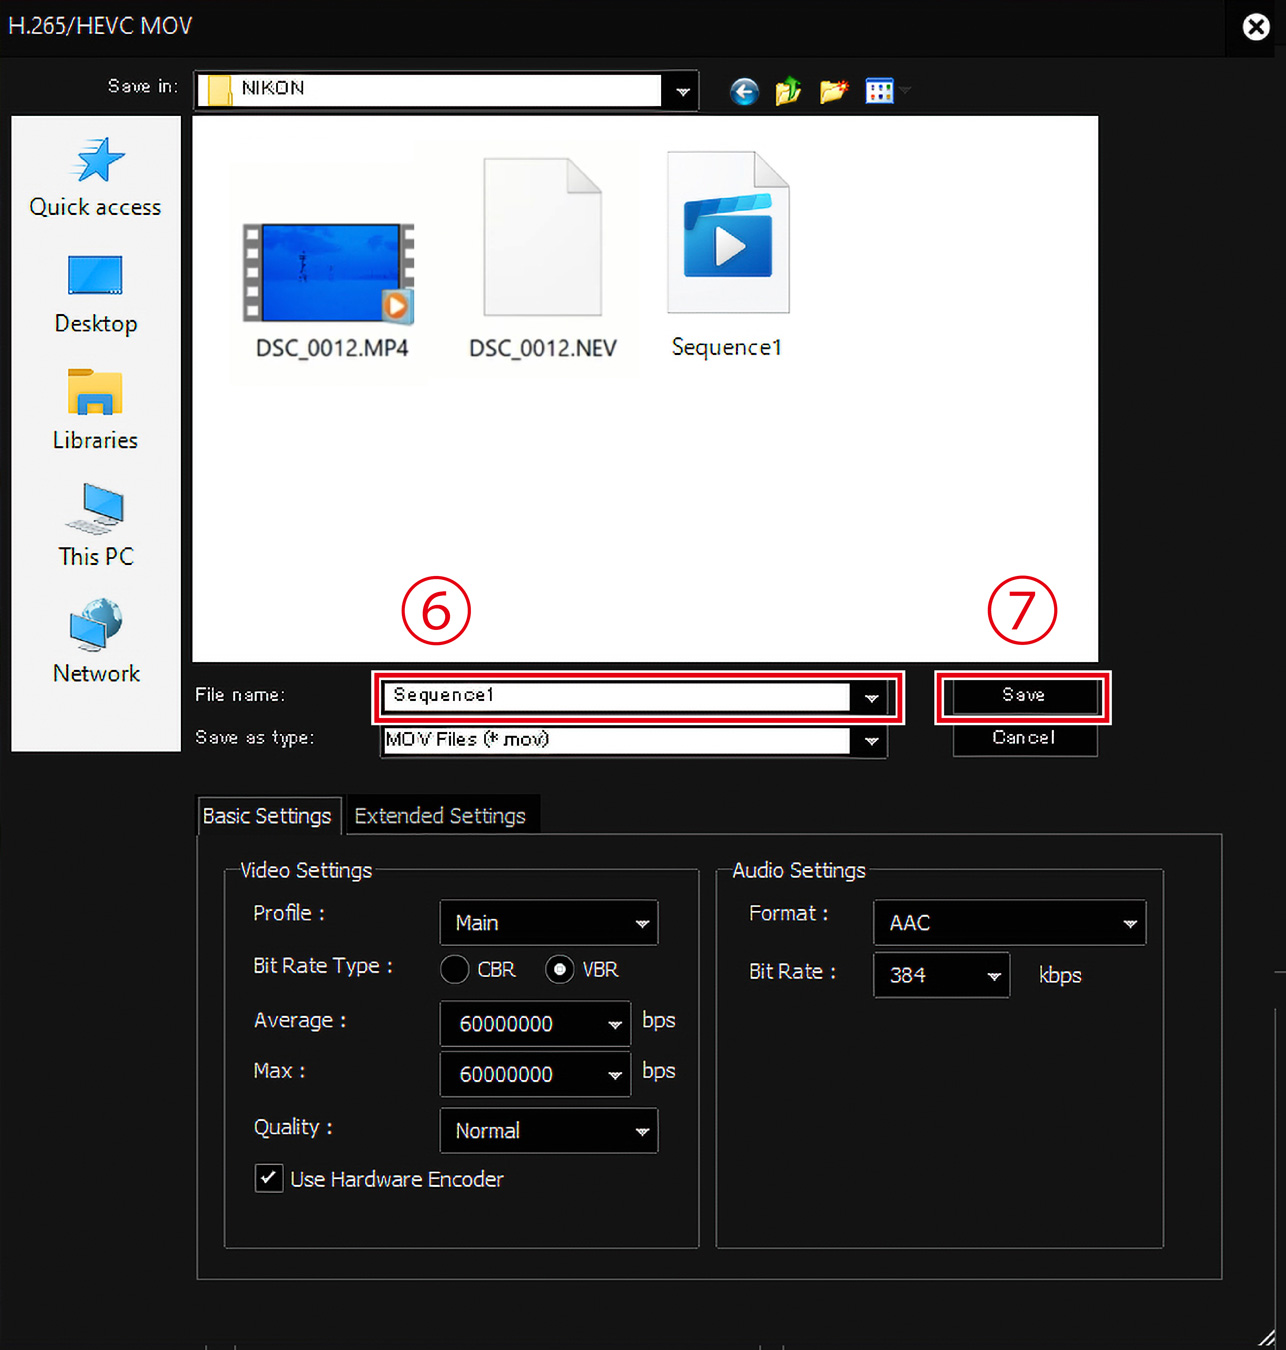
- Select an exporter
- Select Export
- Name the file
- Select Save
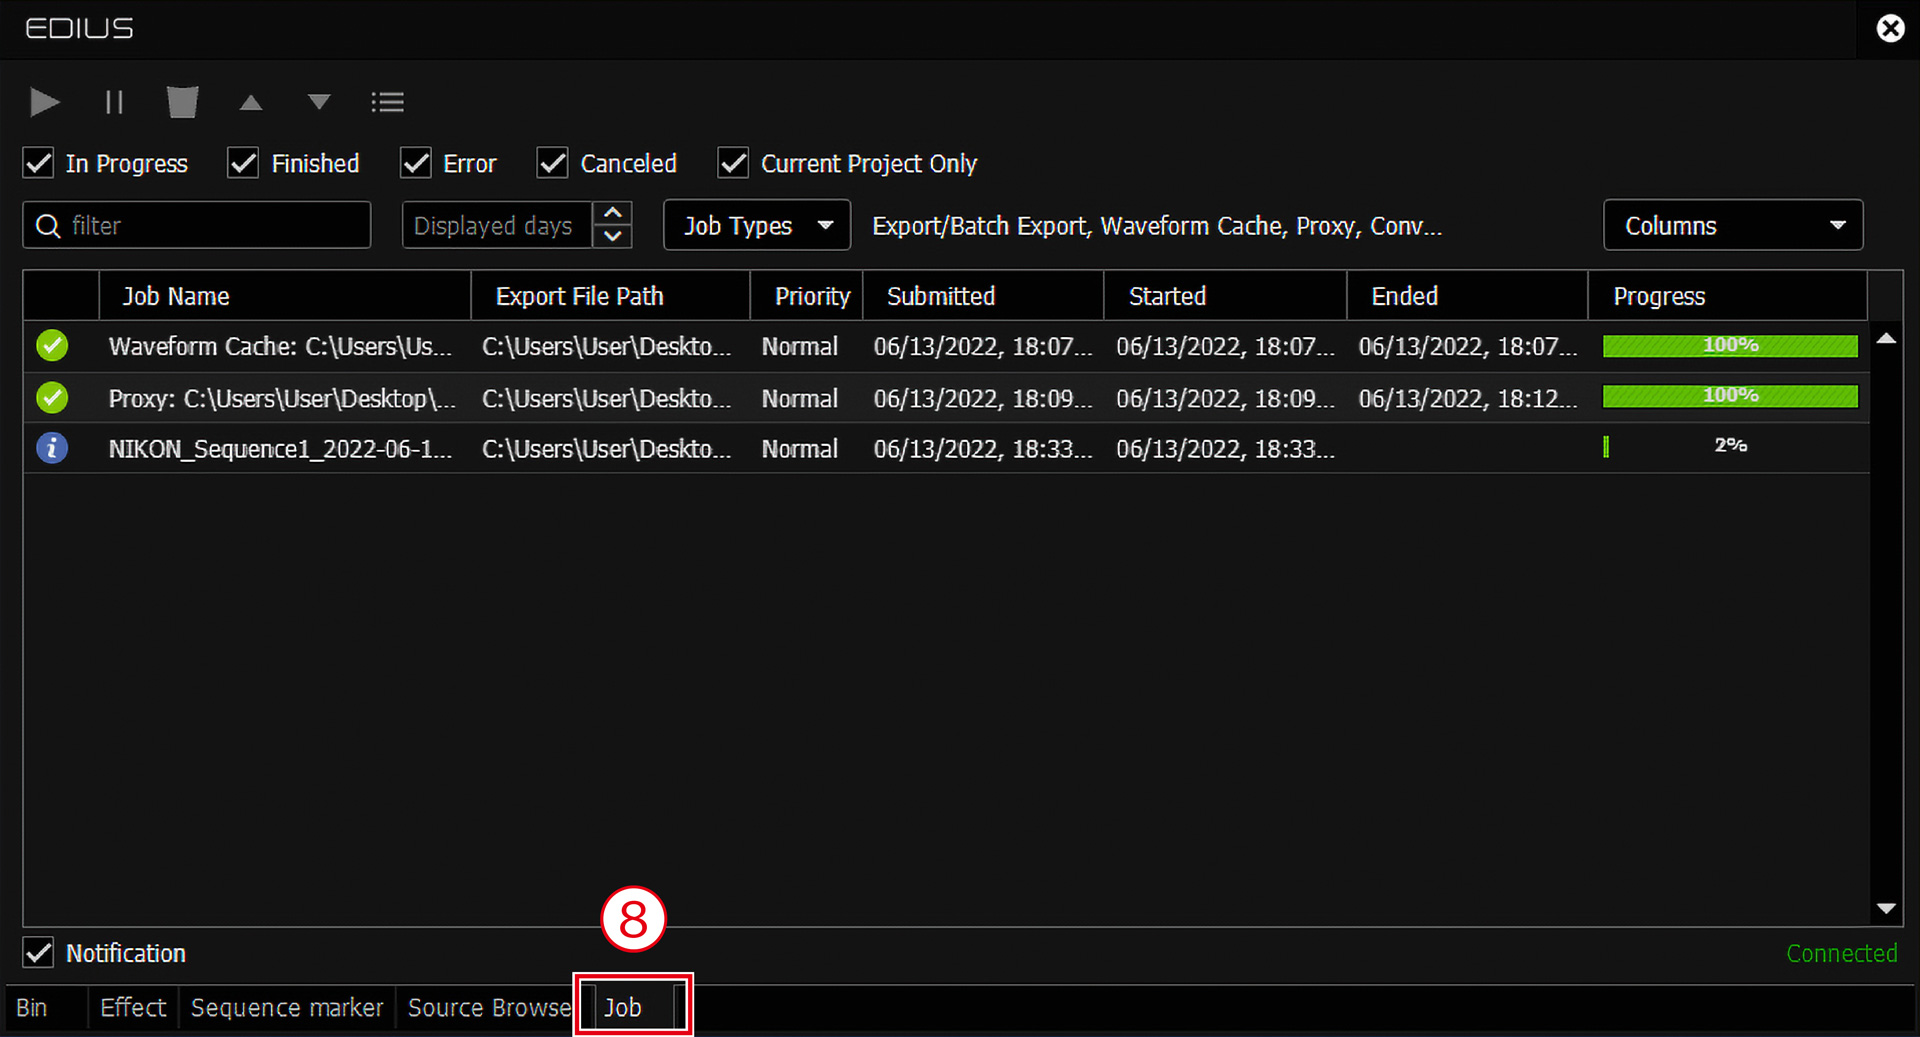
- Select the Job tab and check the rendering progress