Focus-related settings are found in Custom Settings Group "a" [Autofocus].
Users of the D5 should note the differences between it and the D6 with respect to Custom Settings Group "a" [Autofocus].
| D6 | |
|---|---|
| a1 | AF-C priority selection |
| a2 | AF-S priority selection |
| a3 | Focus tracking with lock-on |
| a4 | Focus points used |
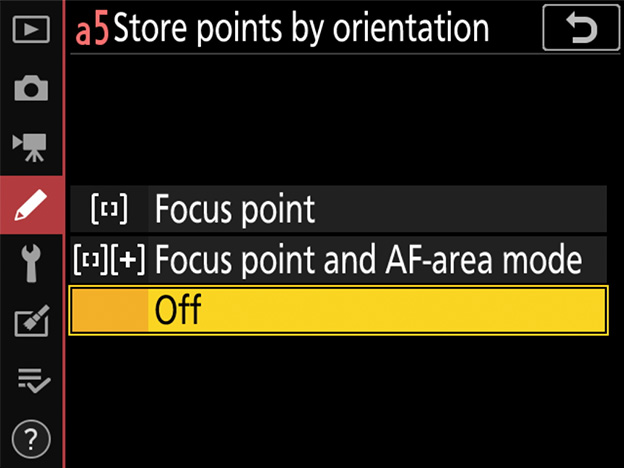
| a5 | Store points by orientation |
| a6 | AF activation |
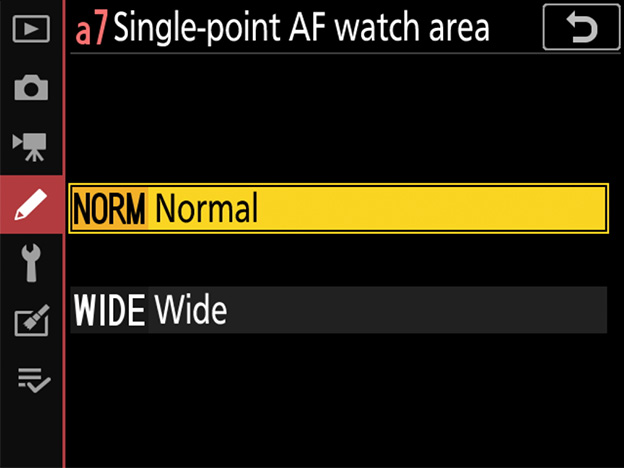
| a7 | Single-point AF watch area |
| a8 | 3D-tracking face-detection |
| a9 | Group-area AF face detection |
| a10 | Custom groupings (C1/C2) |
| a11 | Auto-area AF face detection |
| a12 | Auto-area AF starting point |
| a13 | Focus point persistence |
| a14 | Limit AF-area mode selection |
| a15 | Autofocus mode restrictions |
| a16 | Focus point wrap-around |
| a17 | Focus point options |
| a18 | Manual focus ring in AF mode |
| D5 | |
|---|---|
| a1 | AF-C priority selection |
| a2 | AF-S priority selection |
| a3 | Focus tracking with lock-on |
| a4 | 3D-tracking face-detection |
| a5 | 3D-tracking watch area |
| a6 | Number of focus points |
| a7 | Store by orientation |
| a8 | AF activation |
| a9 | Limit AF-area mode selection |
| a10 | Autofocus mode restrictions |
| a11 | Focus point wrap-around |
| a12 | Focus point options |
The D6 features seven new Custom Settings:
The former a6 [Number of focus points] is now a4 [Focus points used], and the options available have changed to reflect the change in the number of focus points. The former a7 [Store by orientation] is now a5 [Store points by orientation], replacing the former a5 [3D-tracking watch area], which is no longer available.
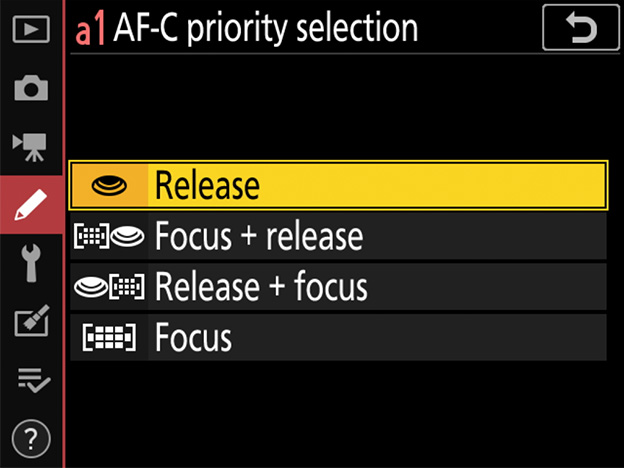
Custom Setting a1 [AF-C priority selection] controls whether the camera gives priority to focus or shutter release.
Pictures can be taken whether or not the camera is in focus. Frame rates do not slow during burst photography.

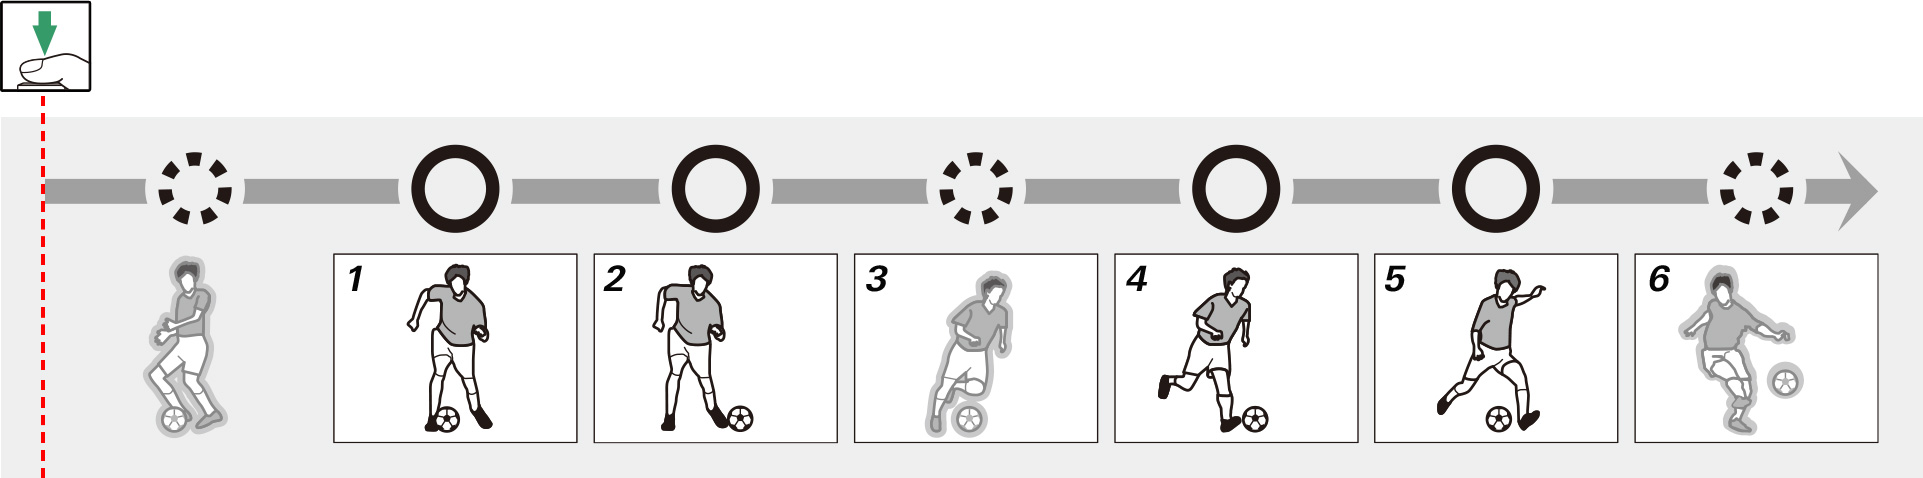
In burst mode, priority is given to focus for the first frame and to release for later frames, ensuring that the first frame is in focus and that no subsequent frames are missed. Frame rates do not slow.
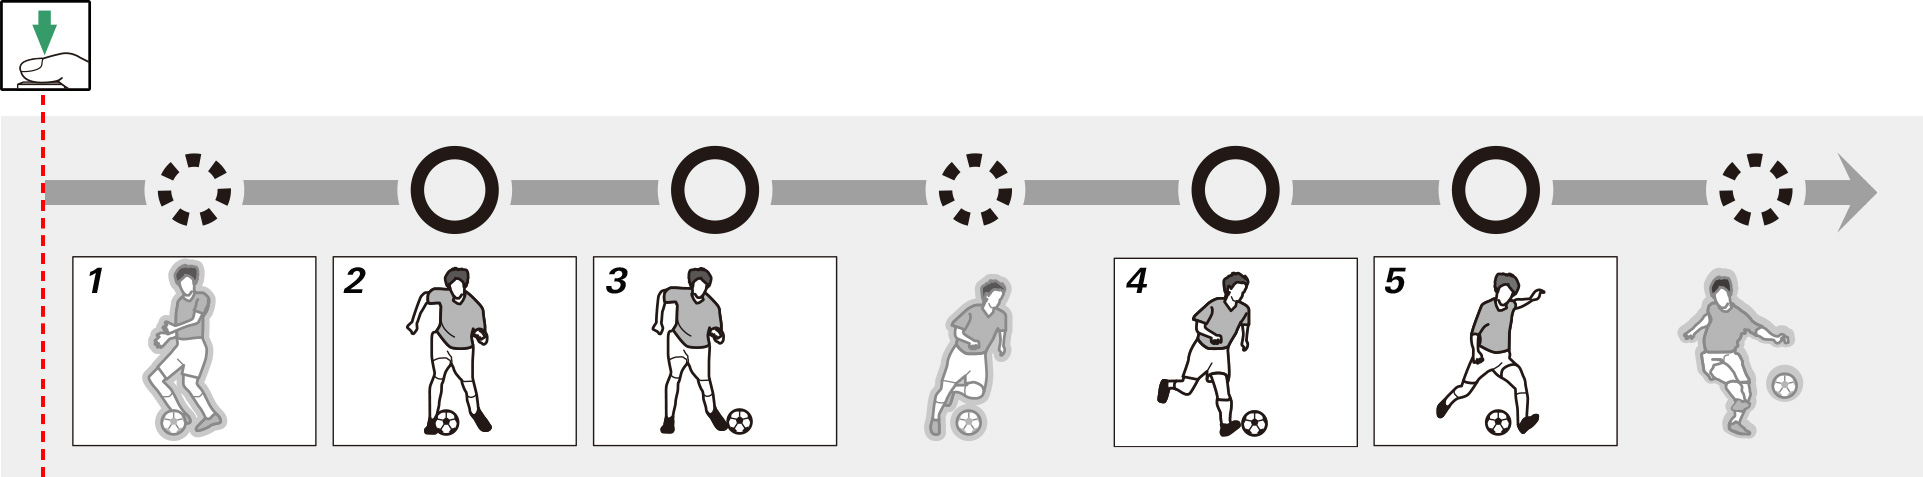
In burst mode, priority is given to release for the first frame and to focus for later frames. Frame rates slow as needed to allow the camera to focus.
Pictures can only be taken when the camera is in focus.
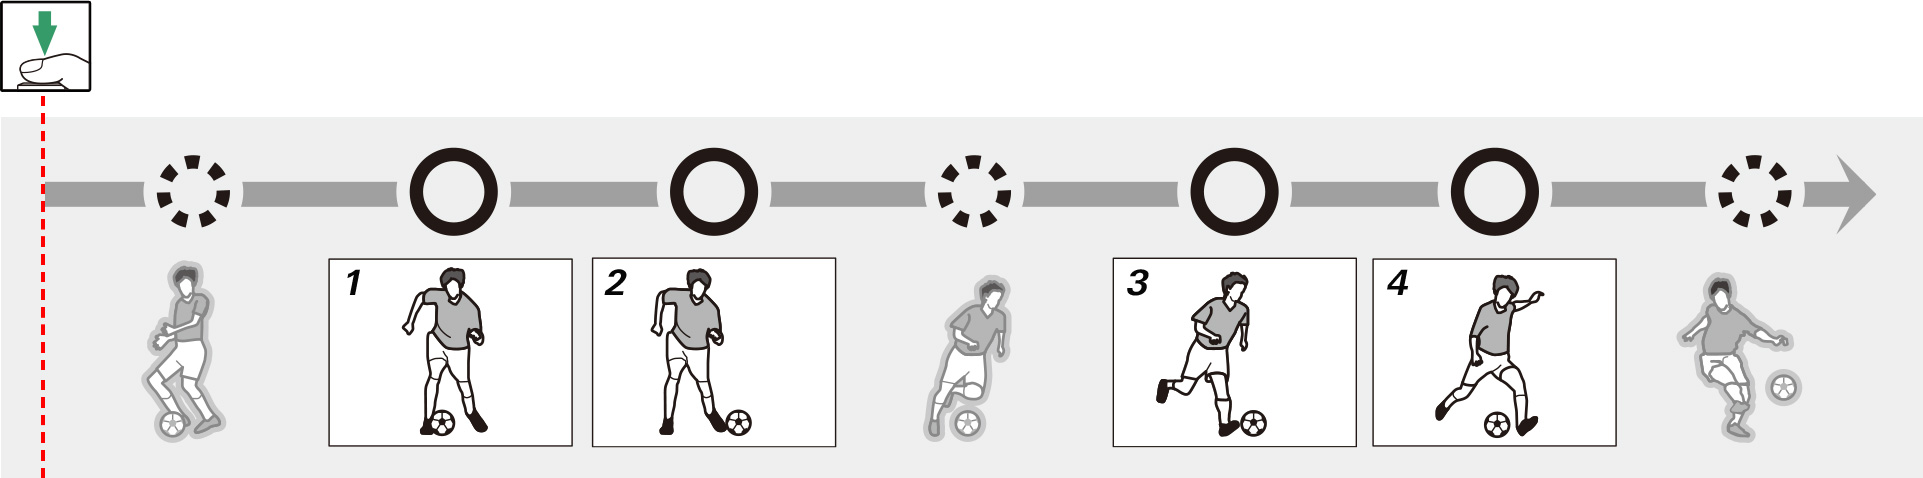
Note: Release timing not exactly as shown.
This menu contains two options: [Blocked Shot AF Response] and [Subject motion].
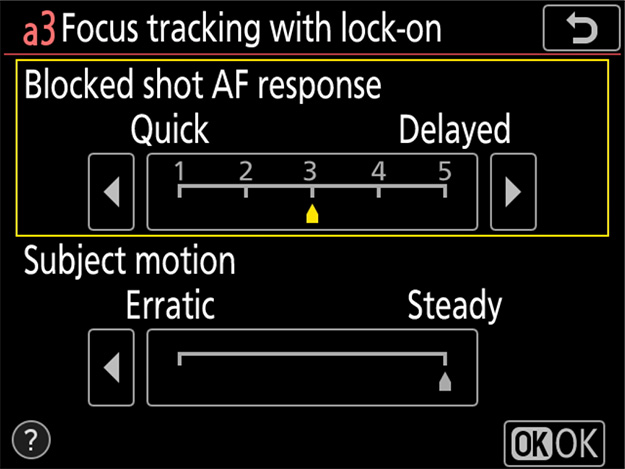
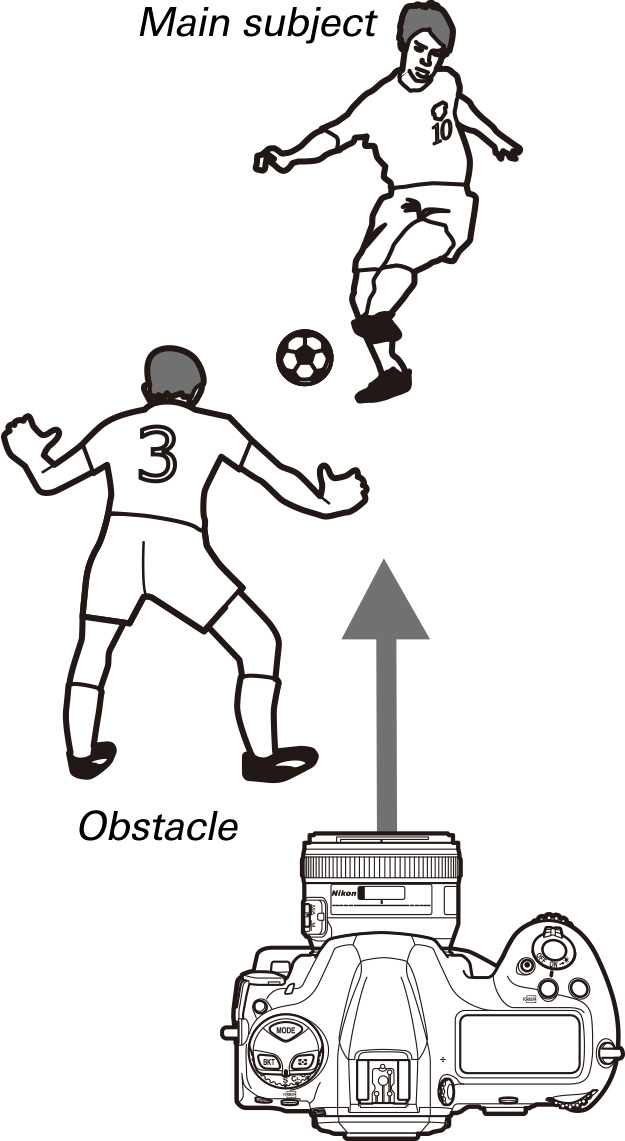
If AF-C is selected for AF mode, focus tracking with lock-on will prevent the camera refocusing when your subject is briefly obscured by another object, ensuring that it will continue to track the main subject once the obstacle has moved away. Choose the length of time before the camera refocuses from [1 (Quick)], [2], [3], [4], and [5 (Delayed)]. Lock-on applies only while the camera is focusing; to focus at a new distance without waiting for lock-on to end, re-initiate autofocus.
ThisThe camera will track and focus on objects at the same distance as the main subject. High values (slow response) make the camera slow to refocus on obstacles when the shot is blocked. Select low values (quick response) to quickly refocus on subjects passing in front of the camera and for improved response when switching rapidly from one subject to another.
Choose how the camera tracks subjects in motion. Choose [Steady] for subjects approaching the camera at a steady pace, like sprinters or race cars on a track, [Erratic] for long or triple jumpers and other subjects prone to sudden stops and starts.
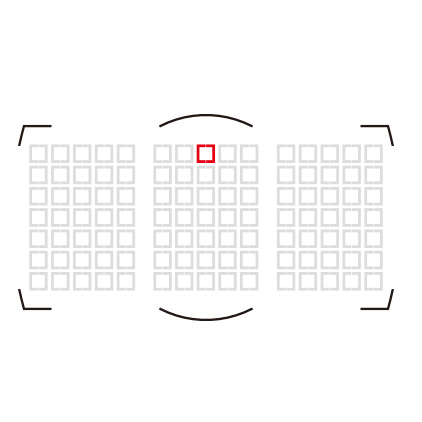
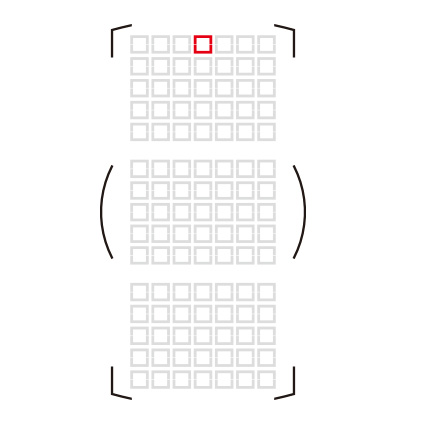
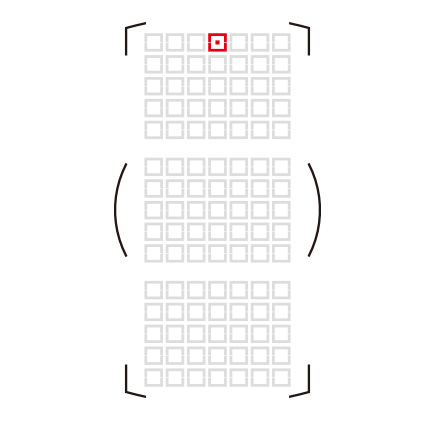
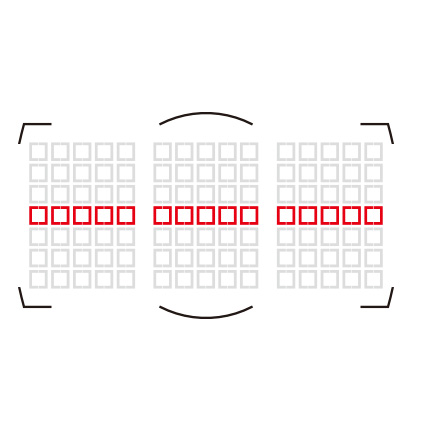
Choose number of focus points available for manual focus-point selection from the options below. Choosing [27 points] or [15 points] speeds focus-point selection.

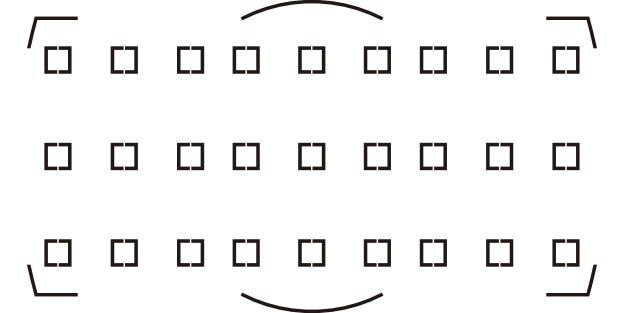

Note that the groupings available when [Group-area AF (C1)] or [Group-area AF(C2)] is chosen for AF-area mode vary with the dimensions of the group.
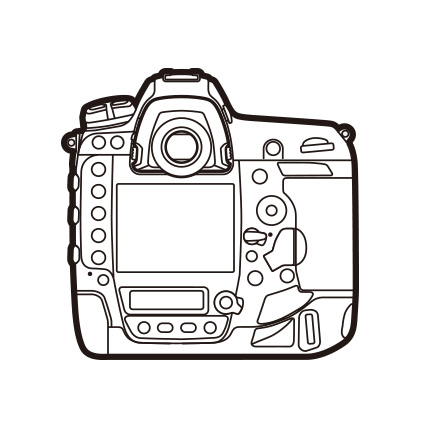
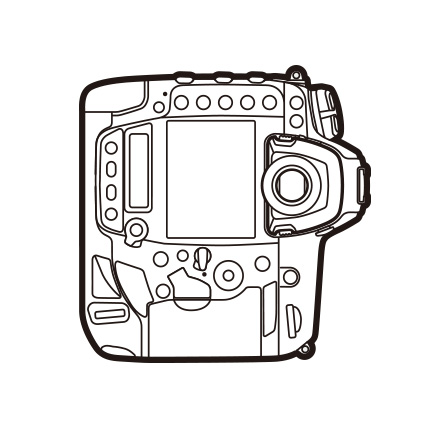
This option lets you concentrate on shooting without having to worry about focus-point selection. Choose whether the camera uses the same focus point and AF-area mode in all orientations, or stores separate focus points and/or AF-area modes for use in "wide" (landscape) orientation, "tall" (portrait) orientation with the camera rotated 90° clockwise, or "tall" orientation with the camera rotated 90° counterclockwise. The options are [Focus point], [Focus point and AF-area mode], and [Off].
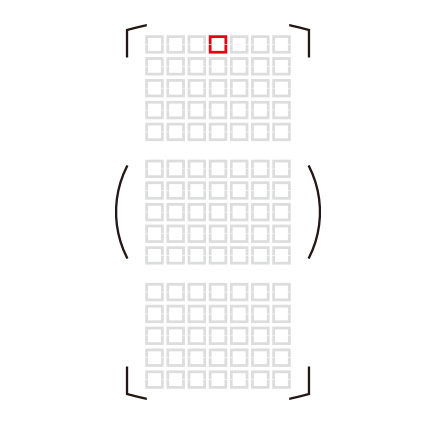
[Focus point]: Rotating the camera restores the focus point last selected in the chosen orientation. If you select [Off] after choosing this option, the camera will select the center focus point for all orientations.
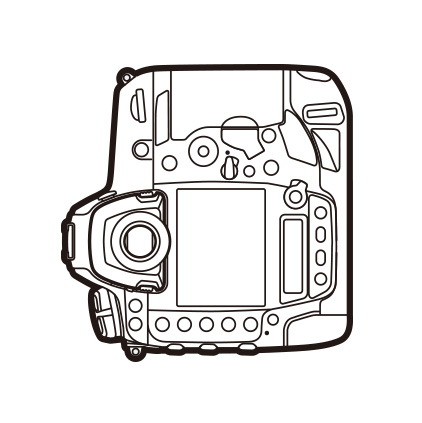
| Camera rotated 90° counterclockwise |
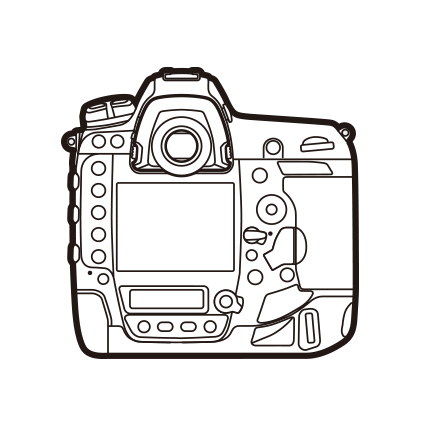
Landscape (wide) orientation |
Camera rotated 90° clockwise |
|---|---|---|
 |
 |
 |
 |
 |
 |
 |
 |
 |
[Focus point and AF-area mode]: Rotating the camera restores the focus point and AF-area mode last selected in the chosen orientation. In the example shown here, 9-point dynamic-area AF is selected when the camera is in landscape orientation, 3D-tracking when it is rotated 90° counterclockwise, and group-area AF when it is rotated 90° clockwise.
| Camera rotated 90° counterclockwise |
Landscape (wide) orientation |
Camera rotated 90° clockwise |
|---|---|---|
 |
 |
 |
 |
 |
 |
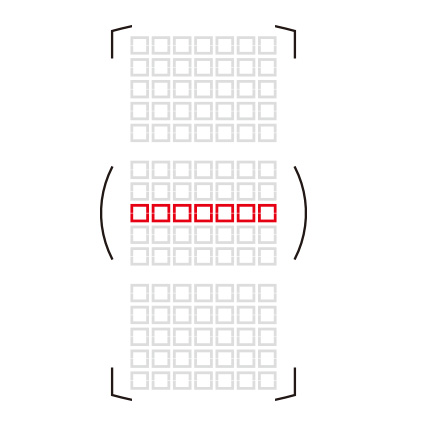
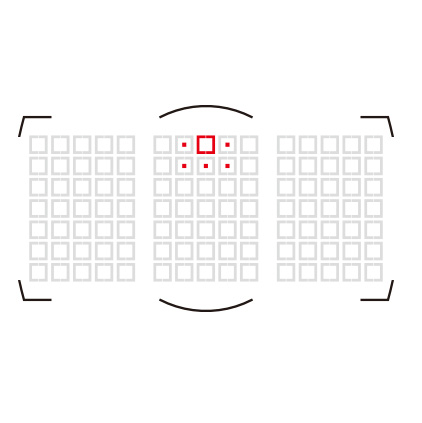
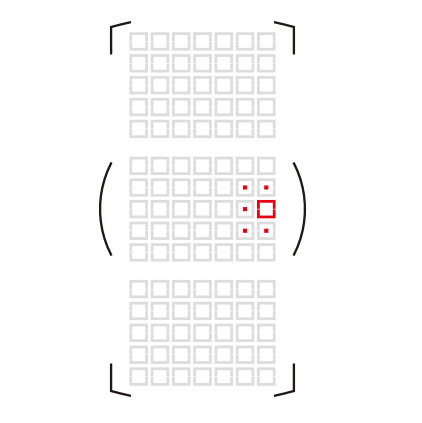
If you select a group with a single row of focus points (15 × 1) for group-area AF (C1) when the camera is in landscape orientation and groups with a single column of focus points (1 × 7) for group-area AF (C2) when the camera is in portrait orientation, the camera will consistently focus on subjects in a line across the frame.
| Camera rotated 90° counterclockwise |
Landscape (wide) orientation |
Camera rotated 90° clockwise |
|---|---|---|
 |
 |
 |
 |
 |
 |
[Off]: The same focus point and AF-area mode will be used regardless of camera orientation.
| Camera rotated 90° counterclockwise |
Landscape (wide) orientation |
Camera rotated 90° clockwise |
|---|---|---|
 |
 |
 |
 |
 |
 |
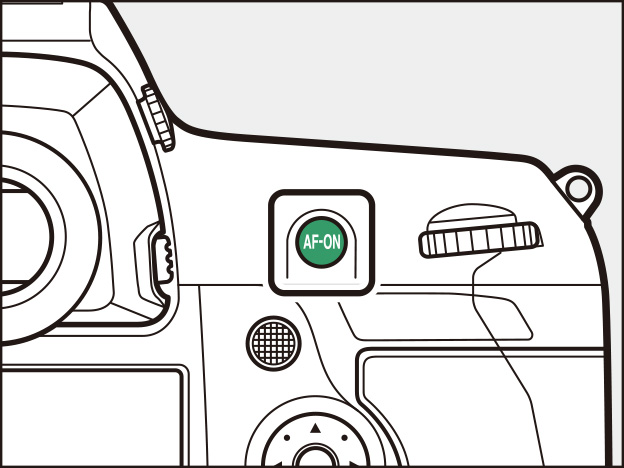
Choose [AF-ON only] to split the functions of the AF-ON button (or the control to which [AF-ON] has been assigned using Custom Setting f3 [Custom Controls]) and the shutter-release button so that the former is used for focus while the latter is used only to release the shutter. Lift your thumb from the AF-ON button to lock focus and take more shots at the current focus distance or prevent the camera refocusing when an object passes between you and your subject.
Highlighting [AF-ON only] and pressing displays an [Out-of-focus release] option; for sports photography, confirm that [Enable] is selected.
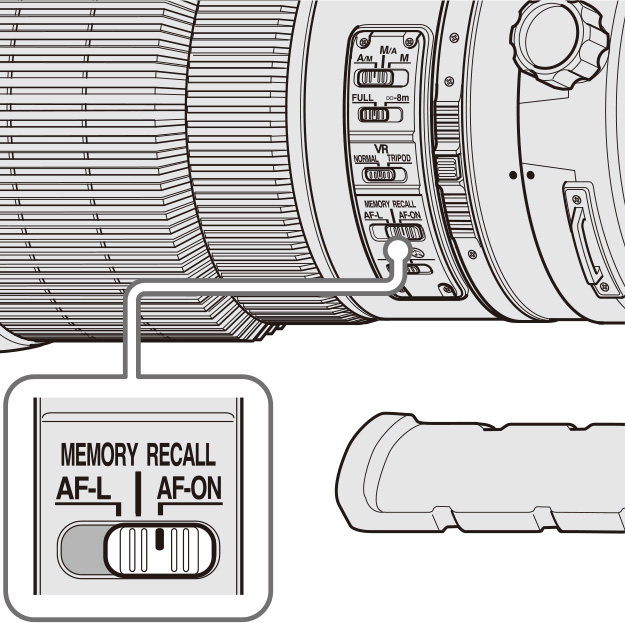
When the lens focus function selector available with certain telephoto lenses (see this section) is in the AF-ON position, the lens focus function buttons will perform the same function as the camera AF-ON button.
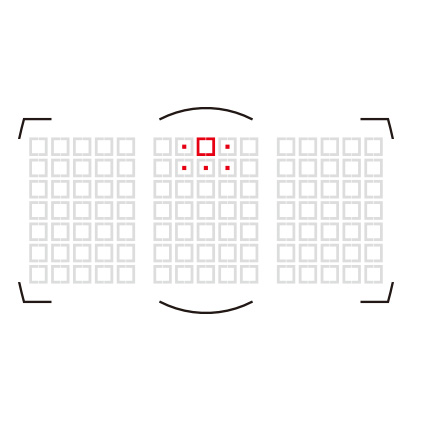
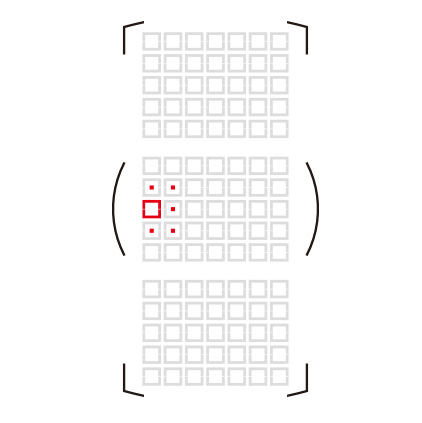
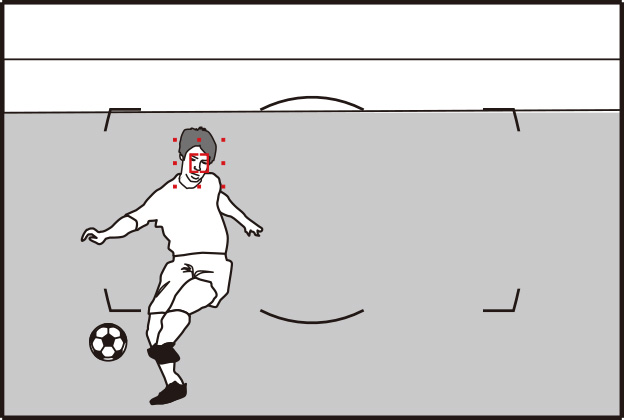
If [Wide] is selected in single-point or dynamic-area AF AF-area mode, the camera will use data from surrounding areas to locate subjects slightly outside the selected focus point. Use for fast-moving, hard-toframe subjects.
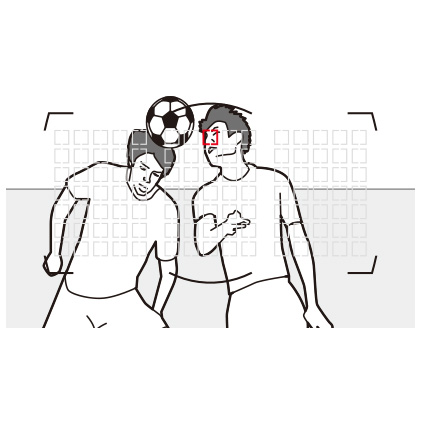
Selecting [Enable] lets you use the multi selector to choose the starting focus point when AF-C and auto-area AF are selected respectively for AF mode and AF-area mode. The camera will resume normal auto-area AF after focusing on the subject in the selected point.
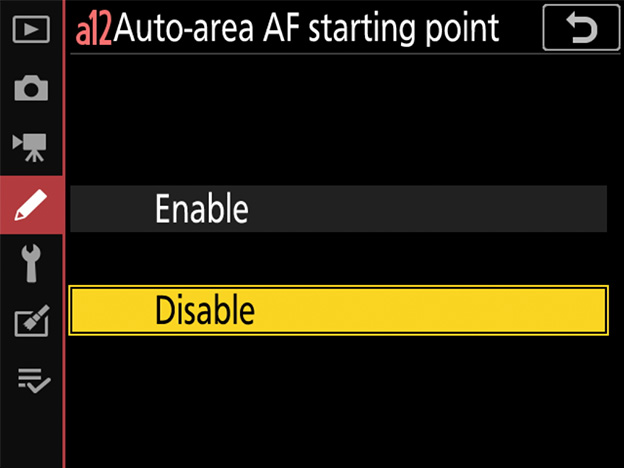
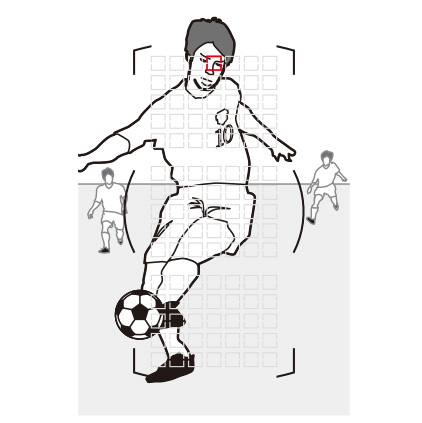
By default, auto-area AF will automatically focus on the subject closest to the camera, and consequently when photographing subjects that appear briefly at a fixed location-for example, passing the starting line or jumping off a ramp-you may find that the camera fails to focus as desired. Enabling [Auto-area AF starting point], framing the shot in advance, and choosing a focus point where you anticipate your subject will appear ensures that focus will start from the selected point, helping keep your shots in focus.
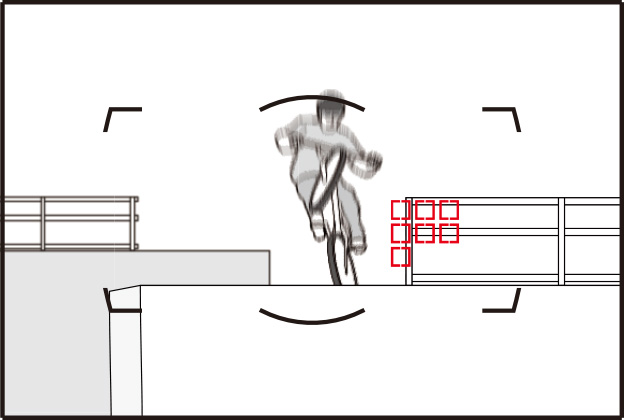
When [Disable] is selected, the amera may focus on foreground objects.
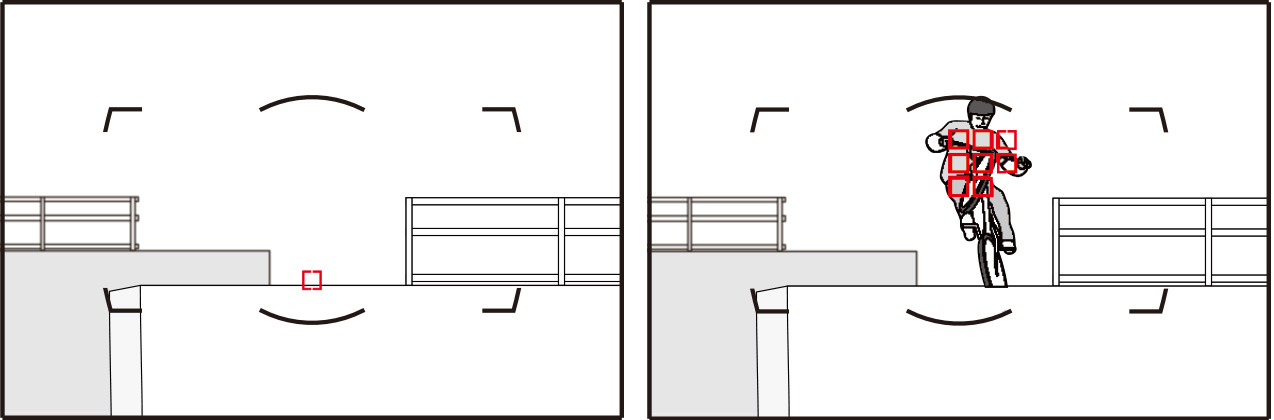
Selecting [Enable] lets you choose the focus point before shooting. The focus operation will start from the selected point, helping ensure your shots are in focus.
For more information on using [Auto-area AF starting point], view the video at the link below.
YouTube | Digitutor
D6 NPS #2. Nimble Focusing Using the Auto-area AF Starting Point Function
If you have assigned [AF-area mode] or [AF-area mode + AF-ON] to a control using Custom Setting f3 [Custom controls], you can hold the control to switch temporarily from the current AF-area mode to a second, pre-selected mode. Selecting [Auto] for Custom Setting a13 [Focus point persistence] lets you do so without changing focus points.

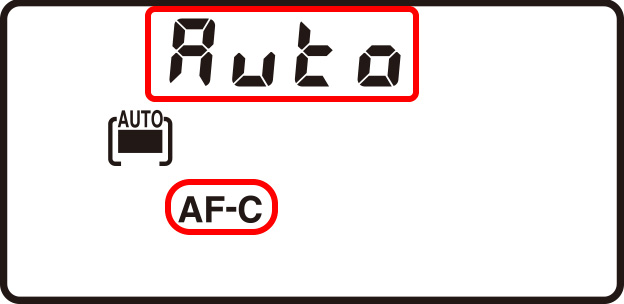
In this example, we will assign [AF-area mode] to the Fn1 button and hold it to switch temporarily from the current AF-area mode (auto-area AF in this case) to a second, pre-selected mode (here 9-point dynamic-area AF).
1 Enable focus-point persistence.
Select [Auto] for Custom Setting a13 [Focus point persistence].

2 Select the default AF-area mode.
For this example we will choose [Auto-area AF] and an autofocus mode of AF-C.
3 Assign [AF-area mode] or [AF-area mode + AF-ON] to a control.
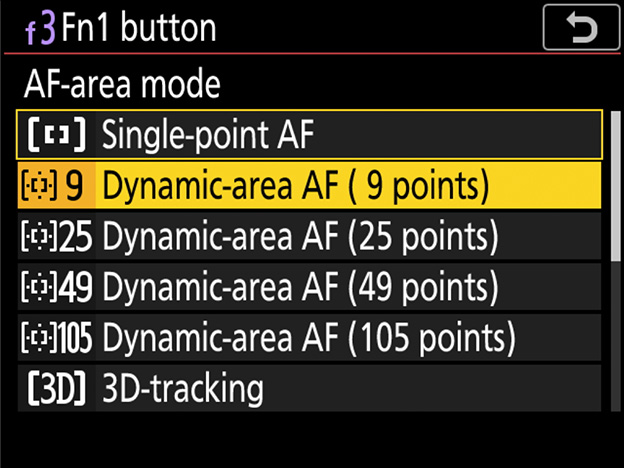
Select Custom Setting f3 [Custom controls] and choose the desired control and role (in this case, the Fn1 button and [AF-area mode]). To choose the AF-area mode activated while the button is pressed, highlight [AF-area mode] and press . This example assumes that [Dynamic-area AF (9 points)] is selected.
4 Focus using the default AF-area mode.
Press the shutter-release button halfway or press the AF-ON button to focus using the default AF-area mode. In the case of auto-area AF, the camera will automatically detect the subject and choose the focus area.
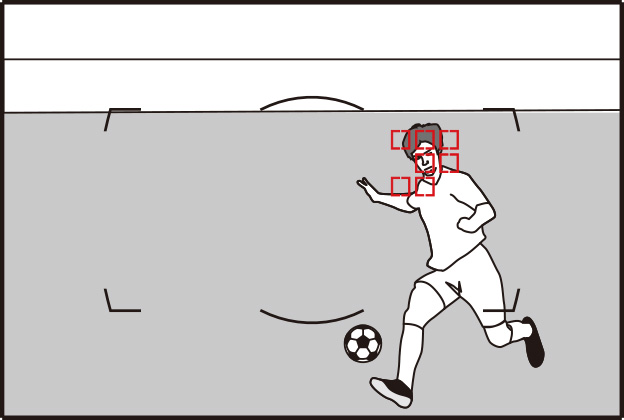
At the settings selected in this example, focus will track subject motion while the shutter-release button is pressed halfway or the AF-ON button is pressed.
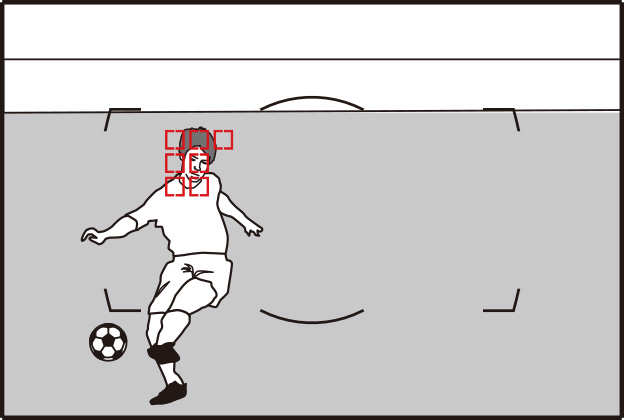
5 Switch AF-area modes.
Hold the selected control (the Fn1 button) to switch to the AF-area mode selected in Step 3 (9-point dynamic-area AF). Because we selected [Auto] for Custom Setting a13 [Focus point persistence] in Step 1, the camera will focus on the subject in the current focus point using 9-point dynamic-area AF.
Had we selected [Off], the camera would not have maintained focus on the subject in the point chosen by auto-area AF but would have instead switched to a different focus point.

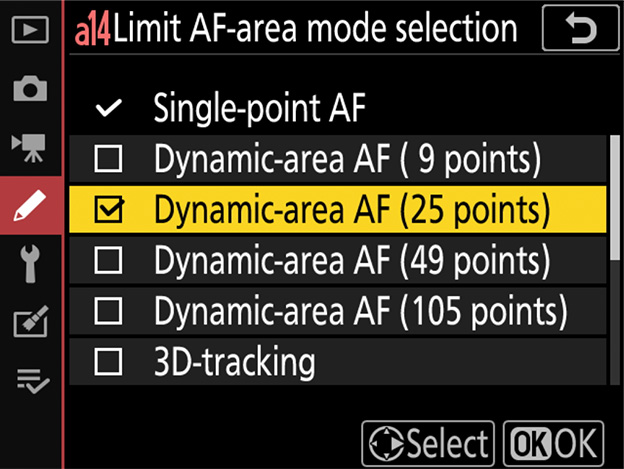
Limiting the choice of AF-area modes available during viewfinder photography speeds AF-area mode selection and prevents your accidentally selecting an undesired option. For example, you can limit the choice of AF-area modes to single-point and 25-point dynamic-area AF by selecting only these options in the AF-area mode list. Note that [Single-point AF] cannot be deselected.
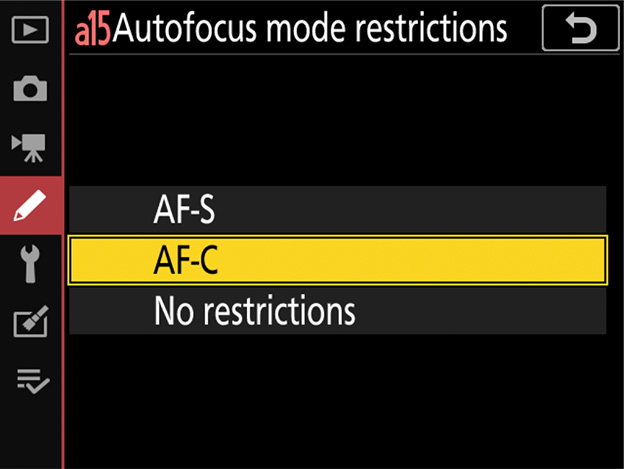
Limiting the choice of available autofocus modes prevents accidental selection of an undesired option. For sports photography, you may find it convenient to choose [AF-C] to stop you accidentally selecting AF-S.
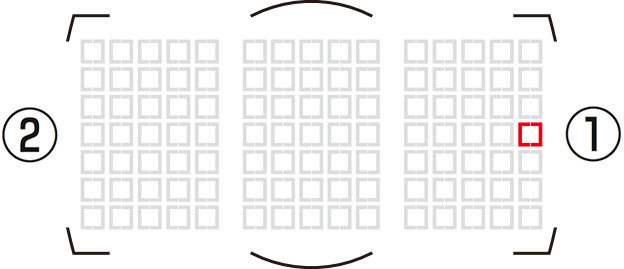
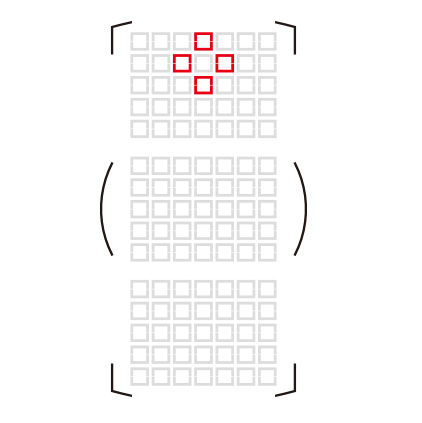
Select [Wrap] if you frequently switch between widely-separated focus points.
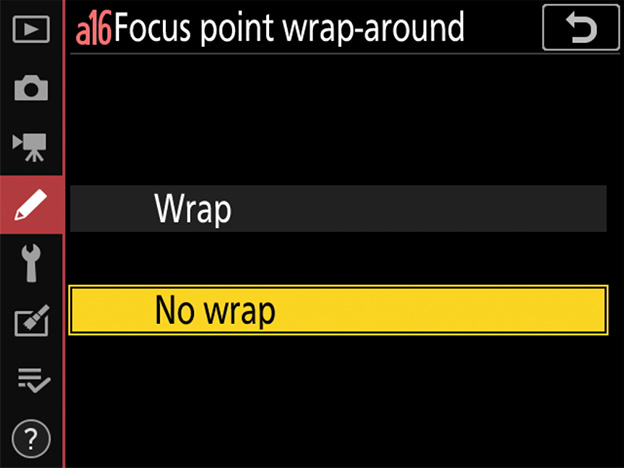
Focus-point selection will "wrap around" from top to bottom, bottom to top, left to right, and right to left so that, for example, pressing when a focus point on the right edge of the display is highlighted () selects the corresponding focus point on the left edge of the display ().