We recommend that you set the camera clock to the correct time and date before shooting. If you are using multiple cameras, it is particularly important that their clocks agree so that pictures can be correctly sorted by time and date of recording when displayed in ViewNX-i or other software after transfer to a computer.
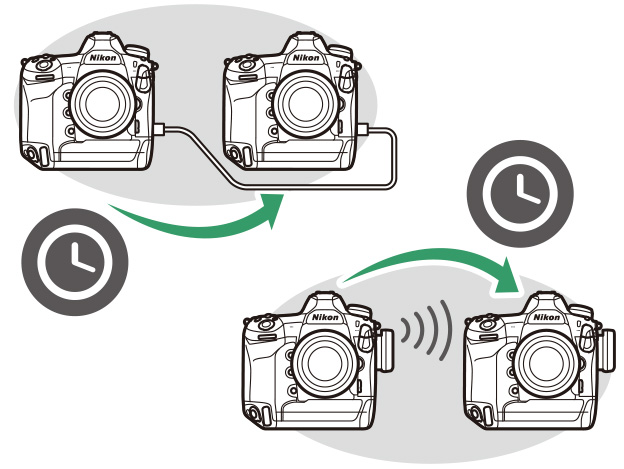
Clocks can be synchronized via:

Use the [Location data (built-in)] option in the setup menu to set the camera clock to the time (UTC, or Universal Coordinated Time) reported by the navigation satellite system.
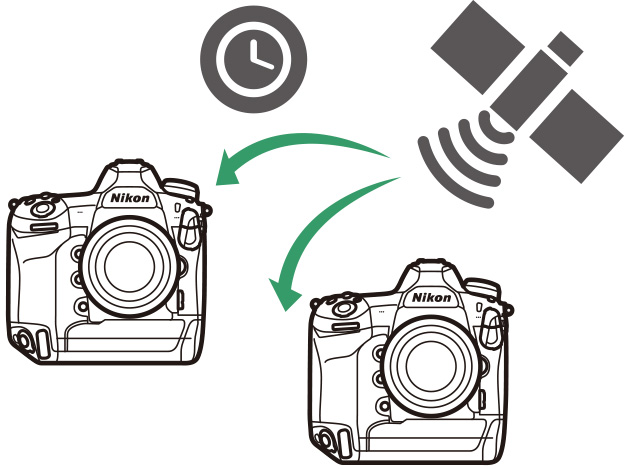
1 Enable location data.
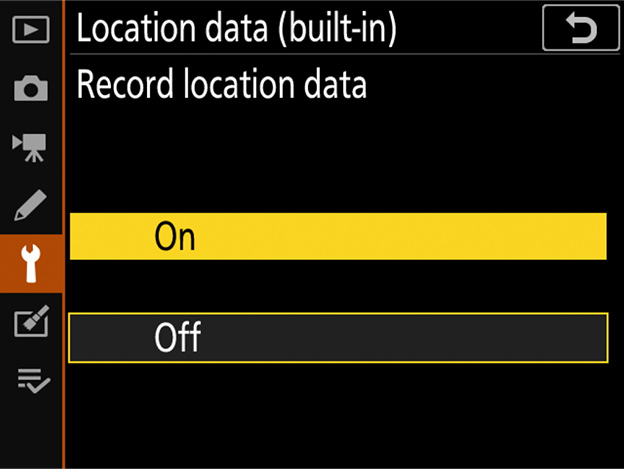
Select [On] for [Location data (built-in)] > [Record location data] in the setup menu to enable the camera's built-in location data feature and start downloading location data from the satellite system.
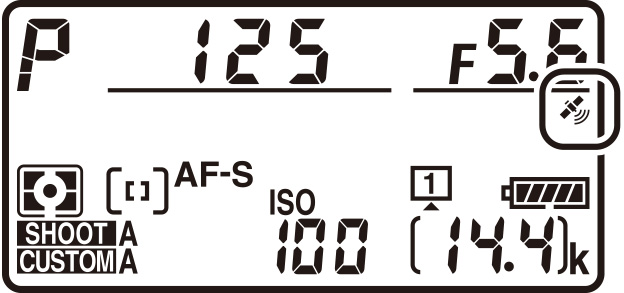
A flashing icon will appear in the top control panel while the camera connects to the satellite system. The flashing stops when a connection is established.
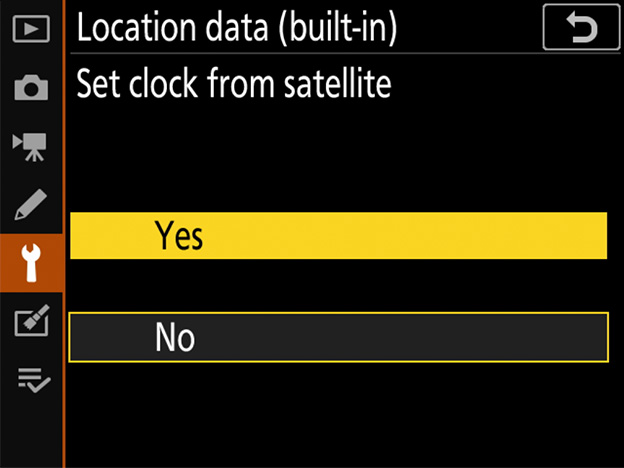
2 Select [Yes] for [Set clock from satellite].
After confirming that the icon in the top control panel has stopped flashing, return to [Location data (built-in)] in the setup menu and select [Yes] for [Set clock from satellite] to set the camera clock to the time reported by the satellite system. The clock will be resynchronized the next time the camera is turned on.
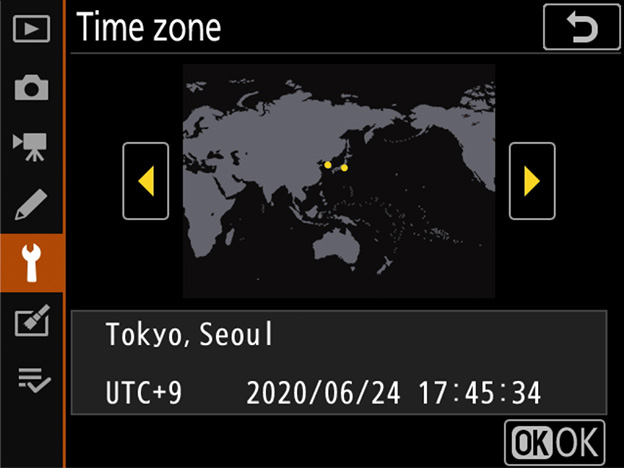
3 Choose a time zone.
The clock is set to UTC, not to the current time zone. To set the camera clock to the time in your current time zone, select [Time zone and date] > [Time zone] in the setup menu and choose the desired zone.
For more information on the camera's built-in location data feature, see "Recording Location Data".
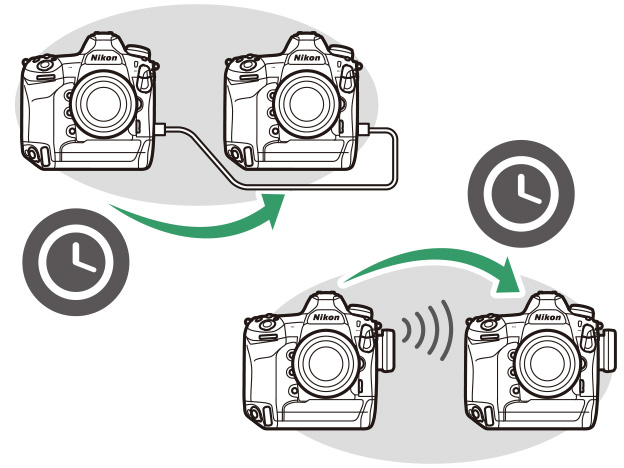
When [No] is selected for [Location data (built-in)] > [Set clock from satellite] in the setup menu, a master D6 can be used to set the clock on a remote D6 camera connected via an Ethernet cable or an optional WT-6 wireless transmitter. All [Time zone and date] settings in the remote camera's setup menu will be adjusted to match the settings on the master camera.
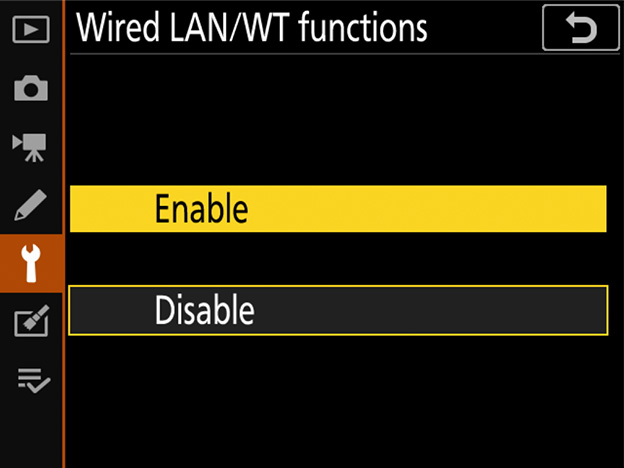
1 Enable wired LAN/WT functions.
Select [Enable] for [Wired LAN/WT] > [Wired LAN/WT functions] in the setup menus for both the master and remote cameras.
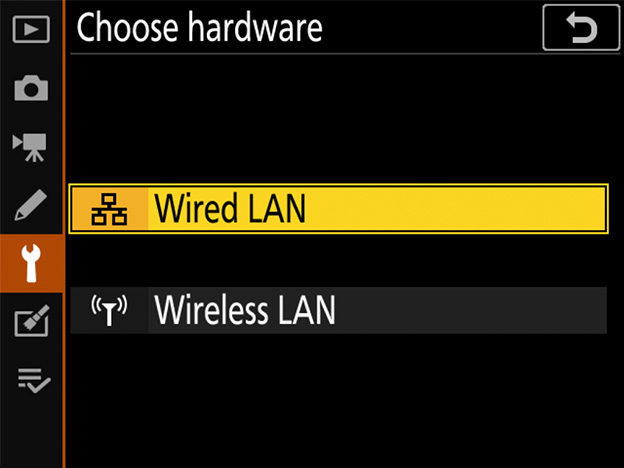
2 Choose the network hardware.
On both the master and remote cameras, select [Wired LAN/WT] > [Choose hardware] and choose the option matching the hardware that will be used to connect the cameras. Choose [Wired LAN] if the cameras will be connected via an Ethernet cable or [Wireless LAN] if you are using WT-6 wireless transmitters.
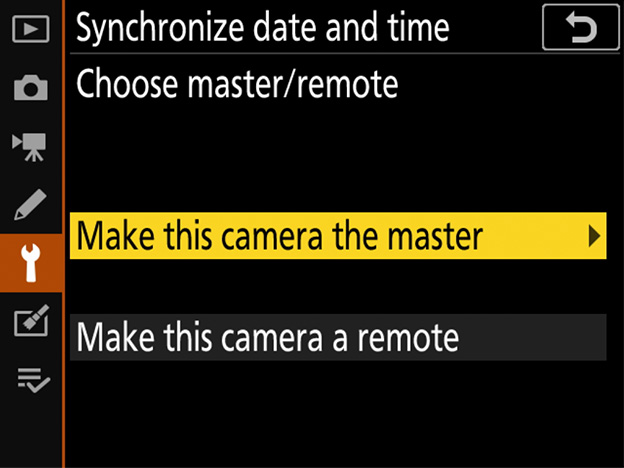
3 Choose the camera roles.
Choose one camera as the master by selecting [Make this camera the master] for [Network settings] > [Synchronize date and time] and make the other a remote by choosing [Make this camera a remote]. Both cameras will enter synchronization mode and display current clock settings.
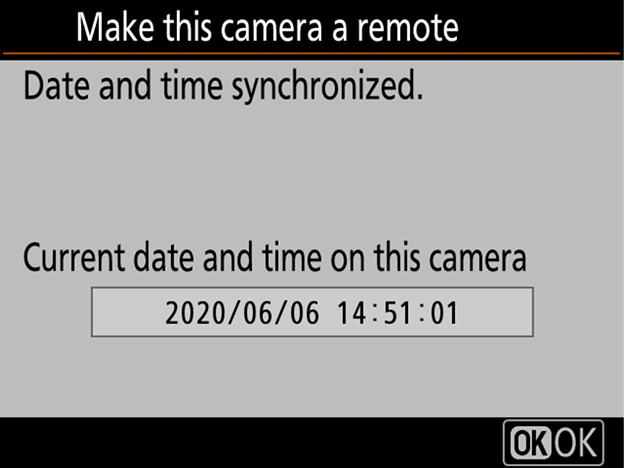
4 Press on the remote camera.
The remote camera will connect to the master using the chosen network type and synchronize its clock with the clock on the master camera. The remote camera will display a message when the process is complete.
5 Exit synchronization mode.
Press on both cameras to exit synchronization mode and return to the [Network settings] menu.
Repeat Steps 1-5 for each additional camera you want to synchronize.
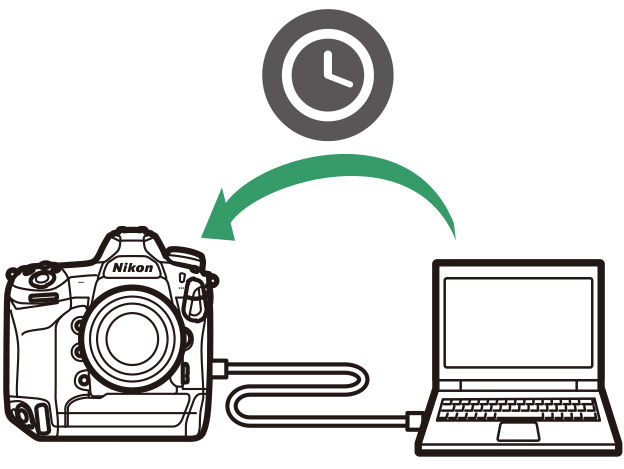
With the help of the Nikon Transfer 2 component of Nikon's ViewNX-i and Capture NX-D computer software, you can use the computer to set the clocks for cameras such as the D6, D5, and D4S. ViewNX-i and Capture NX-D are available via the Nikon Download Center:

For accurate time-keeping, configure the computer to set its clock automatically (for more information, see the documentation for the computer operating system). The clock may not report the correct time and date when the clock is set manually. Note that if [Yes] is selected for [Set clock from satellite] and the location data feature is enabled, the camera will preferentially set its clock to the time reported by GNSS. Select [No] when setting the clock from a computer.
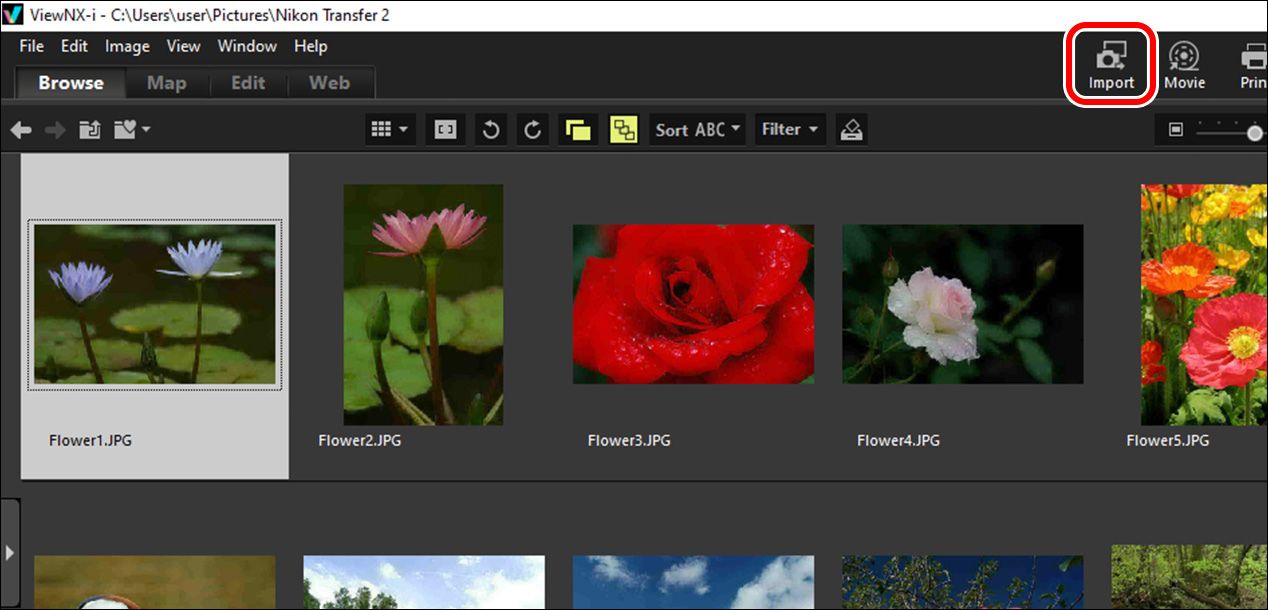
1 Launch Nikon Transfer 2.
After connecting the camera to the computer via USB and starting ViewNX-i or Capture NX-D, click [Import] to launch Nikon Transfer 2.
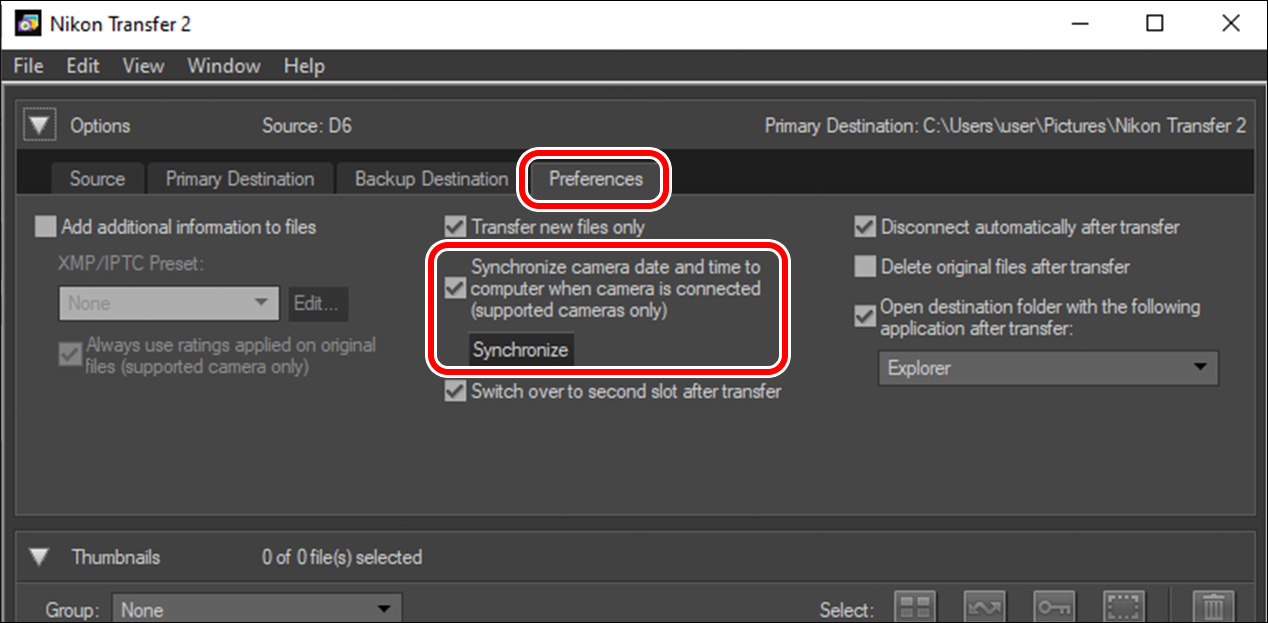
2 Click [Synchronize].
In the [Preferences] tab, click the [Synchronize] button under [Synchronize camera date and time to computer when camera is connected (supported cameras only)].
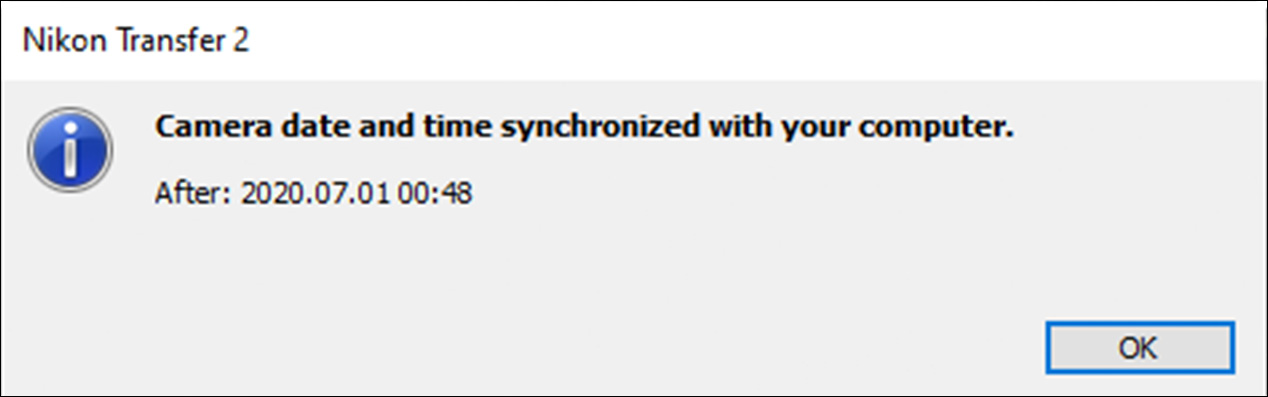
A confirmation dialog will be displayed when synchronization is complete. Click [OK] to return to Nikon Transfer 2.
Repeat Steps 1-2 for each additional camera you want to synchronize.