Technical Solutions
| D800/D800E TIPS

Shooting Techniques / Static Subjects

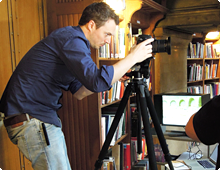
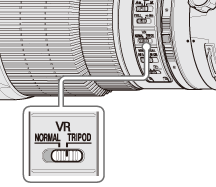
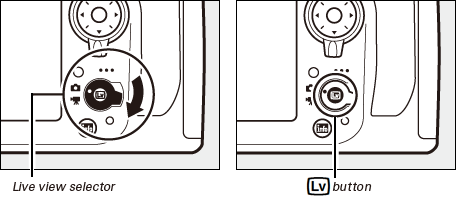
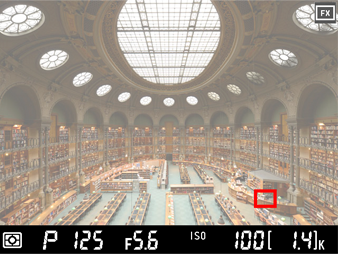
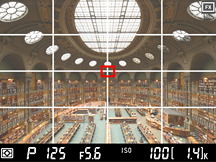
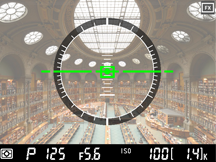
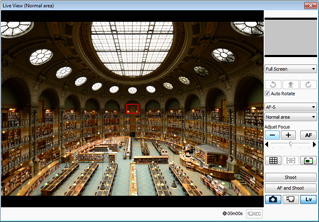
At the high resolutions offered by the D800/D800E, even the slightest camera motion can result in blur. The technique revealed in this section minimizes blur through a combination of live view photography and a tripod.

  • ■ Lens: AF-S NIKKOR 14–24mm f/2.8G ED
  • ■ Exposure mode: Manual
  • ■ Shutter speed: 1 s
  • ■ Aperture: f/8
  • ■ White balance: Choose color temp. (5000 K)
  • ■ ISO sensitivity: 100
  • ■ Picture control: Standard

Note: This photo was shot in 14-bit NEF (RAW) and processed using Capture NX 2.
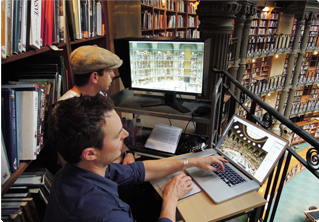
Lesson 1: Use a Tripod

Use a tripod to reduce blur when photographing static subjects. It should be as sturdy as possible; avoid extending the legs or center column farther than necessary. A large head helps keep the camera steady.

Tripod Mode

Some lenses, such as the AF-S NIKKOR 200 – 400mm f/4G ED VR II, offer vibration reduction with a TRIPOD option that is particularly effective at reducing blur at shutter speeds of 1⁄15–1 s. This option is generally recommended when the camera is mounted on a tripod. The NORMAL option is preferred, however, if the tripod head is not fixed or when a monopod is used.

Lesson 2: Use Live View

Live view can be used to achieve sharper focus and prevent blur.

Live View Photography

Rotate the live view selector to and press to raise the mirror and display the view through the lens in the monitor.

Why Use Live View?
1. The mirror is raised prior to shooting, reducing blur

At the high resolutions offered by the D800/D800E, even the slight movement that occurs when the mirror is raised can sometimes be enough to blur photographs. With live view, the mirror is raised well before the shutter is released, reducing one possible cause of blur.

Reducing Blur During Viewfinder Photography

If the live view display is difficult to see outdoors or under bright ambient light, use the viewfinder to frame photographs. Use mirror-up mode when using the viewfinder to frame photos to reduce the blur that sometimes occurs when the mirror is raised. Press the release mode dial lock release and rotate the release mode dial to MUP.

After focusing, press the shutter-release button all the way down once to raise the mirror and again to release the shutter. An optional remote cord can be used to prevent the camera from moving when the shutter-release button is pressed, or an option other than Off can be selected for Custom Setting d4 (Exposure delay mode) to delay shutter release until 1–3 s after the mirror is raised. Use of a tripod is recommended.

Why Use Live View?
2. Focus anywhere in the frame.

With live view, the multi-selector can be used to position the focus point anywhere in the frame, regardless of the options selected for AF/MF and autofocus.

The ability to position the focus point anywhere within the monitor's angle of view greatly expands the range in which the camera can focus.

In autofocus mode, press the shutter-release button halfway, or press the AF-ON button, to focus on the subject in the selected focus point. In manual focus mode, focus can be adjusted by rotating the lens focus ring.

Why Use Live View?
3. Zoom in for precise focus.

Press the button to magnify the view in the monitor by up to 23X for precise focusing with live view. This is particularly effective with manual focus.

A navigation window will appear in a gray frame at the bottom of the display. Use the multi-selector to scroll to areas of the frame not visible in the monitor.

Suggested Settings

White balance > Choose color temp.:
White balance can be adjusted in steps as small as 10 K. To adjust white balance on the amber (A) – blue (B) axis, hold the button and press or to highlight a digit and or to change it.

Framing guide:
Framing guides, helpful in composing photographs, can be displayed with live view photography by pressing the button.

Virtual horizon:
The button can also be used to display pitch and roll indicators that help keep the camera level with live view photography.

Lesson 3: Avoid Very Small Apertures

Stopping down the aperture in manual and aperture-priority auto exposure modes increases depth of field, bringing both the foreground and the background into focus. Stop the aperture down too far, however, and the effects of diffraction may actually result in images with less definition. The optimal aperture setting — that which produces the greatest depth of field with no loss of sharpness — varies from lens to lens. With the AF-S NIKKOR 14-24mm f/2.8G ED used in this example, an aperture setting of f/8 produces the sharpest image.

Amount of detail visible
in window leads and frieze is
less than at f/8

Camera Control Pro 2

The optional Camera Control Pro 2 software can be used to control most camera functions from a computer. To use Camera Control Pro 2, start the computer and connect the camera using the supplied USB cable as shown below.

Camera Control Pro 2 supports live view. When the live view display in the Camera Control Pro 2 image area is zoomed in, more detail is visible than is possible with the live view display in the camera monitor.
Photographs are saved directly to the computer, where they can be inspected and retouched using optional Capture NX 2 software.

Same Shot with Viewfinder Framing

The second sample image below was captured without using live view. As the mirror was not raised until the photo was taken, the resulting image is slightly blurred.

Book edges and
other details are
blurred

Digitutor

Digitutor is a Nikon website featuring various information that includes basic knowledge, useful techniques, and tips on taking good photos with Nikon Digital Cameras.