Saving Pictures in Other Formats Using NX Studio
NX Studio can be used to create JPEG, HEIF, or TIFF format copies of photos taken with HLG selected for tone mode. RAW (NEF) and HEIF photos can be viewed in third-party software that does not support these formats by converting them to JPEG or TIFF. If desired, entire folders can be selected for conversion to other formats.
Saving Pictures in Other Formats: An Overview
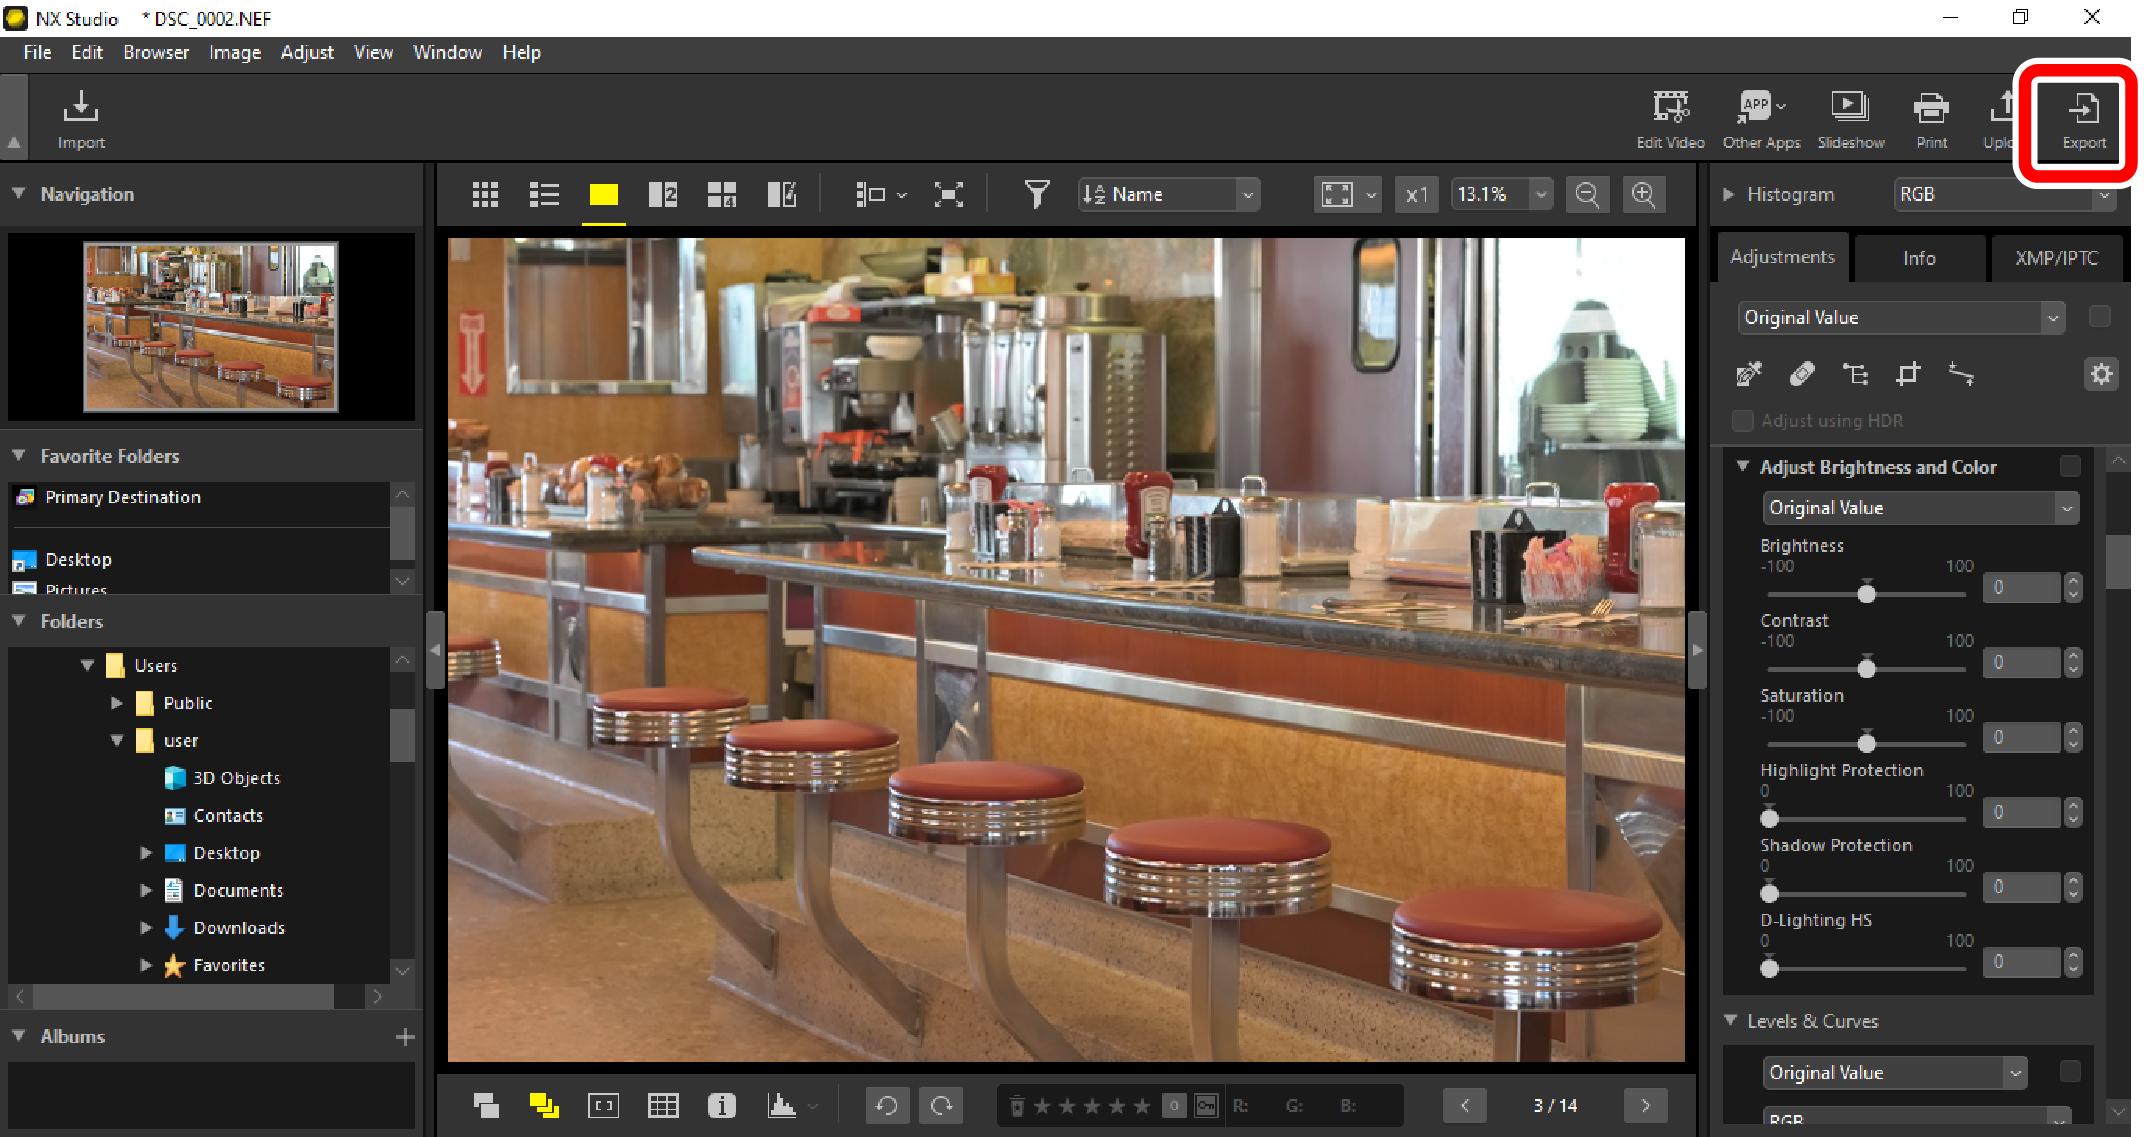
Click [Export] in the toolbar.
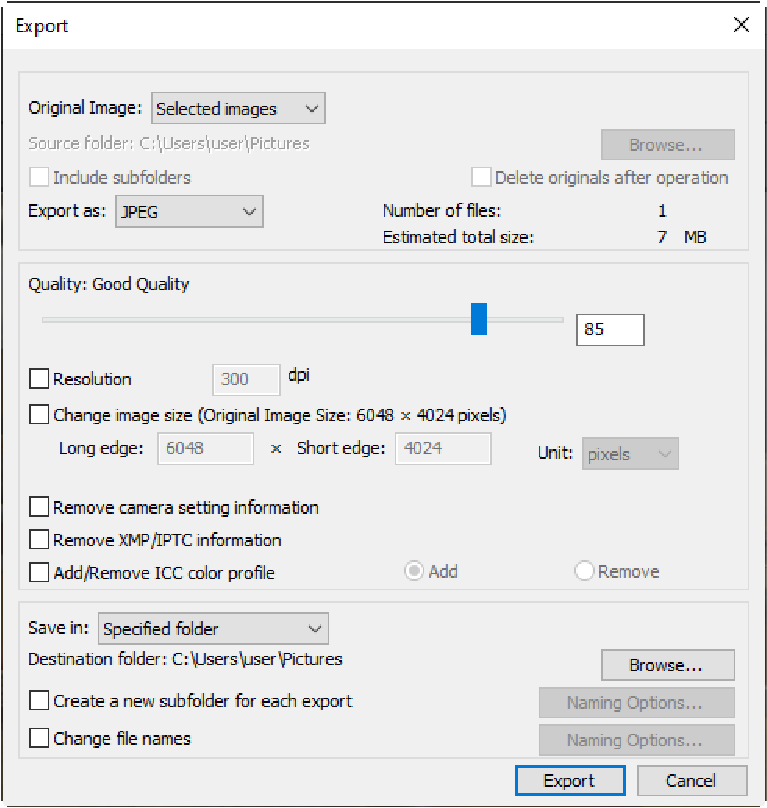
A dialog will be displayed where you can adjust image quality, size, and other settings.
- For information on the options available, see “Export Options” (0 Export Options).
Click [Export].
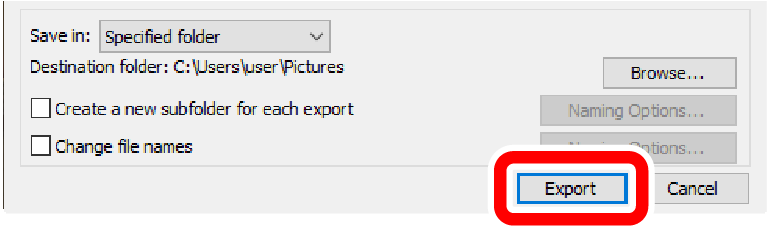
- The copies will be saved in the selected folder.
RAW Pictures
[Export] can be used to save RAW pictures in other formats. To save RAW pictures without converting them to other formats, use [Save] or [Save As] in the [File] menu. More options for use when saving pictures can be found in the [Save] section of the [Options] dialog.
Export Options
The following settings can be adjusted:
- [Original Image]
- Export the pictures in the current selection or in selected folders.
- [Selected images]: Export the pictures in the current selection.
- [Selected folder]: Export all pictures in a selected folder. To choose the folder, click [Browse].
- [Include subfolders]: Include pictures in all sub-folders under the selected folder.
- [Delete originals after operation]: Delete the original pictures from the folder once export is complete.
- [Export as]
- Choose a format for the exported files from [JPEG], [TIFF (8 Bit)], [TIFF (16 Bit)], [HEIF (HLG)], and [HEIF (PQ)].
- Files with thumbnails marked “PQ” cannot be saved in other formats.
- [HEIF (HLG)] and [HEIF (PQ)] will be available only if the thumbnail for the source file is marked “HLG”.
- The estimated total size is not displayed when an HEIF option is selected.
- [Quality]: Choose the compression ratio for pictures exported in JPEG or HEIF format. The JPEG compression ratio can be selected by dragging the slider or entering the desired value. In the case of HEIF, Windows offers a choice of [Highest Compression Ratio], [Good Compression Ratio], [Good Balance], [Good Quality], and [Excellent Quality]. macOS does not offer a choice of HEIF compression settings.
- [Use LZW Compression]: This option is available when pictures are saved in TIFF format. Select it to compress the files using a lossless LZW compression algorithm.
LZW Compression
Enabling LZW compression when converting pictures to 16-bit TIFF may increase file size.
“HEIF (HLG)” and “HEIF (PQ)”
Pictures exported with [HEIF (HLG)] or [HEIF (PQ)] selected for [Export as] will be saved respectively in HLG or PQ (Perceptual Quantization) HEIF format.
- While HLG and PQ formats both conform to the HDR standard, they differ in the following respects.
- HLG represents luminosity as a relative value, meaning that luminosity varies with the device on which the picture is displayed.
- PQ represents luminosity as an absolute value, meaning that luminosity does not vary with the device on which the picture is displayed.
- Pictures converted to PQ HEIF using the [HEIF (PQ)] option have thumbnails marked “PQ” and can no longer be edited in NX Studio.
- [Resolution]
- Export pictures at new resolutions.
- [Change image size]
- Resize pictures during export. Entering a value for [Long edge] automatically updates [Short edge] to maintain aspect ratios. The units can be selected from [pixels], [inch] (inches), and [cm] (centimeters).
- [Remove camera setting information]
- Strip shooting data from pictures during export.
- [Remove XMP/IPTC information]
- Strip XMP/IPTC information from pictures during export.
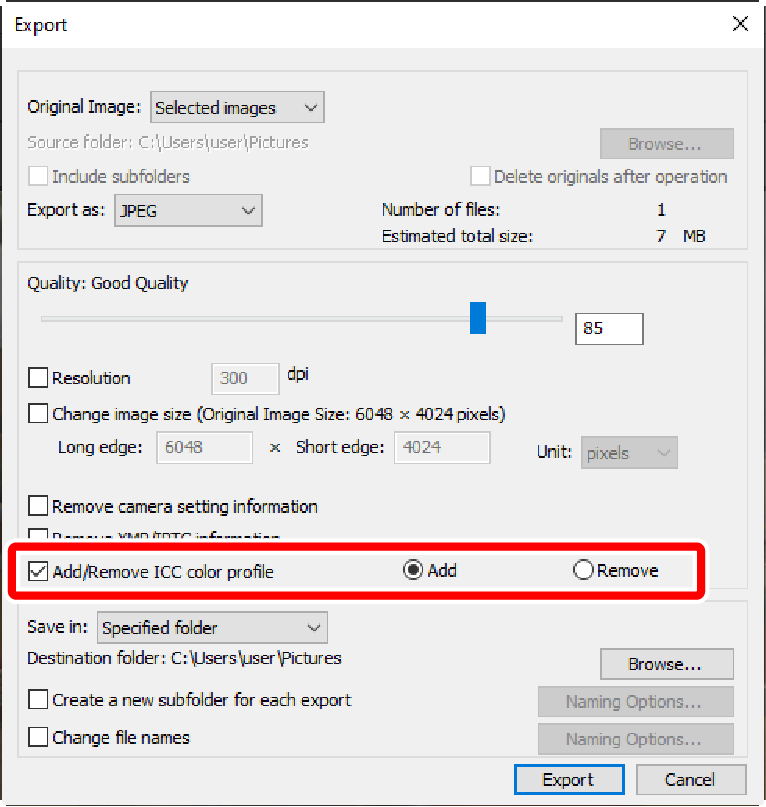
- [Add/Remove ICC color profile] (not displayed when [HEIF (HLG)] or [HEIF (PQ)] is selected for [Export as])
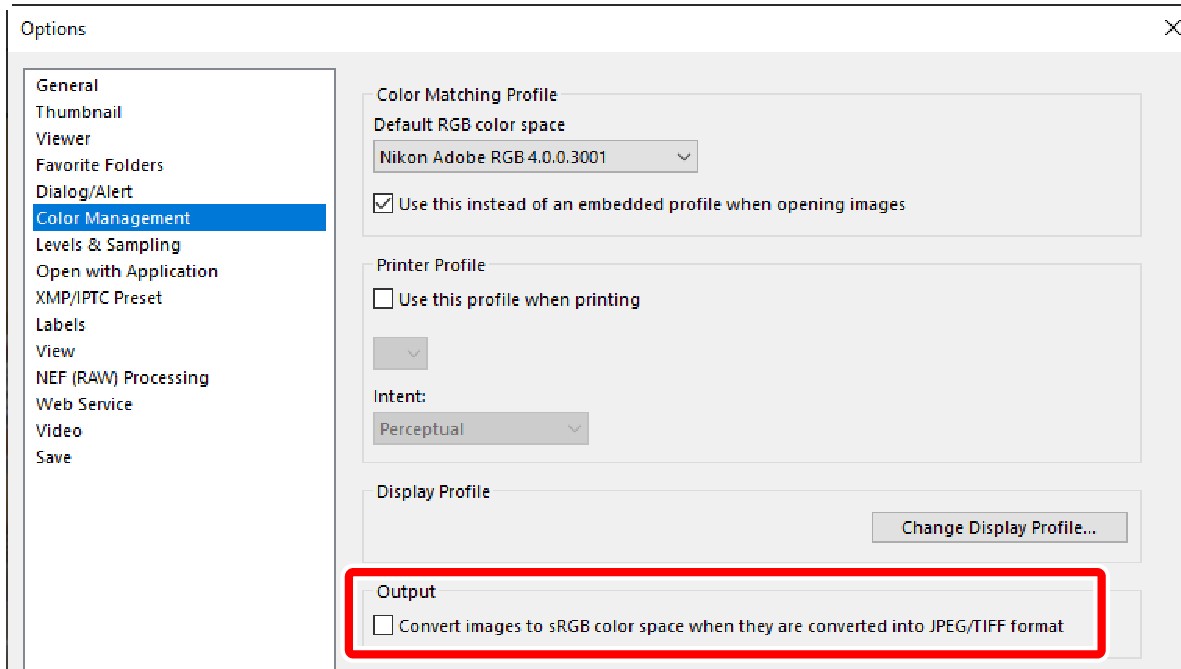
- To add or remove color profiles, select this option and choose [Add] or [Remove]. The profiles added when [Add] is selected vary with the option selected for [Color Management] in the [Options] dialog. The color profiles available for [Color management] are described below.
- If only [Use this instead of an embedded profile when opening images] is selected, the [Default RGB color space] profile (or in macOS, [RGB Default Profile]) will be embedded in pictures during export.
- If only [Convert images to sRGB color space when they are converted into JPEG/TIFF format] is selected, the sRGB color profile will be embedded in pictures during export.
- If both are selected, the sRGB color profile will be embedded in pictures during export.
- If neither is selected, the original color profile will be embedded in pictures during export.
- [Save in]
- Choose the destination folder for the exported pictures.
- [Same folder as originals]: Save the exported pictures to the same folders as the original files.
- [Specified folder]: Save the exported pictures to a selected folder. To choose the destination, click [Browse].
- [Create a new subfolder for each export]: Automatically create a new sub-folder within the chosen folder each time pictures are exported. To choose how the folders are named, click [Naming Options].
- [Change file names]
- Rename files during export. To choose how the files are named, click [Naming Options].
Converting Pictures to Color Spaces Other than sRGB
RAW pictures taken in the sRGB color space can be converted to other color spaces during export. Note, however, that the color space for RAW pictures recorded with HLG selected for tone mode is fixed at BT.2100, regardless of the color space selected at export or in the options (preferences) dialog.
Choose the desired default RGB color space for [Options] > [Color Management] > [Color Matching Profile] and select [Use this instead of an embedded profile when opening images].

Remove the check from [Convert images to sRGB color space when they are converted into JPEG/TIFF format] under [Output] in the [Color Management] panel.
Select the desired option for [Options] > [NEF (RAW) Processing] > [Color Space for Color Reproduction].
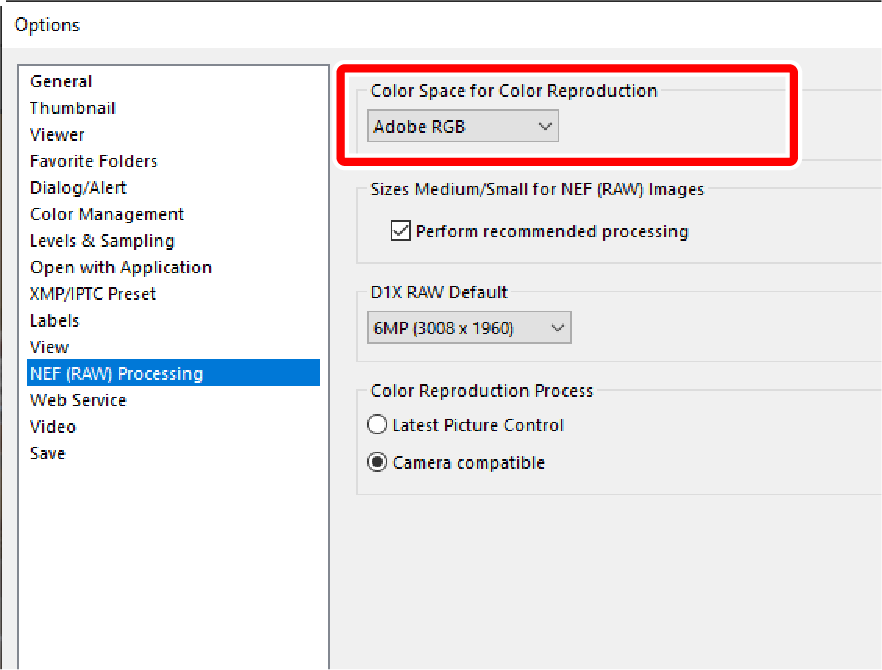
“Color Space for Color Reproduction”
The current color space for color reproduction can be viewed using the i button on the camera.
Select [Export] > [Add/Remove ICC color profile] and choose [Add].
Click [Export].
- The pictures will be exported in the selected color space.
Restoring the sRGB Color Space
To restore pictures to the sRGB color space:
- select [sRGB] for [Options] > [NEF (RAW) Processing] > [Color Space for Color Reproduction],
- place a check next to [Convert images to sRGB color space when they are converted into JPEG/TIFF format] under [Output] in the [Color Management] panel, and
- select [Nikon Adobe sRGB 4.0.0.3002] for [Options] > [Color Management] > [Color Matching Profile] and remove the check from [Use this instead of an embedded profile when opening images].