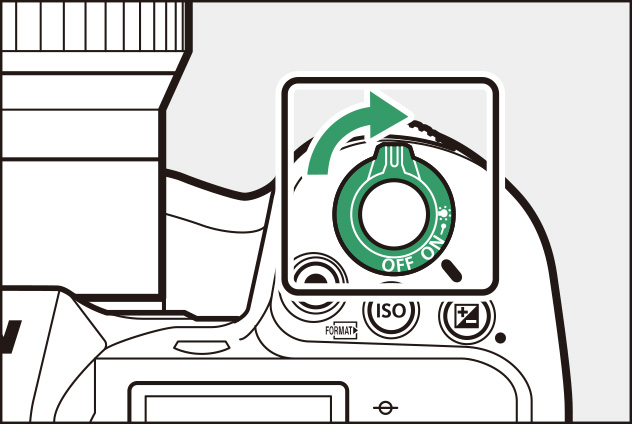
Technical Solutions | Z 9 TIPS

The Video Recording Workflow

1 Prepare.

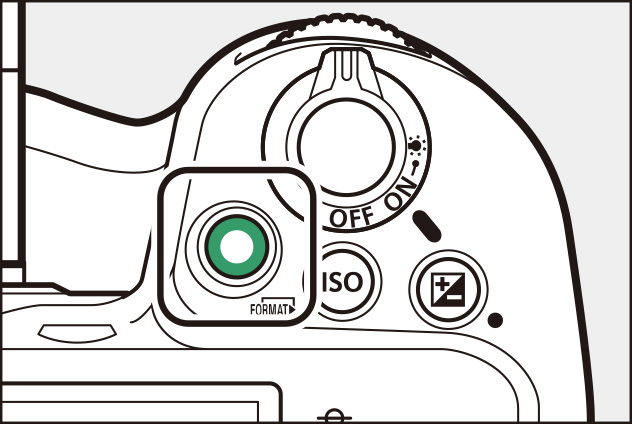
Before making videos, learn the names and locations of camera controls and insert a battery and memory card.

  • The supplied EH‑7P charging AC adapter or an optional AC adapter is recommended for extended recording. The camera can also be powered via USB. For more information, see the description of the setup menu [USB power delivery] option in the Z 9 Reference Guide, available from the Nikon Download Center's Z 9 product page (https://downloadcenter.nikonimglib.com/en/products/589/Z_9.html ).
  • Once you're ready to proceed, turn the camera on.

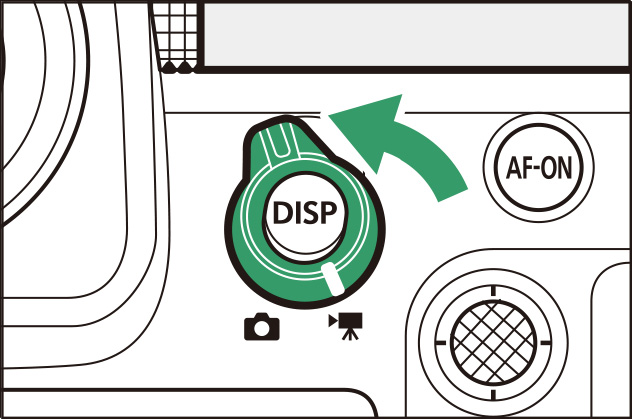
2 Select video mode by rotating the photo/video selector to .

The camera is now ready to record. Adjust recording settings as desired.

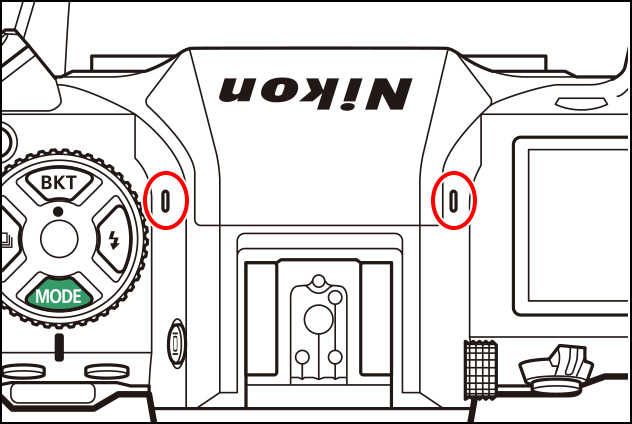
3 Press the video-record button to start recording.

  • Press the video-record button to start recording.
  • You can also start recording via a control chosen using Custom Setting g2 [Custom controls] (see this section).
  • A recording indicator will be displayed and the borders of the shooting display will turn red. The shooting display also shows the time remaining, or in other words the approximate amount of new footage that can be recorded to the memory card.
  • Sound is recorded via the video microphone. Do not cover the video microphone during recording.

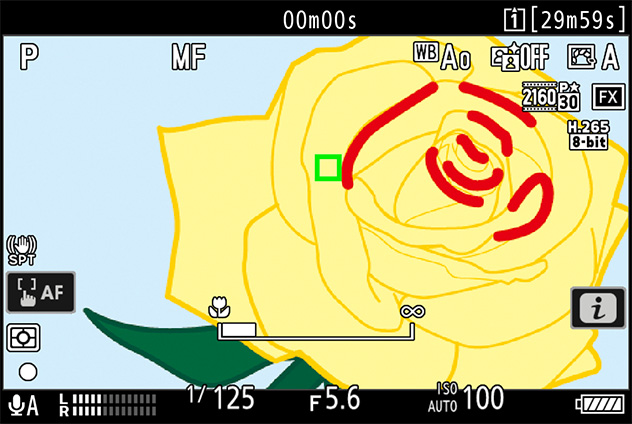
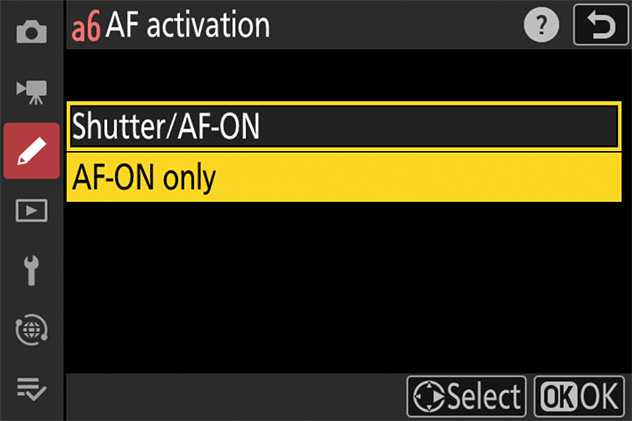
4 Adjust focus as required.

In the default focus mode—AF-F—the camera adjusts focus automatically. No particular action is required on your part, as the camera will adjust focus continuously in response to subject movement or changes in composition.

  • To focus on a new subject, tap it in the monitor. The camera will also automatically refocus on subjects in focus points chosen using the multi selector.
  • To focus in modes AF-S and AF-C, press the AF-ON button or press the shutter-release button halfway.
  • When MF is selected for focus mode, you can adjust focus by rotating the lens focus ring or control ring. If [ON] is selected for Custom Setting a13 [Focus peaking] > [Focus peaking display], objects that are in focus will be indicated by colored outlines.

5 Press the video-record button to end recording.

Press the video-record button again to end recording.

Using Other Controls for Video Recording
  • You can start and end video recording using a control that has been assigned [Record videos] via Custom Setting g2 [Custom controls].
    [Record videos] can be assigned to (see this section):
    • the focus-mode button,
    • the shutter-release button,
    • the AF-ON button,
    • the center of the sub-selector,
    • the button,
    • the AF-ON button for vertical shooting, or
    • the center of the vertical multi selector.
  • If, after assigning [Record videos] to the shutter-release button, you would prefer that the camera not focus at the start of recording, select [AF-ON only] for Custom Setting a6 [AF activation].
Starting and Ending Recording Remotely

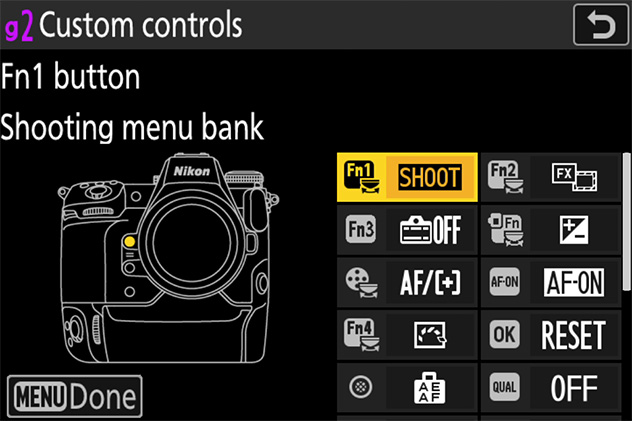
When [Record videos] is selected for Custom Setting g2 [Custom controls] > [Shutter-release button], the shutter-release buttons on MC‑36A remote cords and other remote release accessories can be used to start and stop video recording.