This section covers the focus settings used when recording movies.
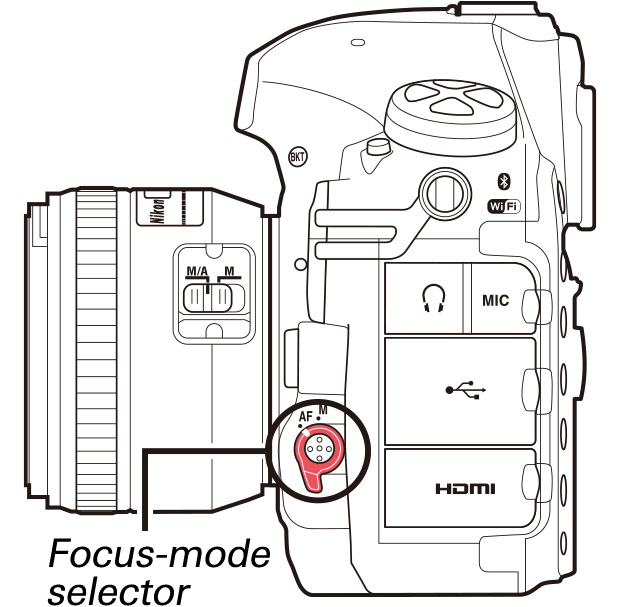
Use the focus-mode selector to choose whether the camera focuses in autofocus or manual focus mode. Select AF for autofocus, M for manual focus.
AF mode determines how the camera focuses when the focus-mode selector is rotated to AF.
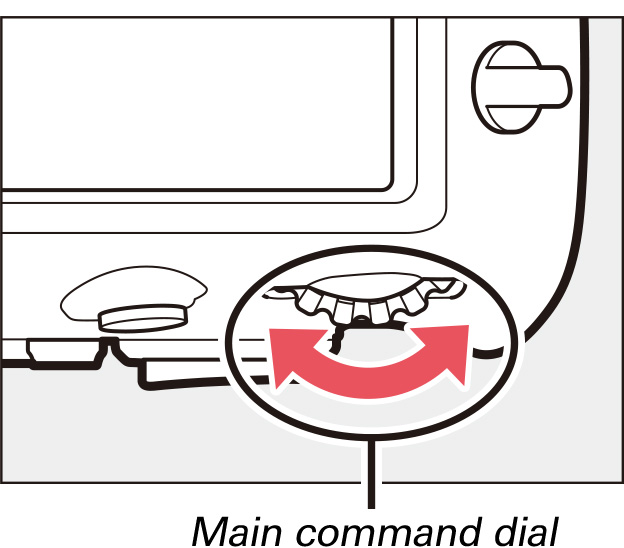
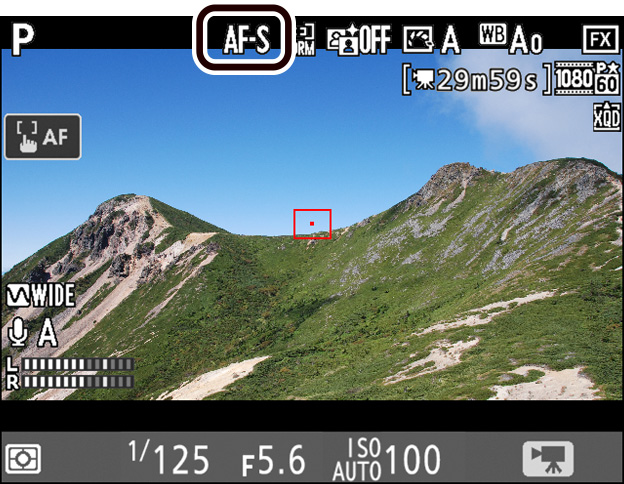
To choose the AF mode, press the AF-mode button and rotate the main command dial until the desired setting is displayed in the monitor.

Choose from the following settings:
| AF-S | Single-servo AF: For stationary subjects. Touch the monitor to focus on the selected subject. You can also focus using the AF-ON button or by pressing the shutter-release button halfway. |
|---|---|
| AF-F | Full-time-servo AF: For moving subjects. The camera adjusts focus continuously until you touch the monitor or press the shutterrelease button halfway. Focus locks until you lift your finger from the display or release the shutter-release button. You can also focus using the AF-ON button. |
AF-area mode determines how the camera selects the focus point for autofocus.
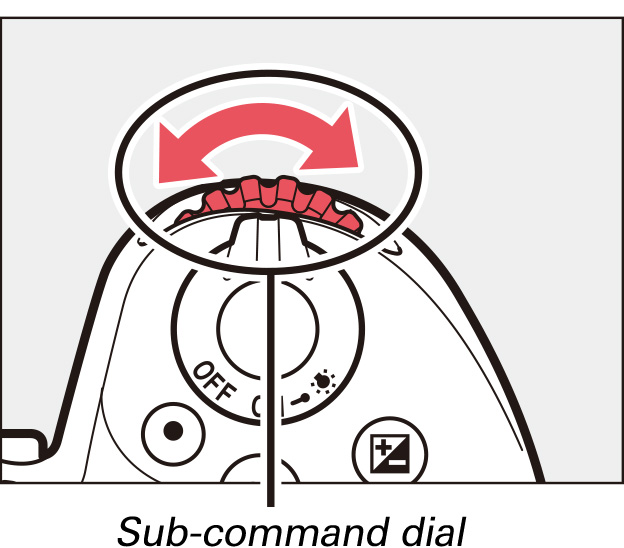
To choose the AF-area mode, press the AFmode button and rotate the sub-command dial until the desired setting is displayed in the monitor.

Choose from the following settings:
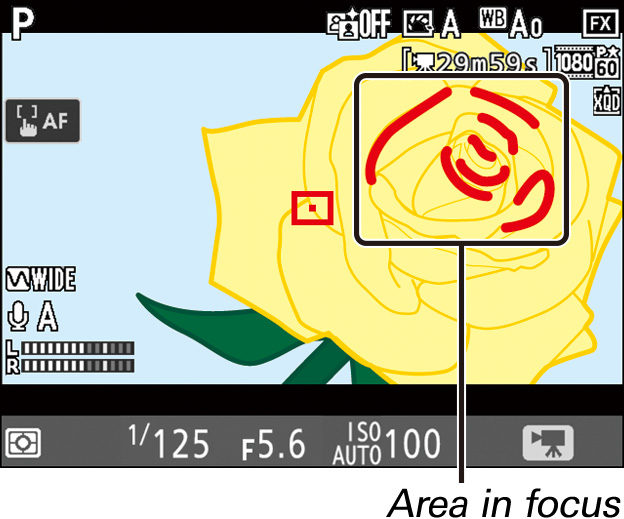
| Face-priority AF: The camera automatically detects and focuses on portrait subjects; the selected subject is indicated by a double yellow border (if multiple faces are detected, the camera will focus on the closest subject; to choose a different subject, tap the subject in the monitor or use the multi selector). If the camera can no longer detect the subject (because, for example, the subject has turned to face away from the camera), the border will no longer be displayed. | |
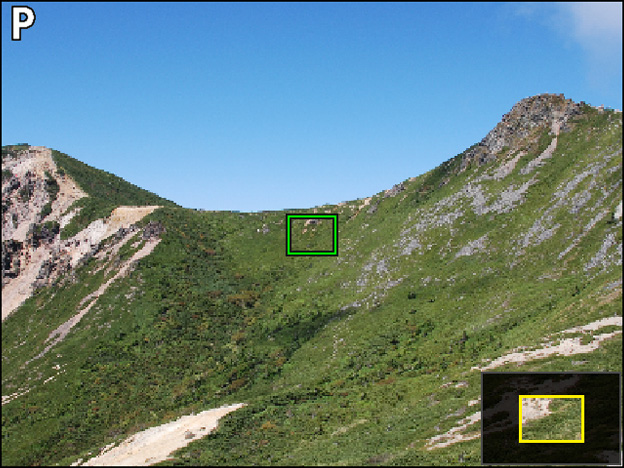
| Wide-area AF: Use for hand-held shots of landscapes and other non-portrait subjects. Use touch controls or the multi selector to move the focus point anywhere in the frame, or press the center of the multi selector to position the focus point in the center of the frame. | |
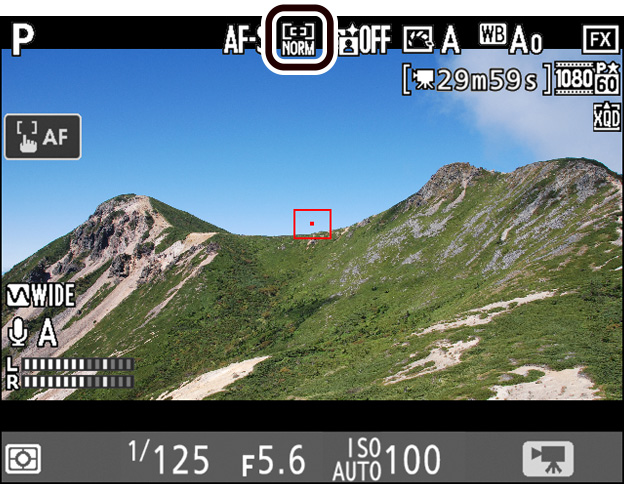
| Normal-area AF: Focus on a selected spot in the frame. Use touch controls or the multi selector to move the focus point anywhere in the frame, or press the center of the multi selector to position the focus point in the center of the frame. A tripod is recommended. | |
| Pinpoint AF: As for normal-area AF, except that a smaller focus point is used for pinpoint focus on smaller targets. | |
| Subject-tracking AF: To start focus tracking, touch your subject in the monitor or position the focus point over your subject and press the center of the multi selector; the focus point will track the selected subject as it moves through the frame. While tracking is in progress, touching the monitor anywhere will cause the camera to focus on the current subject. To end tracking, press the center of the multi selector. Note that the camera may be unable to track subjects if they move quickly, leave the frame or are obscured by other objects, change visibly in size, color, or brightness, or are too small, too large, too bright, too dark, or similar in color or brightness to the background. |
Use an AF-S or AF-P lens. The desired results may not be achieved with other lenses or teleconverters. Note that in live view, autofocus is slower and the monitor may brighten or darken while the camera focuses. The focus point may sometimes be displayed in green when the camera is unable to focus. The camera may be unable to focus in the following situations:
Press the button to magnify the view in the monitor up to a maximum of about 16×. A navigation window will appear in a gray frame at the bottom right corner of the display. Use the multi selector to scroll to areas of the frame not visible in the monitor, or press () to zoom out. Focus zoom is not available during movie recording.
If Zoom on/off is selected for Custom Setting f2 (Multi selector center button) > Live view, you can also use the center of the multi selector to zoom in on the view in the monitor. Choose the initial zoom setting from Low magnification (50%), 1:1 (100%), and High magnification (200%). The zoom display will center on the active focus point. Note that regardless of the option selected, pressing the center of the multi selector when subject-tracking AF is in effect will select the subject in the active focus point for focus tracking; to zoom in, use the button.
If you enable focus peaking when recording movies in manual focus mode, objects that are currently in focus will be indicated by colored outlines.
To enable or disable focus peaking without leaving live view:
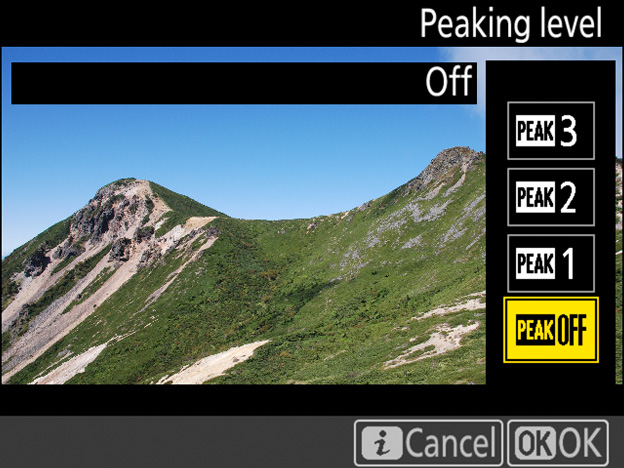
1 Select Peaking level in the -button menu.
With the camera in movie mode, press the button to display the -button menu. Press or to highlight Peaking level and press to view options.
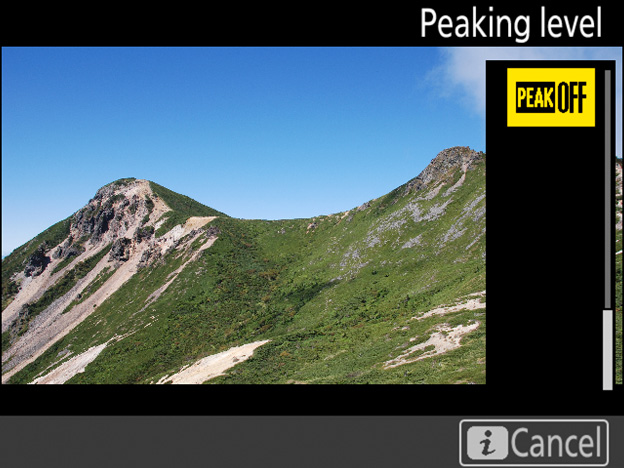
2 Select the desired option.
Press or to highlight the desired option and press to select. Choose from 3 (high sensitivity), 2 (standard), 1 (low sensitivity), and Off; the higher the setting, the greater the depth shown as being in focus. Press the button to exit to the shooting display when settings are complete.
The peaking color can be selected using Custom Setting d8 (Peaking highlight color). Choose from Red, Yellow, Blue, and White. Focus peaking cannot be used with Active D-Lighting (see this section) or electronic vibration reduction (see this section) and is not displayed at a frame size of 1920 × 1080 (slow-mo) or 3840 × 2160.