This section is devoted to settings that affect exposure.
Metering determines how the camera sets exposure.
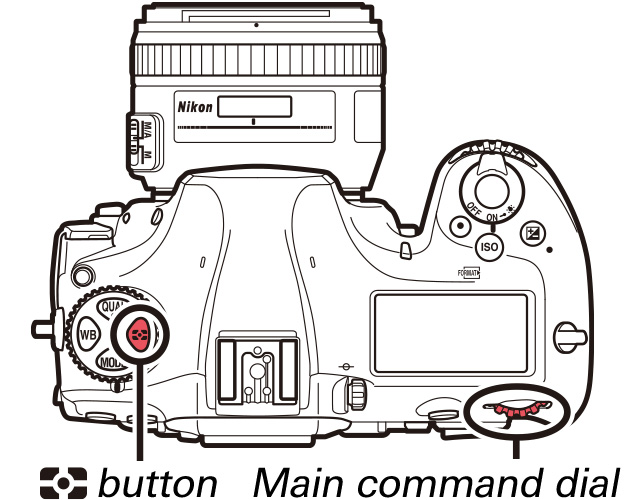
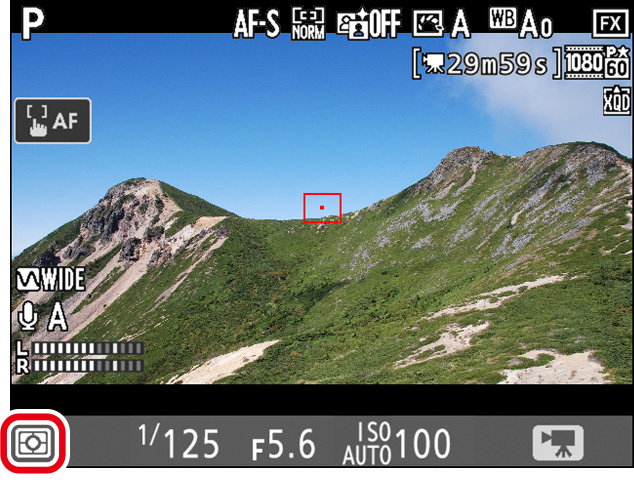
To choose a metering option, press the button and rotate the main command dial until the desired setting is displayed in the monitor and control panel.
The following options are available:
|
Matrix |
Produces natural results in most situations. Camera meters wide area of the frame and sets exposure according to tone distribution, color, composition, and distance information. |
|---|---|
|
Center weighted |
Camera meters entire frame but assigns greatest weight to center area. Classic meter for portraits; recommended when using filters with an exposure factor (filter factor) over 1×. |
|
Highlight weighted |
Camera assigns greatest weight to highlights. Use to reduce loss of detail in highlights, for example when filming spotlit performers on-stage. |
Spot metering cannot be used with movies.
Exposure mode determines how the camera adjusts shutter speed and aperture to obtain the desired exposure.
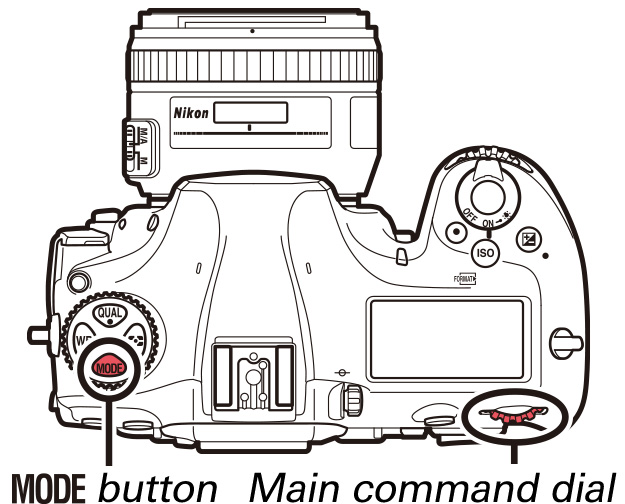
To choose the exposure mode, press the button and rotate the main command dial until the desired option appears in the monitor or control panel.

The exposure settings that can be adjusted manually in each exposure mode are indicated below by check marks. Note that shutter speed cannot be adjusted manually in mode S, making mode S equivalent to mode P when the camera is in movie mode.
| Exposure mode | Exposure settings | ||
|---|---|---|---|
| Aperture | Shutter speed | ISO sensitivity1 | |
| P.S | ━ | ━ | ━2 |
| A | ━ | ━2 | |
| M | 3 | ||
If the image in the monitor seems over- or under-exposed in mode P or S, exit and restart live view or switch to mode A and adjust aperture until the desired result is achieved.
In exposure mode M, shutter speed can be set to values between 1/25 s and 1/8000 s (the slowest available shutter speed varies with the frame rate, see this section).
When mode A or M is selected in movie mode, aperture can be adjusted using the multi selector or custom controls (power aperture, see this section).
Exposure compensation is used to alter exposure from the value suggested by the camera, making pictures brighter or darker.
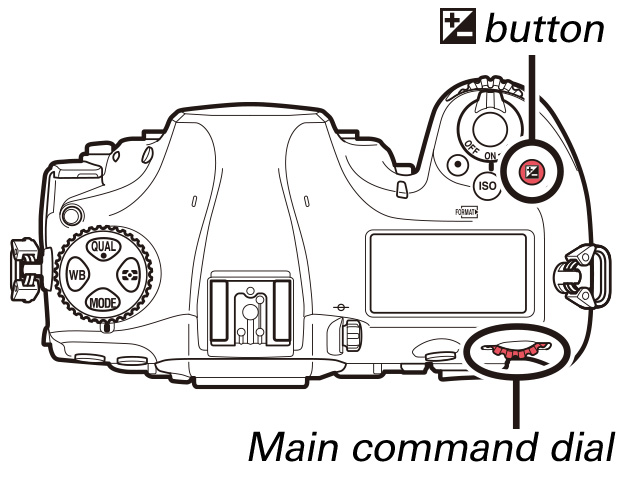
To choose a value for exposure compensation, press the button and rotate the main command dial until the desired value is displayed in the monitor or control panel. The current value can be confirmed by pressing the button.
If Multi selector exposure comp. is enabled, exposure compensation can also be set using the multi selector (see this section).

Exposure compensation is adjusted in increments of 1/3 EV. In general, positive values make the subject brighter while negative values make it darker. Normal exposure can be restored by setting exposure compensation to ±0.0. Exposure compensation is not reset when the camera is turned off.
In exposure mode M, exposure compensation affects only the exposure indicator; shutter speed and aperture do not change.
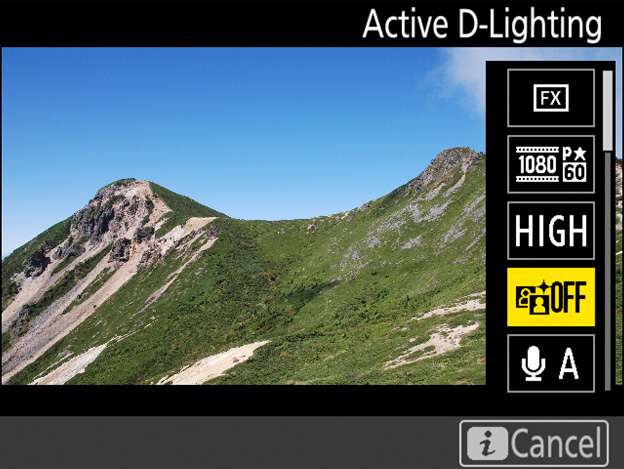
Active D-Lighting preserves details in highlights and shadows, creating photographs with natural contrast. Use for high-contrast scenes, for example when photographing brightly lit outdoor scenery through a door or window or taking pictures of shaded subjects on a sunny day. To adjust Active D-Lighting without leaving live view:
1 Select Active D-LIghting in the -button menu.
With the camera in movie mode, press the i button to display the -button menu. Press or to highlight Active D-Lighting and press to view options.
2 Select the desired option.
Press or to highlight the desired option and press to select. Press the button to exit to the shooting display when settings are complete.
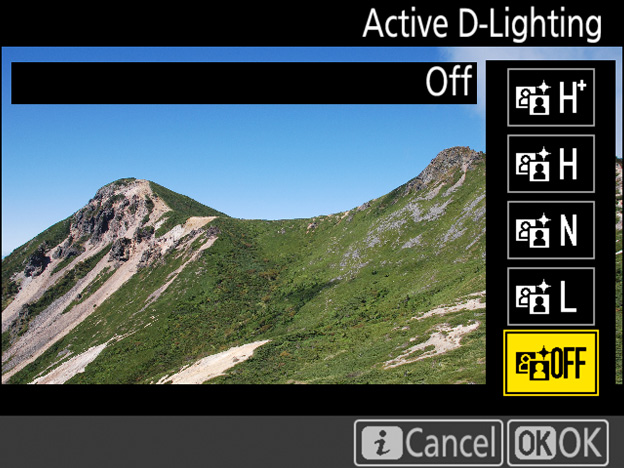
Active D-Lighting cannot be combined with focus peaking (see this section) and does not apply at a frame size of 1920 × 1080 (slow-mo) or 3840 × 2160 (see this section).
Use the Flicker reduction option in the movie shooting menu to reduce flicker and banding when shooting under fluorescent or mercury-vapor lighting during live view or movie recording. Choose Auto to allow the camera to automatically choose the correct frequency, or manually match the frequency to that of the local AC power supply.
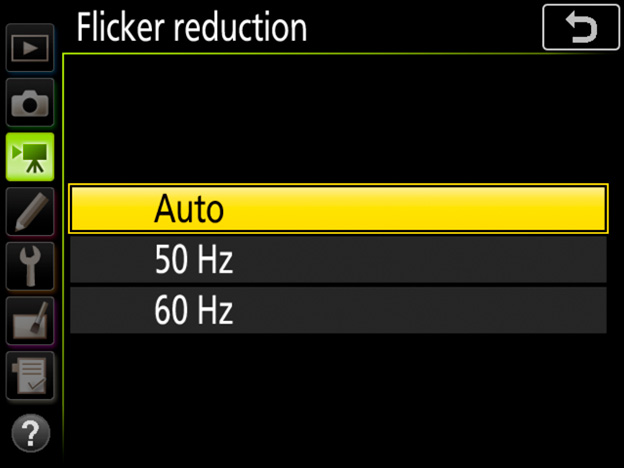
If Auto fails to produce the desired results and you are unsure as to the frequency of the local power supply, test both the 50 and 60 Hz options and choose the one that produces the best results. Flicker reduction may not produce the desired results if the subject is very bright, in which case you should try choosing a smaller aperture (higher f-number). To prevent flicker, select mode M and choose a shutter speed adapted to the frequency of the local power supply: 1/125 s, 1/60 s, or 1/30 s for 60 Hz; 1/100 s, 1/50 s, or 1/25 s for 50 Hz.