Time-lapse movies are created from photographs shot automatically at preset intervals. The resulting movie is viewed at a much higher rate than the frames are captured, speeding the apparent passage of time. The camera offers two options that can be used to create time-lapse movies: the Time-lapse movie option in the movie shooting menu and the Interval timer shooting option in the photo shooting menu. Although both are used to automatically record a preset number of shots at a preset interval, they differ in the following respects:
| Time-lapse movie | Interval timer shooting | |
|---|---|---|
| Description | The camera automatically takes photos at a preset interval and uses the resulting frames to generate a silent time-lapse movie. | The camera automatically takes photos at a preset interval, generating the raw materials for a time-lapse movie created using third-party movie-editing software. |
| Frame size | Up to 3840 × 2160. The options available are the same as those for Frame size/frame rate in the movie shooting menu. | Up to 8256 × 5504, selected using the Image size option in the photo shooting menu. |
Click here for the image optimized for small screens. (JPG 106KB).
Follow the steps below to film silent time-lapse movies using the Time-lapse movie option in the movie shooting menu.
Before shooting a time-lapse movie, take a test shot at current settings and view the results in the monitor. Time-lapse movies are shot using the movie crop; to check the composition, press the () button in the Time-lapse movie display (to return to the Time-lapse movie display, press the / button again). For consistent coloration, choose a white balance setting other than (auto) or (natural light auto).
We recommend using a tripod and disabling lens vibration reduction (VR). Mount the camera on a tripod before shooting begins. To ensure that shooting is not interrupted, use an optional AC adapter and power connector or a fully-charged battery. To prevent light entering via the viewfinder interfering with photographs and exposure, close the viewfinder eyepiece shutter.
Time-lapse cannot be combined with some camera features, including live view, movie recording, long time exposures (bulb or time photography), the self-timer, bracketing, HDR (high dynamic range), multiple exposure, interval timer photography, and focus shift.
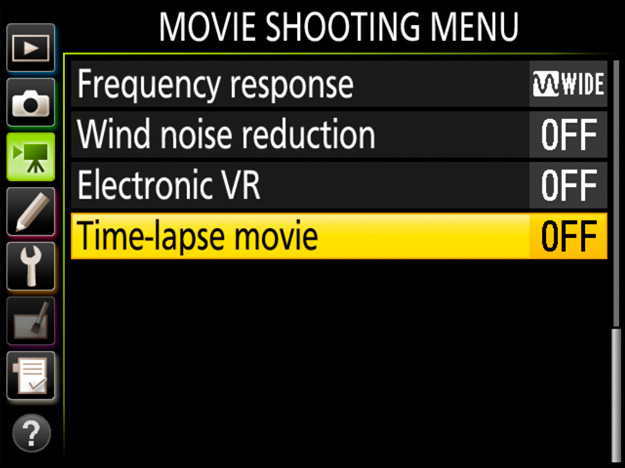
1 Select Time-lapse movie.
Highlight Time-lapse movie in the movie shooting menu and press to display time-lapse movie settings.
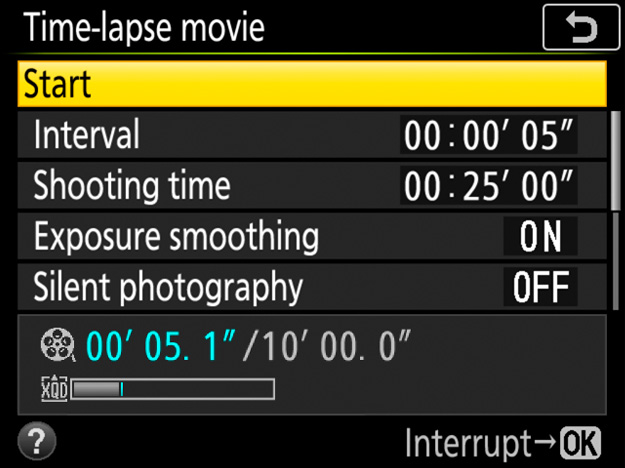
2 Adjust time-lapse movie settings.
Adjust the following settings:
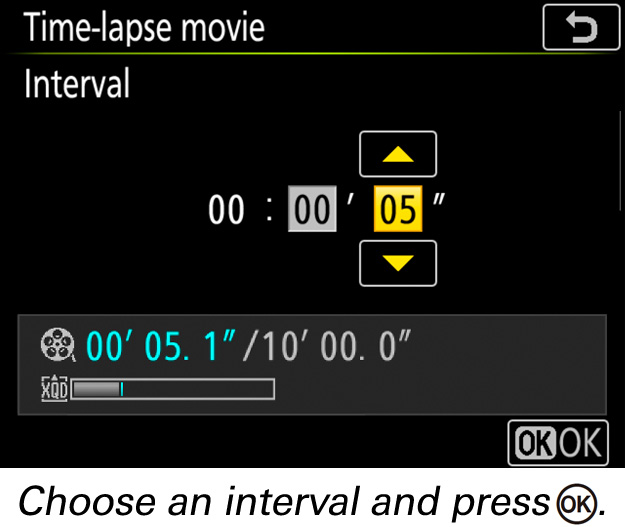
Interval: The interval (in minutes and seconds) should be longer than the slowest anticipated shutter speed.

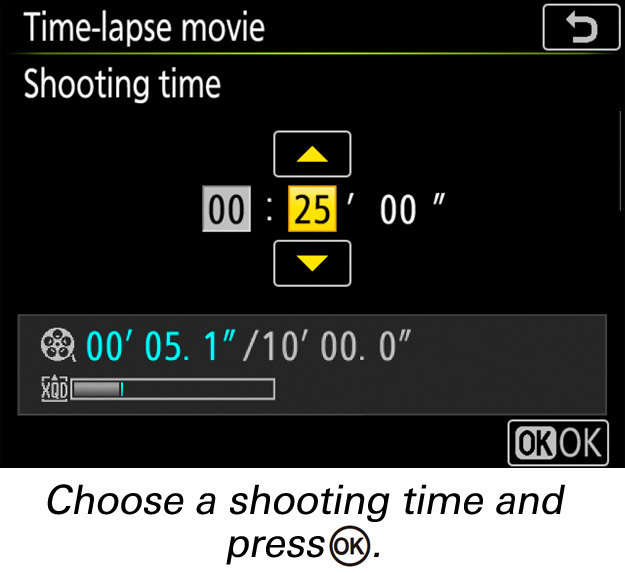
Shooting time: The total shooting time (in hours and minutes) can be up to 7 hours and 59 minutes.

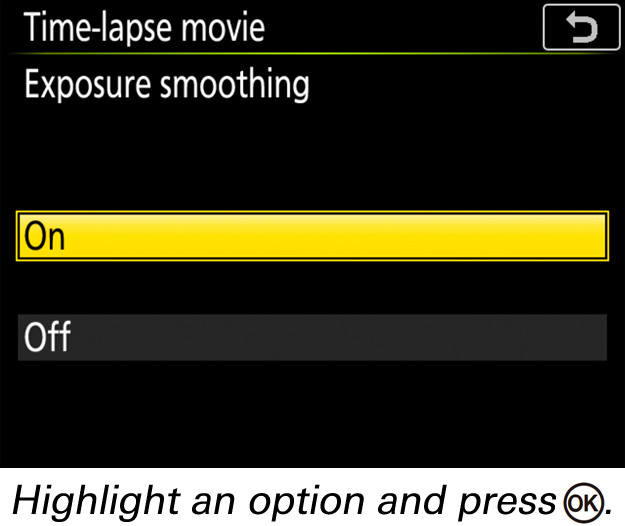
Exposure smoothing: Select On to smooth abrupt changes in exposure in modes other than M (note that exposure smoothing only takes effect in mode M if auto ISO sensitivity control is on). Large changes in subject brightness during shooting may result in apparent variations in exposure, in which case it may be necessary to shorten the interval between shots.

Silent photography: Select On to reduce wear on the shutter mechanism and silence the shutter during shooting; the only time the sound of the shutter or mirror will be heard is when the mirror is raised or lowered at the start and end of shooting. Some camera features will be disabled, including ISO sensitivities of Hi 0.3 through Hi 2.0 (see this section), flash photography, exposure delay mode, long exposure noise reduction, and flicker reduction (see this section).
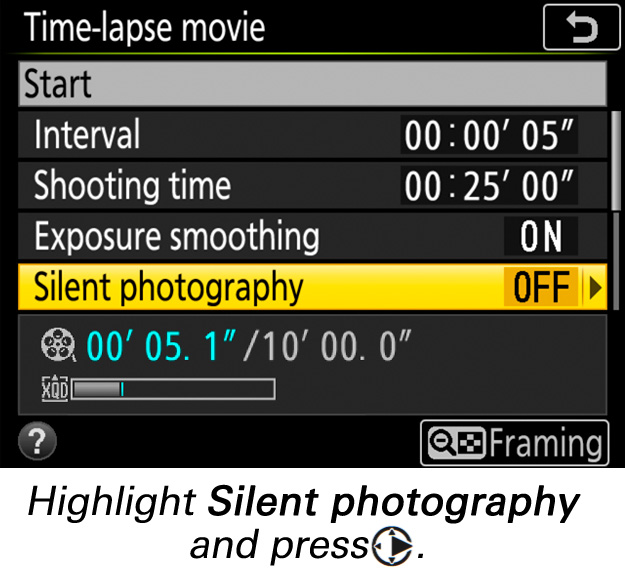
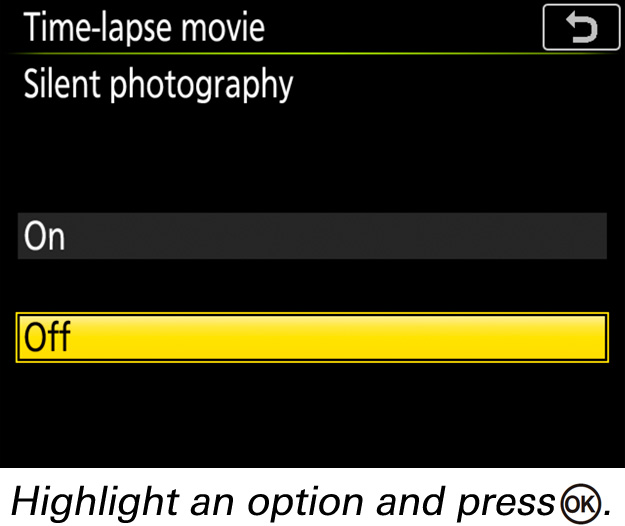
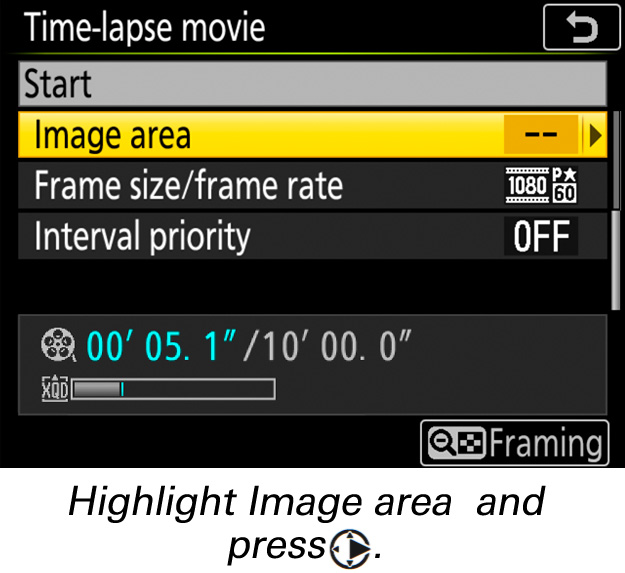
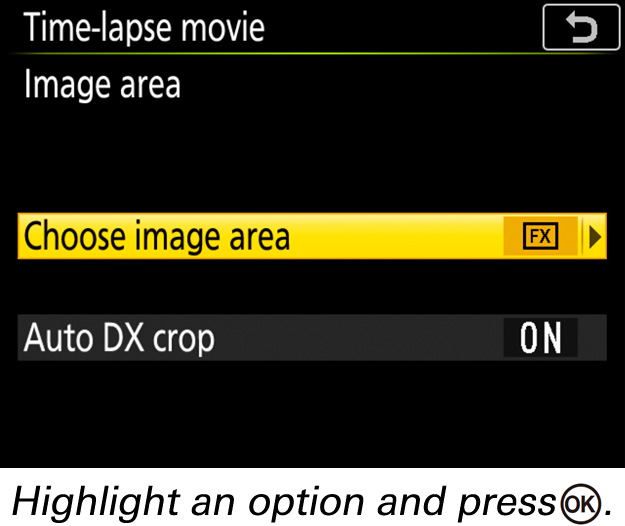
Image area: Choose the image area used for time-lapse recording.
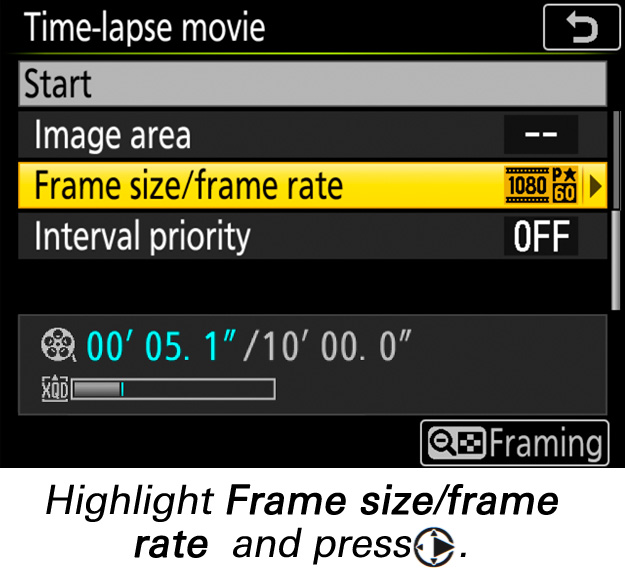
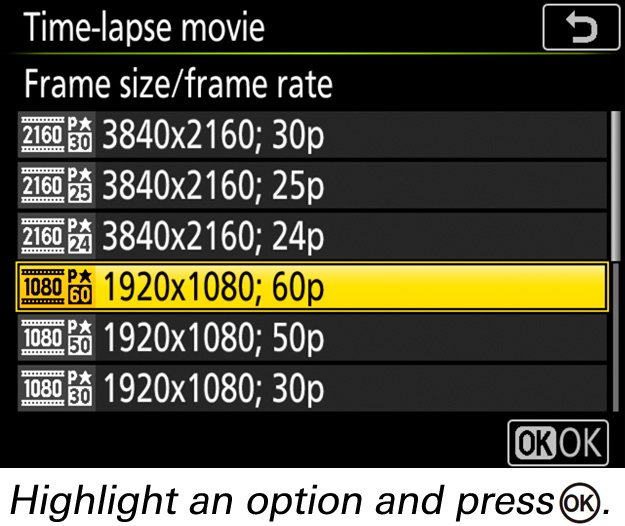
Frame size/frame rate: Choose the frame size and rate at which the final movie will play back.
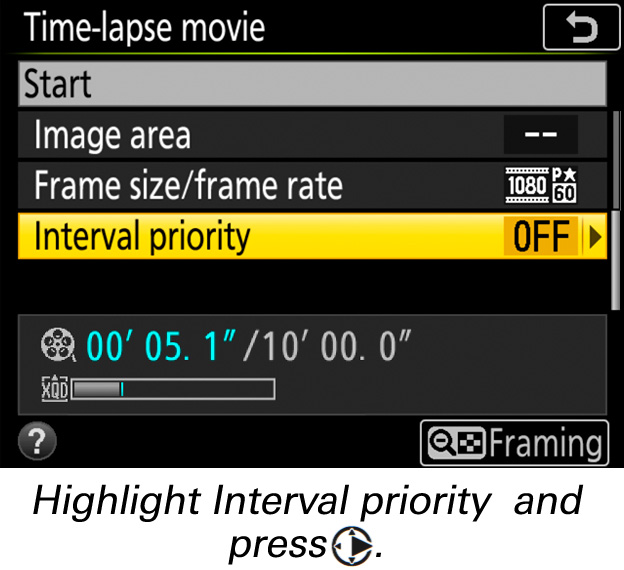
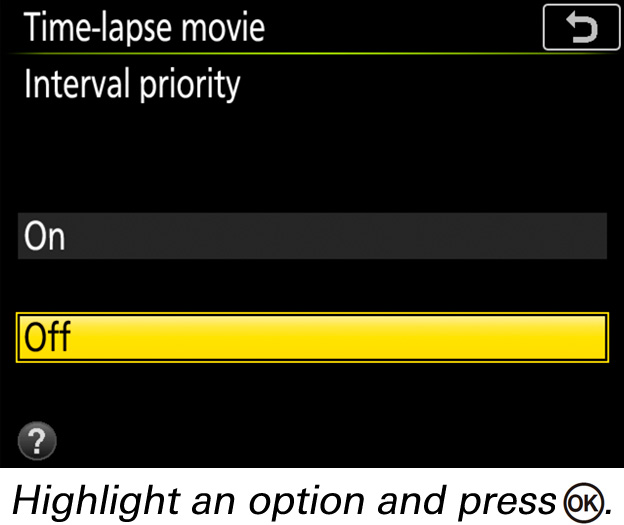
Interval priority: Choose On to prioritize interval timing over exposure time, but note that time-lapse recording will end if the camera cannot focus or the shutter release is otherwise disabled.
3 Start shooting.
Highlight Start and press . Shooting starts after about 3 s, after which the camera will take photographs at the selected interval for the selected shooting time. When complete, time-lapse movies are recorded to the memory card selected for Destination in movie shooting menu (see this section).

Enabling both exposure smoothing and silent photography extends the lower limit of the exposure metering system downward by −3 EV, allowing exposure mode A to be used with subjects—such as the stars coming out as the sky darkens from dusk, or the sky brightening from night to dawn—that vary so greatly in brightness that they cannot be shot in mode M .
We recommend using a tripod and disabling lens vibration reduction (VR). Mount the camera on a tripod before shooting begins. To ensure that shooting is not interrupted, use an optional AC adapter and power connector or a fully-charged battery. To prevent light entering via the viewfinder interfering with photographs and exposure, close the viewfinder eyepiece shutter.
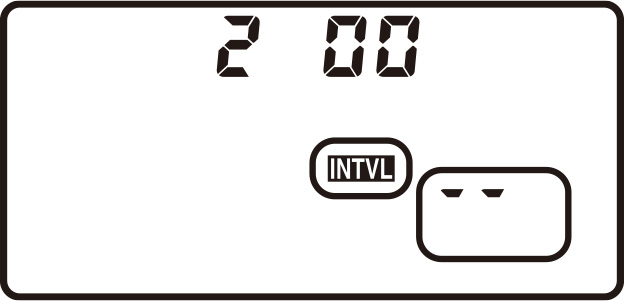
During shooting, will flash and the time-lapse recording indicator will be displayed in the control panel. The time remaining (in hours and minutes) appears in the shutter-speed display immediately before each frame is recorded. At other times, the time remaining can be viewed by pressing the shutter-release button halfway. Regardless of the option selected for Custom Setting c2 (Standby timer), the standby timer will not expire during shooting.
To view current time-lapse movie settings or end shooting, press the MENU button between shots. The data displayed in the time-lapse movie menu while shooting is in progress include exposure smoothing, the interval, and the time remaining. These settings cannot be changed while shooting is in progress, nor can pictures be played back or other menu settings adjusted.
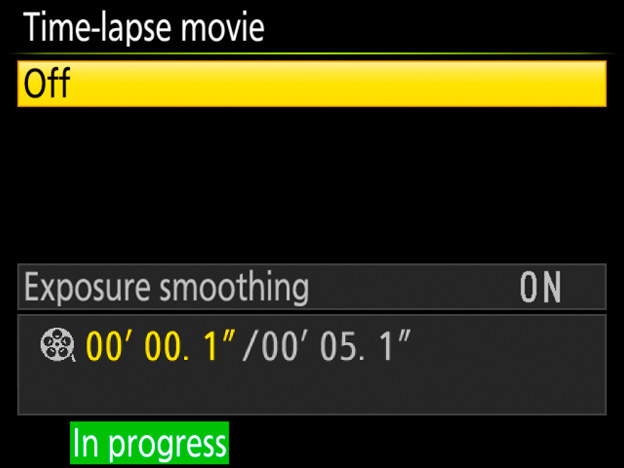
To end shooting before all the frames are taken, highlight Off in the time-lapse movie menu and press , or press between frames. A movie will be created from the frames shot to the point where shooting ended. Note that shooting will end and no movie will be recorded if the power source is removed or disconnected or the destination memory card is ejected. A beep does not sound when time-lapse recording ends.
Because shutter speed and the time needed to record the image to the memory card may vary from shot to shot, the interval between a shot being recorded and the start of the next shot may vary. Shooting will not begin if a time-lapse movie cannot be recorded at current settings (for example, if the memory card is full, the interval or shooting time is zero, or the interval is longer than the shooting time).
Shooting may end if camera controls are used or settings are changed or HDMI cable is connected. A movie will be created from the frames shot to the point where shooting ended. To end shooting and record a photograph, press the shutter-release button all the way down.
The button cannot be used to view pictures while shooting is in progress, but the current frame will be displayed for a few seconds after each shot if On is selected for Image review in the playback menu. Other playback operations cannot be performed while the frame is displayed.
The total number of frames in the final movie can be calculated by dividing the shooting time by the interval and rounding up. The length of the final movie can then be calculated by dividing the number of shots by the frame rate selected for Frame size/frame rate. A 48 frame movie recorded at 1920 × 1080; 24p, for example, will be about two seconds long. The maximum length for time-lapse movies is 20 minutes.
Follow the steps below to create time-lapse movies using the Interval timer shooting option in the photo shooting menu. Before proceeding, be sure to select a release mode other than (self-timer).
Before beginning interval timer photography, take a test shot at current settings and view the results in the monitor. Once settings have been adjusted to your satisfaction, close the viewfinder eyepiece shutter to prevent light entering via the viewfinder interfering with photographs and exposure.
Before choosing a starting time, select Time zone and date in the setup menu and make sure that the camera clock is set to the correct time and date.
We recommend using a tripod and disabling lens vibration reduction (VR). Mount the camera on a tripod before shooting begins. To ensure that shooting is not interrupted, be sure the camera battery is fully charged. If in doubt, charge the battery before use or use an AC adapter and power connector (available separately).
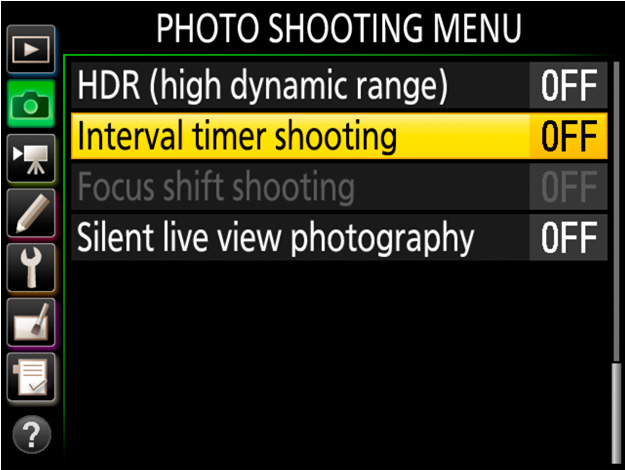
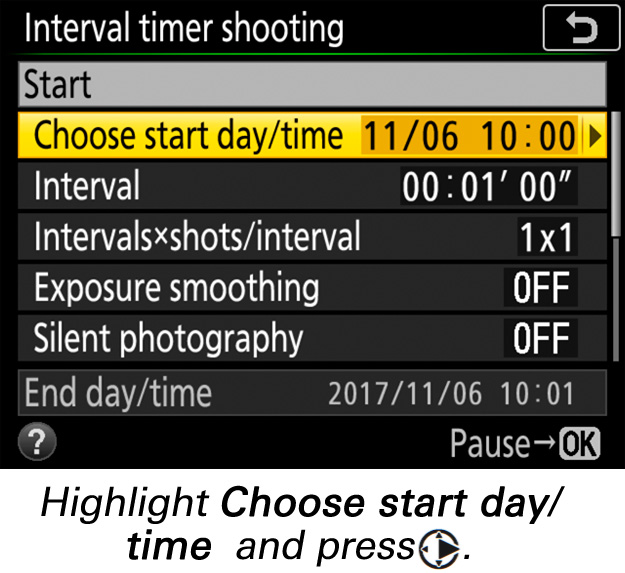
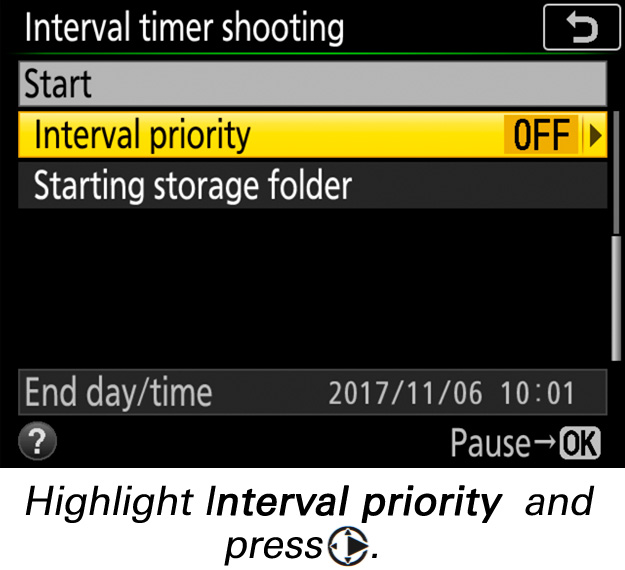
1 Select Interval timer shooting.
Highlight Interval timer shooting in the photo shooting menu and press to display interval timer settings.

2 Adjust interval timer settings.
Adjust the following settings:
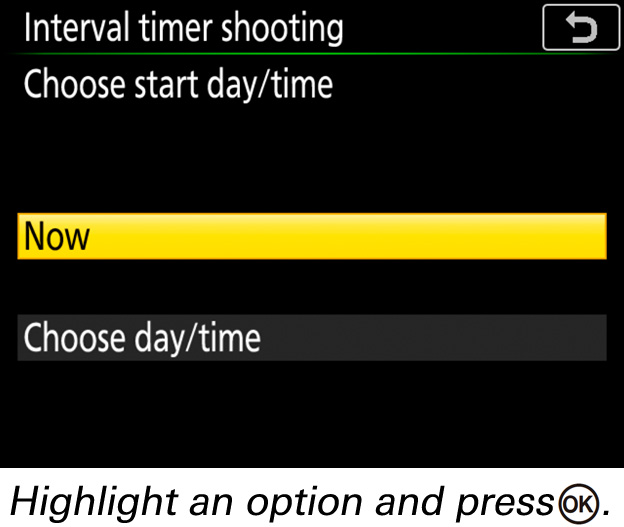
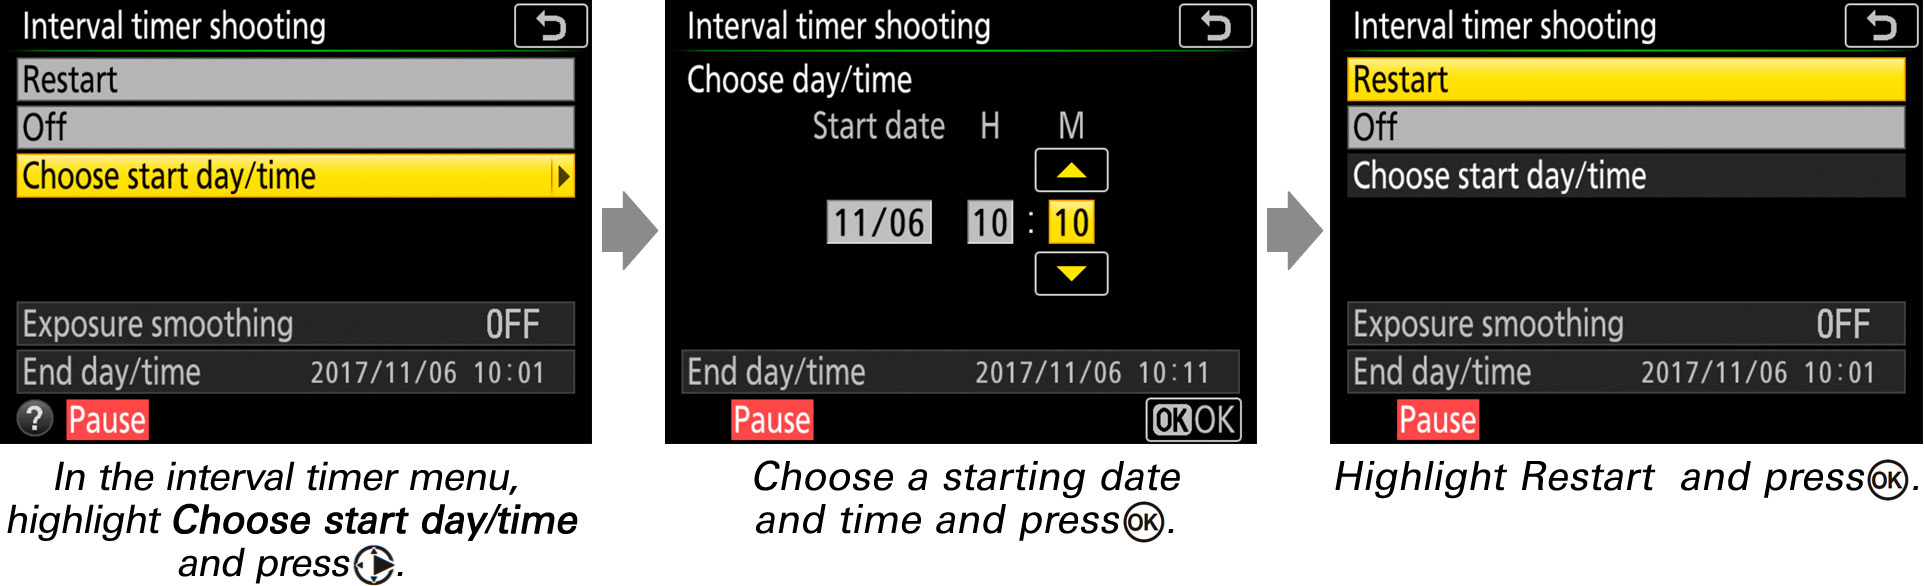
Choose start day/time: To start shooting immediately, select Now. To start shooting at a chosen date and time, select Choose day/time, then choose the date and time and press .
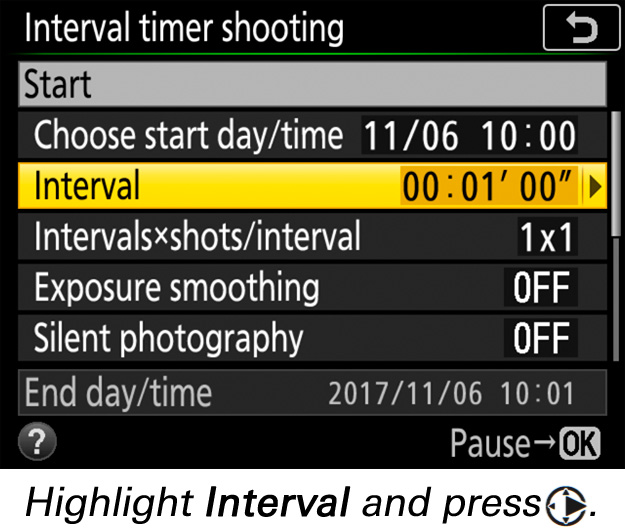
Interval: The interval (in minutes and seconds) should be longer than the time needed to take the shots for each interval, including the time needed for the flash to charge between shots, if applicable. The camera may skip intervals that are too short to allow the selected number of shots to be recorded.

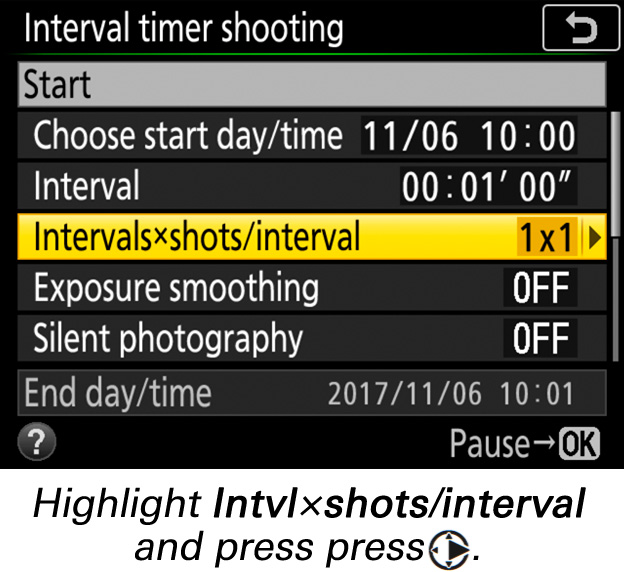
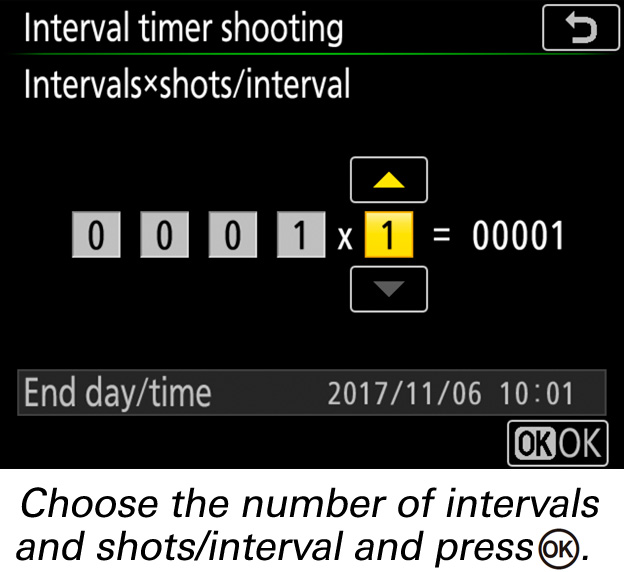
Intvl×shots/interval: Choose the number of intervals and the number of shots per interval. In S (single frame) mode, the photographs for each interval will be taken at the rate chosen for Custom Setting d1 (CL mode shooting speed).
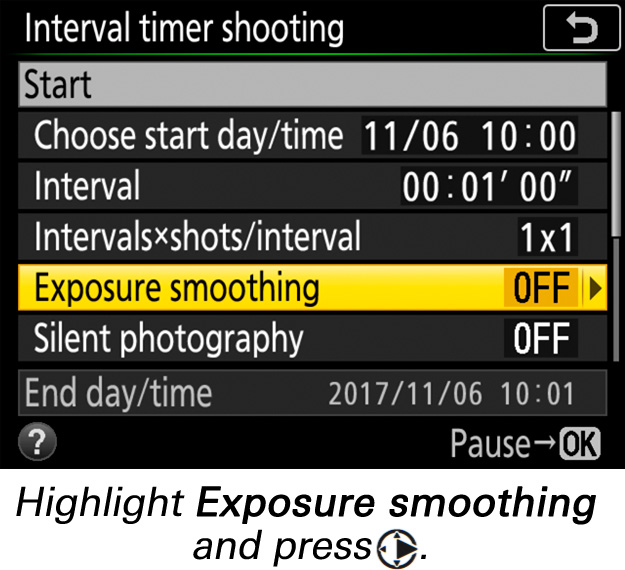
Exposure smoothing: Select On to smooth abrupt changes in exposure in modes other than M (note that exposure smoothing only takes effect in mode M if auto ISO sensitivity control is on). Large changes in subject brightness during shooting may result in apparent variations in exposure, in which case it may be necessary to shorten the interval between shots.

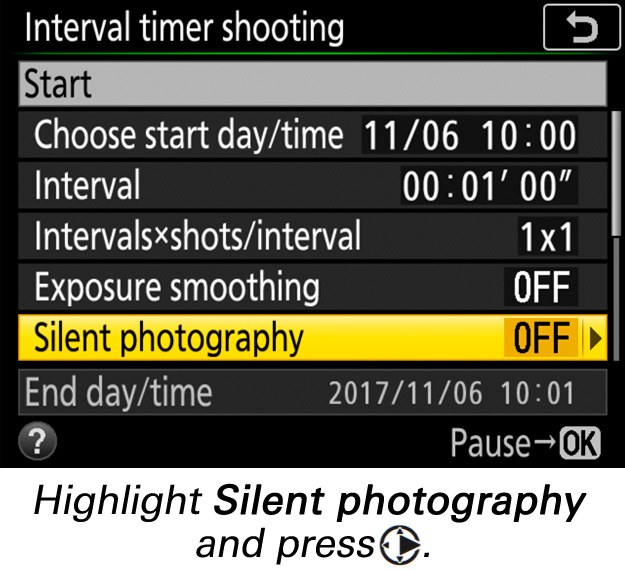
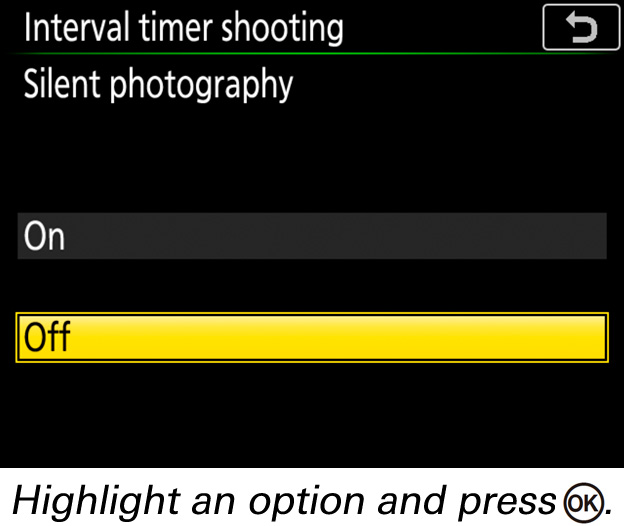
Silent photography: Select On to reduce wear on the shutter mechanism and silence the shutter during shooting; the only time the sound of the shutter or mirror will be heard is when the mirror is raised or lowered at the start and end of shooting. Some camera features will be disabled, including ISO sensitivities of Hi 0.3 through Hi 2.0 (see this section), flash photography, exposure delay mode, flicker reduction (see this section), bracketing, and multiple exposure.
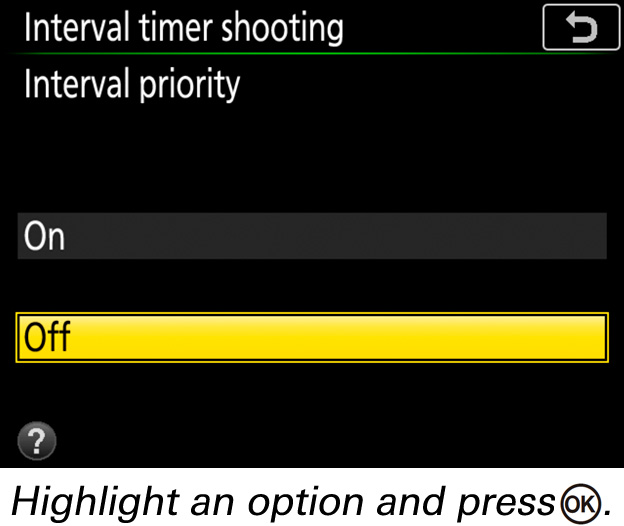
Interval priority: Choose On to prioritize interval timing over exposure time, but note that shooting will end if the camera cannot focus or the shutter release is otherwise disabled.
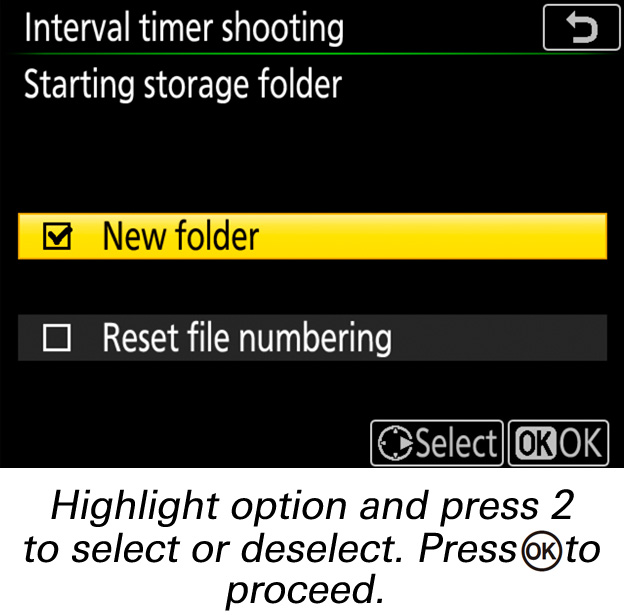
Starting storage folder: Select New folder to create a new folder for each sequence shot using interval timer photography, and Reset file numbering to reset file numbering to 0001 when a new folder is created.

3 Start shooting.
Highlight Start and press . The first series of shots will be taken at the specified starting time, or after about 3 s if Now was selected for Choose start day/time in Step 2. Shooting will continue at the selected interval until all shots have been taken.

4 Create a time-lapse movie.
This step requires third-party software that supports time-lapse movie creation. Use the software to import photos taken using interval timer shooting and create a time-lapse movie.
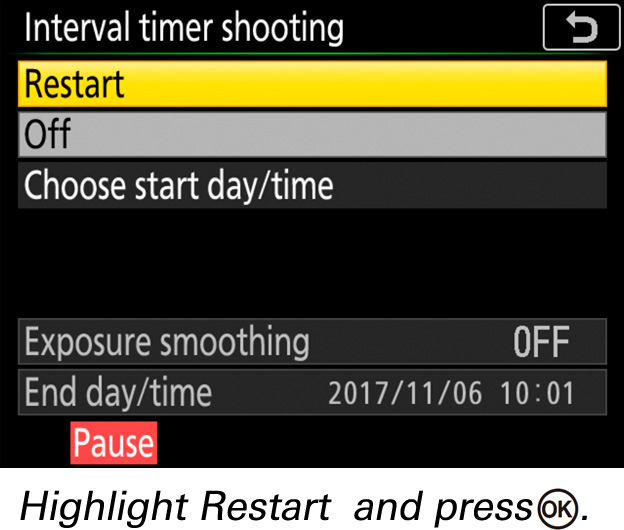
Interval timer photography can be paused between intervals by pressing or selecting Pause in the interval timer menu.
To resume shooting immediately, select Restart in the interval timer menu.
To resume shooting at a specified time:
To end interval timer photography before all the photos are taken, select Off in the interval timer menu.
If the memory card is full, the interval timer will remain active but no pictures will be taken. Resume shooting after deleting some pictures or turning the camera off and inserting another memory card.
Enabling both exposure smoothing and silent photography extends the lower limit of the exposure metering system downward by −3 EV, allowing exposure mode A to be used with subjects—such as the stars coming out as the sky darkens from dusk, or the sky brightening from night to dawn—that vary so greatly in brightness that they cannot be shot in mode M .
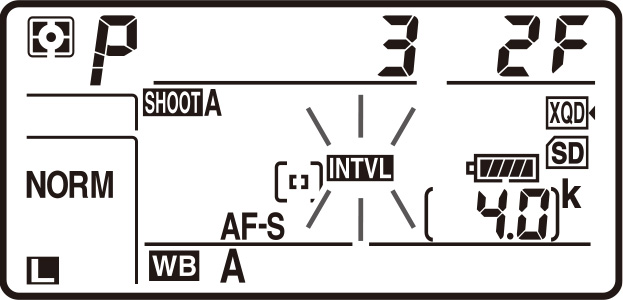
During interval timer photography, the icon will flash in the control panel. Immediately before the next interval begins, the shutter speed display will show the number of intervals remaining, and the aperture display will show the number of shots remaining in the current interval. At other times, the number of intervals remaining and the number of shots in each interval can be viewed by pressing the shutter-release button halfway.
Settings can be adjusted, the menus used, and pictures played back while interval timer photography is in progress. The monitor will turn off automatically about four seconds before each shot. Note that changing camera settings while the interval timer is active may cause shooting to end.
Regardless of the release mode selected, the camera will take the specified number of shots at each interval.
If the interval is too short, the number of photos taken may be less than the total listed in Step 2 (the number of intervals multiplied by the number of shots per interval) or the flash may fire at less than the power needed for full exposure. Interval timer photography cannot be combined with some camera features, including live view, movie recording, time-lapse movies, long-time exposures (bulb or time photography), and focus shift. In addition, interval timer photography is not available when Record movies is selected for Custom Setting g1 (Custom control assignment) > Shutter-release button (see this section). Note that because the shutter speed, frame rate, and time needed to record images may vary from one interval to the next, the time between the end of one interval and the beginning of the next may vary. If shooting cannot proceed at current settings (for example, if a shutter speed of or is currently selected in manual exposure mode, the interval is zero, or the start time is in less than a minute), a warning will be displayed in the monitor.
The camera focuses before each shot. If AF-S is selected and the camera is unable to focus, the camera will either end interval timer photography (On selected Interval priority) or skip to the next interval (Off selected Interval priority) if no photograph is taken after eight seconds.
Interval timer shooting will pause when (self-timer) is selected or if the camera is turned off and then on again (when the camera is off, batteries and memory cards can be replaced without ending interval timer photography). Pausing shooting does not affect interval timer settings.
Adjust bracketing settings before starting interval timer photography. If exposure, flash, or ADL bracketing is active while interval timer photography is in effect, the camera will take the number of shots in the bracketing program at each interval, regardless of the number of shots specified in the interval timer menu. If white balance bracketing is active while interval timer photography is in effect, the camera will take one shot at each interval and process it to create the number of copies specified in the bracketing program. Note that bracketing cannot be used during interval timer photography when On is selected for Interval priority.