Initiating Auto Capture
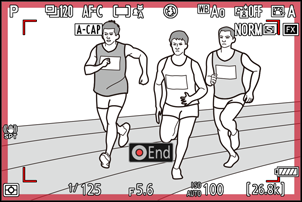
To initiate auto capture, press the video-record button in the settings confirmation dialog.
- Shooting will begin when a subject that meets the selected criteria is detected and continue while the criteria are met.
- A red border will appear around the shooting display when the camera detects a subject and while shooting is in progress.

- Auto capture will be triggered only if all the options selected for [Capture criteria] are satisfied.
- The shooting display will turn off to save power if no operations are performed for about three minutes, but auto capture will remain active. The display can be reactivated by pressing the DISP button or pressing the shutter-release button halfway.
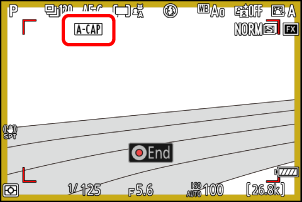
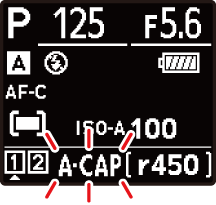
An X icon will flash in the shooting display and “A-CAP” will flash in the control panel. A yellow border will appear around the shooting display if the camera does not detect a subject that meets the configured criteria after starting auto capture.

Shooting display

Control panel
During auto-capture standby, the camera focuses as described below.
- [Capture criteria] > [Distance] enabled (M): The camera focuses at the distance selected for [Farthest].
- [Capture criteria] > [Distance] disabled (U): The camera focuses at the distance in effect when auto capture began.
- The camera may fail to detect subjects in the [Target area] when there are multiple subjects in the frame.
- Falling rain and snow may interfere with subject detection. Auto capture may be triggered by falling snow, heat haze, or other weather phenomena.
All controls other than shutter-release button half-presses and the DISP, video-record, and O (Q) buttons are disabled while auto capture shooting is in progress. End auto capture before attempting to adjust camera settings.
Pausing and Ending Auto Capture
- To pause auto capture and return to the settings confirmation dialog, press the video-record button. Auto capture can be resumed by pressing the button again.
- To end auto capture and exit to the shooting display, press the O (Q) button.
