Exposure for videos and photos shot in video mode can be previewed in the monitor and viewfinder.
The explanation that follows concentrates mostly on the monitor.
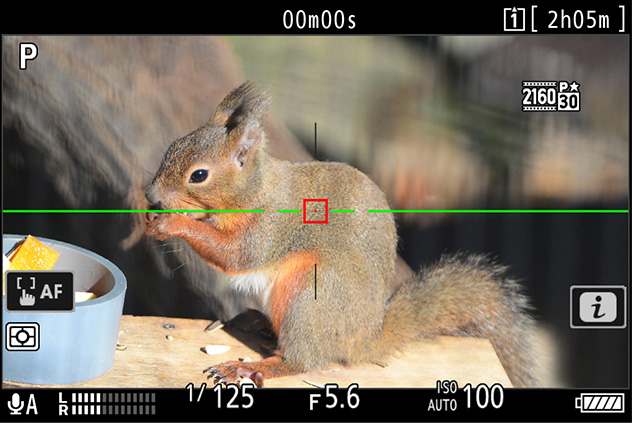
The following are displayed in the monitor in video mode:
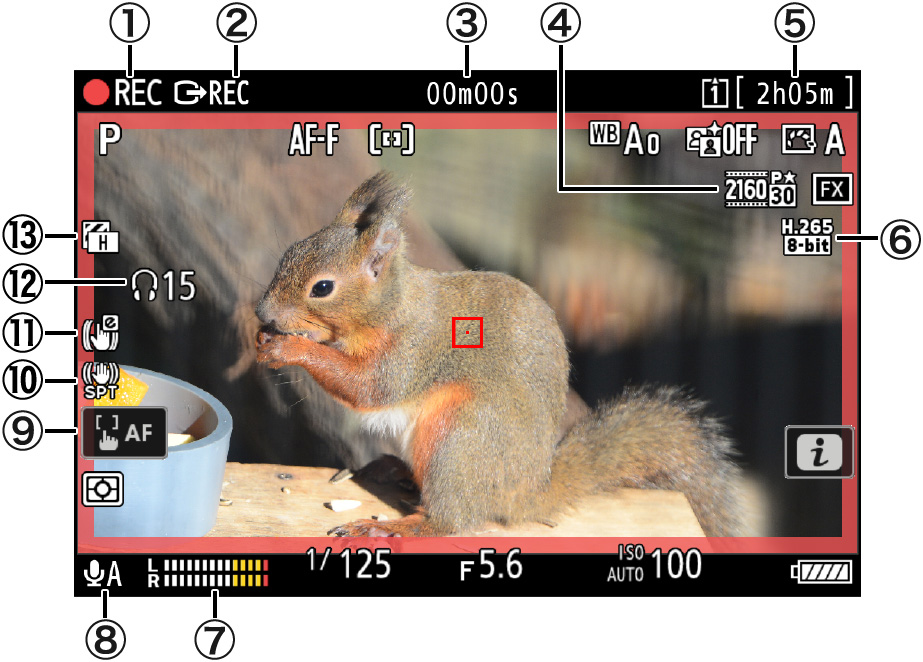
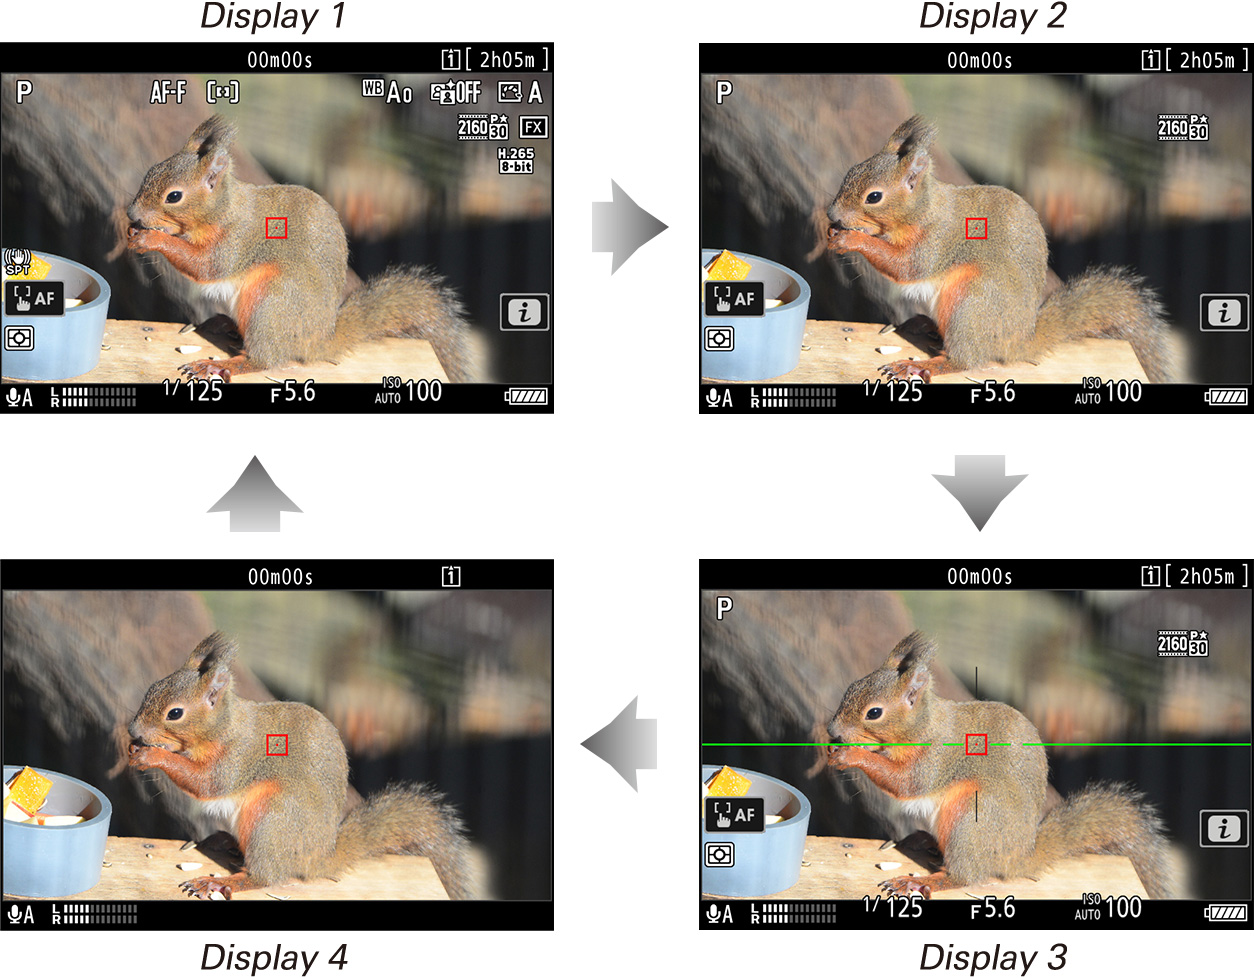
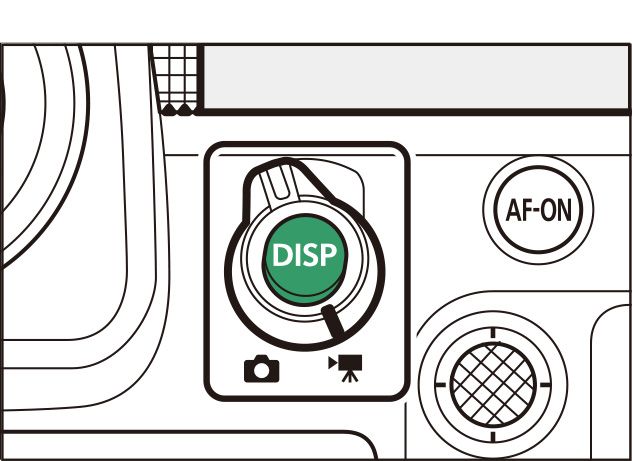
Press the DISP button to choose the information displayed in video mode. The type and content of the displays available vary with the options chosen for Custom Settings g15 [Custom monitor shooting display] and g16 [Custom viewfinder shooting display] (see this section).
The indicators shown in the displays can be chosen using Custom Settings g15 [Custom monitor shooting display] and g16 [Custom viewfinder shooting display]. For more information, see "Custom Shooting Displays". The options available are listed below.
| SIMPLE | [Basic shooting info] | View the shooting mode, shutter speed, aperture, and other basic shooting info. | |
|---|---|---|---|
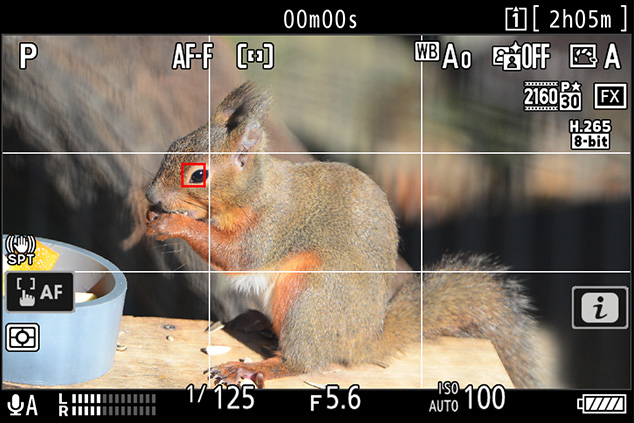
| DETAIL | [Detailed shooting info] | View the focus mode, AF-area mode, white balance, and other detailed shooting info. | |
| [Touch controls] | View options that can be accessed via touch controls, including touch AF and the menu.
|
||
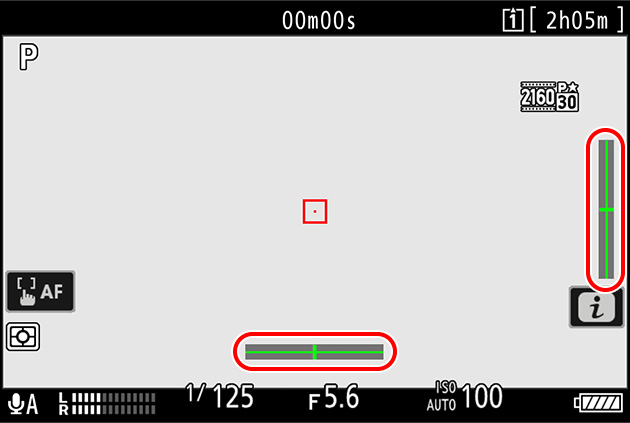
| [Virtual horizon] | Enable the virtual horizon. The display type can be selected using Custom Setting d17 [Virtual horizon type]. |
 |
|
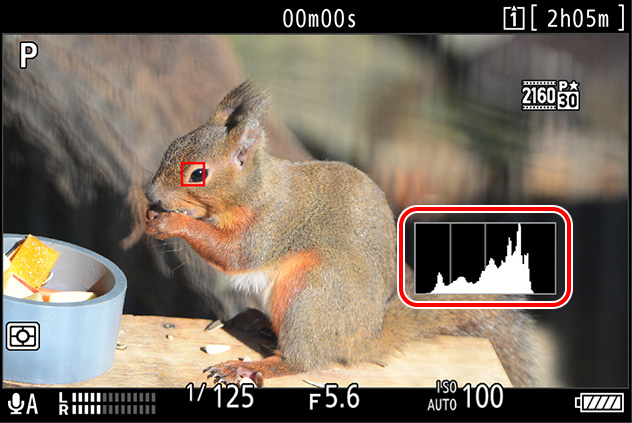
| [Brightness information] | View an RGB histogram or wave-form monitor. The display type can be selected using Custom Setting g14 [Brightness information display]. |
 |
|
| [Framing grid] | Enable the framing grid. |
 |
|
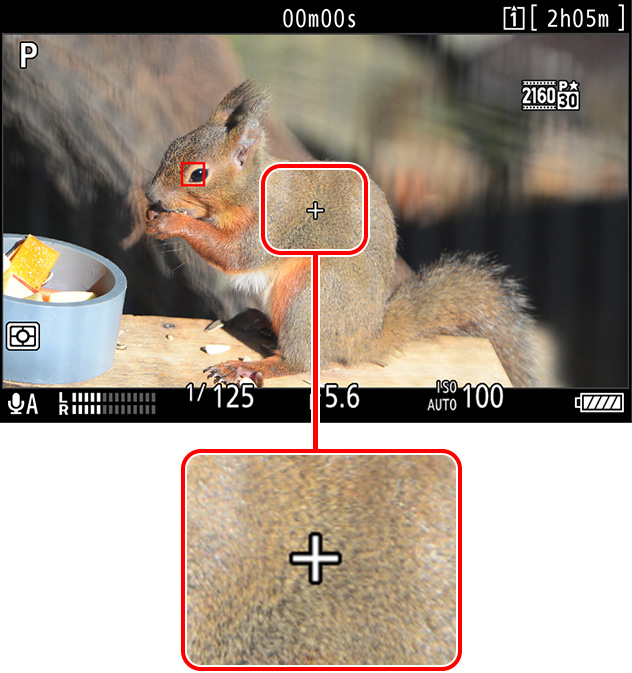
| [Center indicator] | Display crosshairs at the center of the frame. |
 |
|
Click here for the image optimized for small screens. (JPG 288KB).
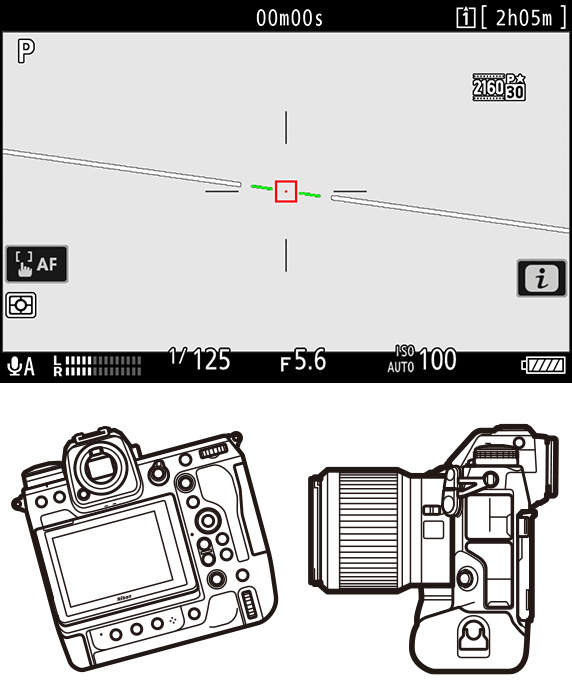
The virtual horizon can be used to help level the camera. It can be used, for example, to level the camera when it is mounted on a tripod. At default settings, it can be viewed by pressing the DISP button to cycle to Display 3.
| Camera level | Camera tilted left or right | Camera tilted forward or back |
|---|---|---|
 |
 |
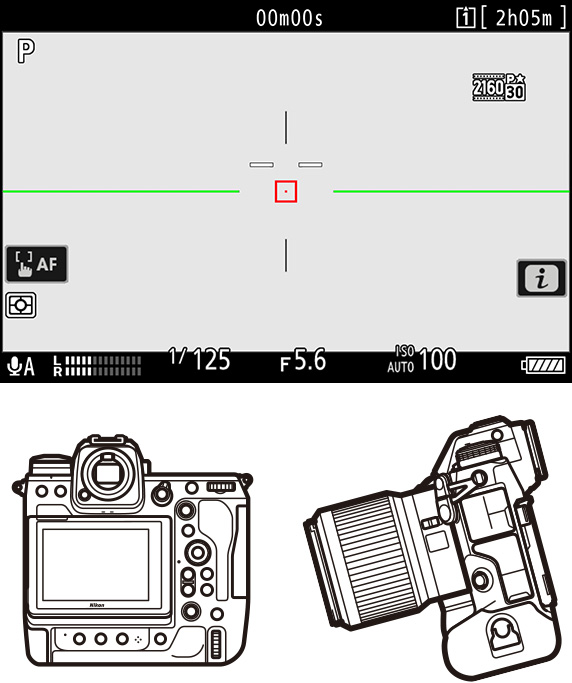 |
Note that the display may not be accurate when the camera is tilted at a sharp angle forward or back. The camera will not display pitch and roll indicators when held at angles at which tilt cannot be measured.
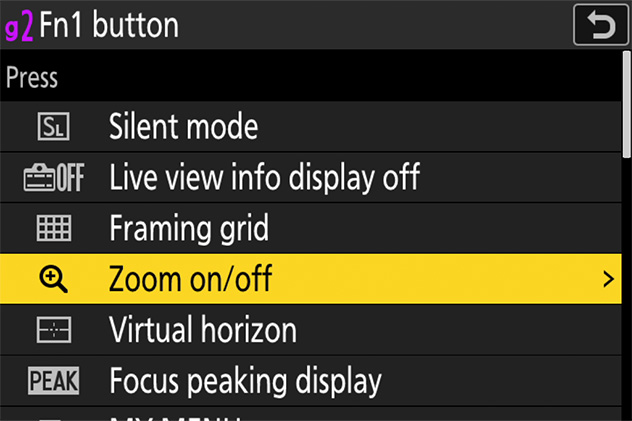
Controls can be assigned display-related functions using Custom Setting g2 [Custom controls].


To zoom in on the display in video mode (to a maximum of approximately 16×), press the button.