Connection Settings: iPad
Ready an iPad to which the NX Field app has been installed.
Ethernet Settings
We recommend that NX Field System connections be made via Ethernet, as this ensures reliable remote camera control unaffected by variations in signal strength. Depending on the model of iPad in question, Ethernet cables can be connected via a third-party USB Type C or Lightning adapter.
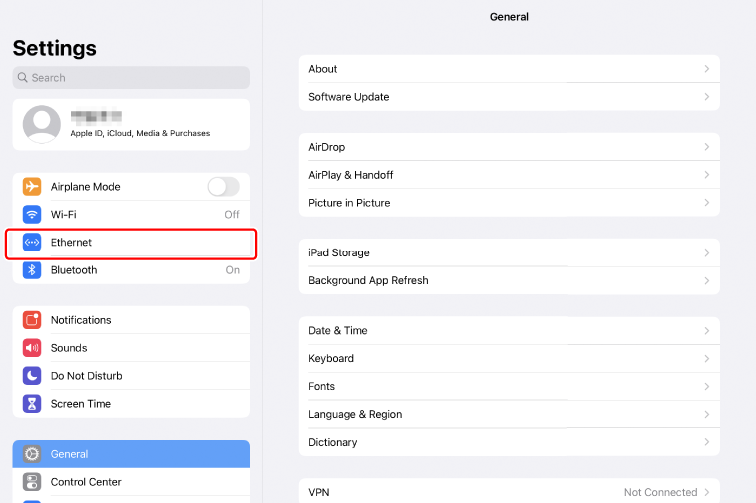
Launch the iOS [Settings] app.
Select [Ethernet].
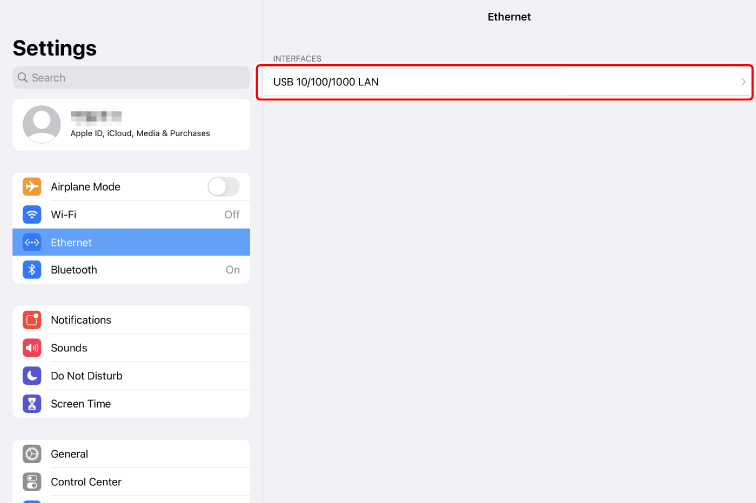
Choose the desired interface.
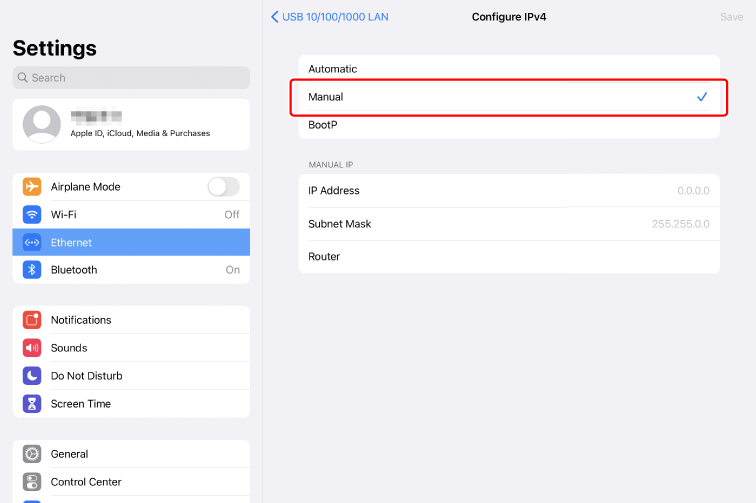
Tap [Configure IP] and select [Manual].
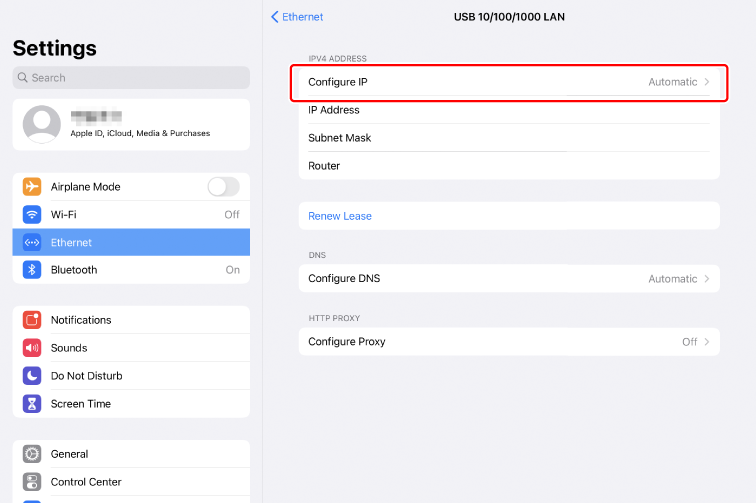
Enter an IP address and subnet mask and tap [Save].
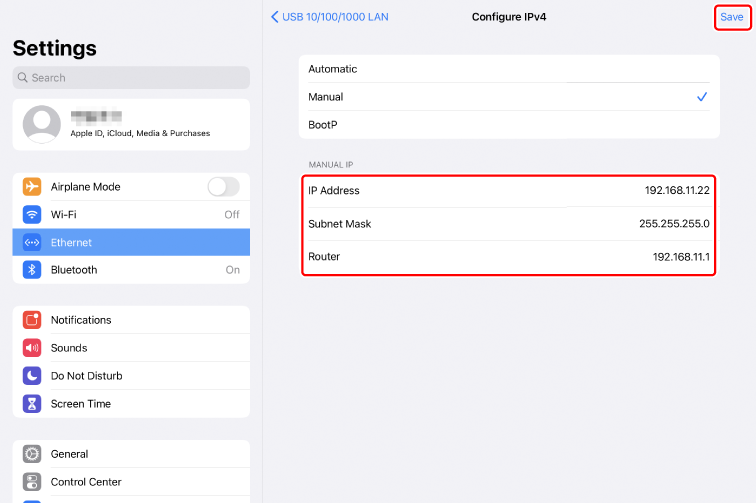
Entering an IP Address and Subnet Mask
When you first open the IPv4 configuration dialog, it will list dummy values for the IP address and subnet mask in gray. The [Save] button will only be available once new values have been entered manually. The new values will be lost if you return to the previous dialog without saving changes.
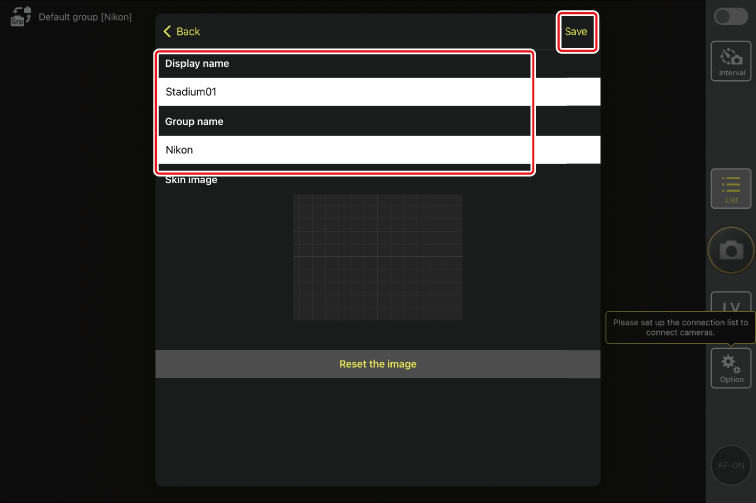
Choosing a Group Name
Remote cameras assigned the same group names in the NX Field app can be added to the remote camera list.
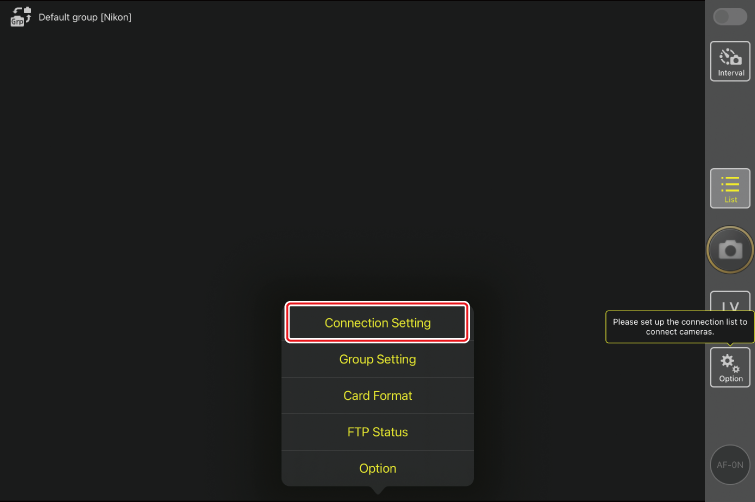
Tap
 (option) and select [Group Setting].
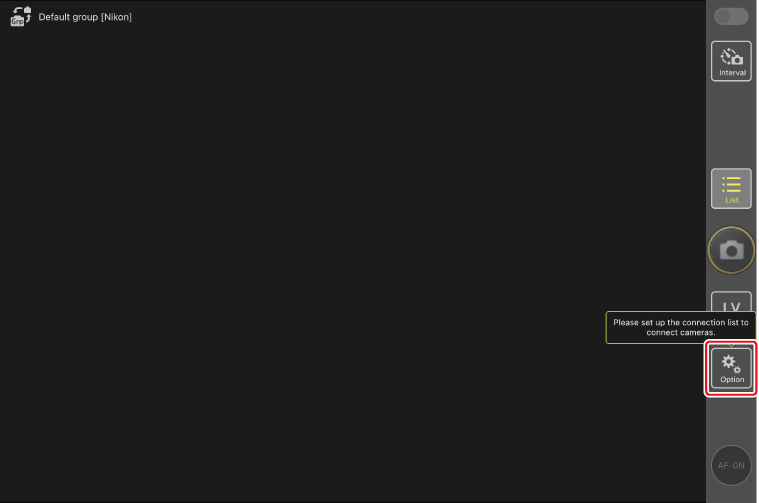
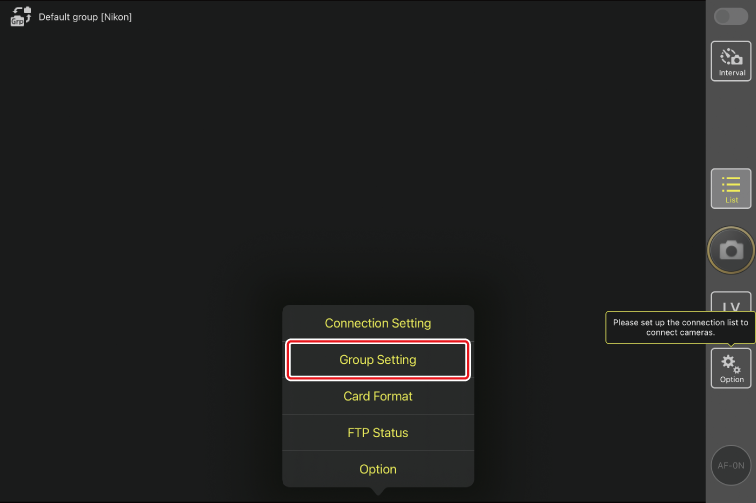
In the [Group name] field, enter a group name matching that chosen on the remote cameras (0 Choosing a Group Name (Z 9), 0 Choosing a Group Name (D6),0 Choosing a Group Name (D5)) and save.
Adding Cameras to the Remote Camera List
Add the cameras in the group to the remote camera list so that the NX Field app can control them individually by name.
Under
(option), select [Connection Setting] and tap  .
.
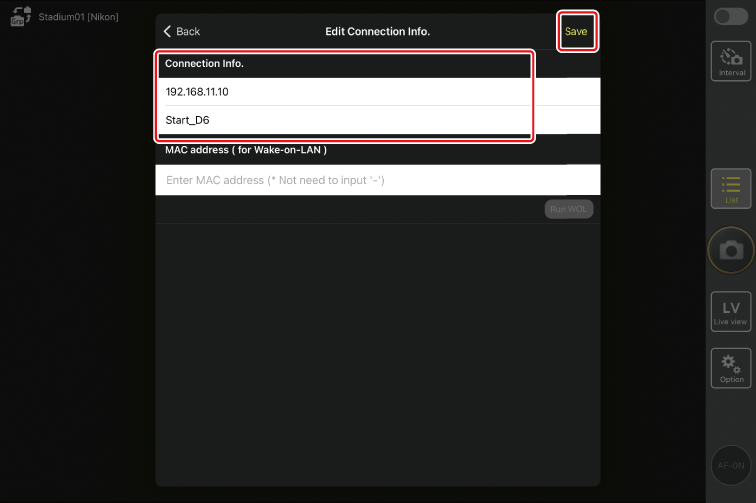
After entering the IP address (0 Connecting Z 9 Cameras to FTP Servers (Z 9), 0 Connecting D6 Cameras to FTP Servers (D6),0 Connecting D5 Cameras to FTP Servers (D5)) assigned to a remote camera, name the camera and then save.
- Names can be assigned as desired. You may find it helpful when taking pictures to name cameras by their locations or other easily-remembered attributes.
- Repeat Steps 1 through 2 for each camera you wish to add.