Configuring Z 9 Cameras for the Master and Remote Roles
To take pictures using master and remote cameras, you will need to add the remote cameras to the master camera’s remote camera list. You will also need to configure cameras for the remote camera role before they can be controlled from an iPhone or iPad.
Configuring Cameras for Use in the Master Role
Select [Master camera] for [Connect to other cameras] > [Master/remote] in the camera network menu.
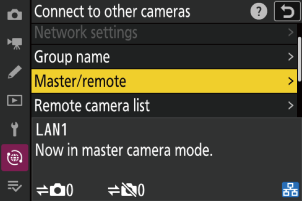
Select [Remote camera list].
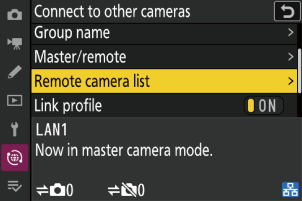
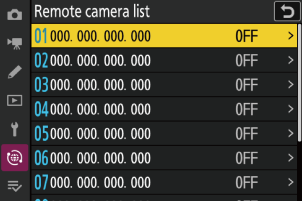
Select the desired slot and enter the IP address currently assigned to a remote camera.
Note that you will need to have first assigned [Remote camera] to the camera in question using [Master/remote].
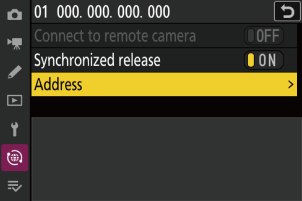
Select [ON] for [Connect to remote camera].
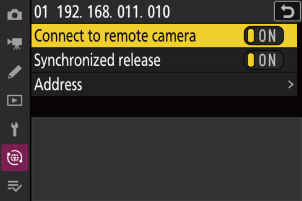
Check the status of the cameras in the remote camera list.
Once you have entered IP addresses for the remote cameras, their status will be displayed as follows:
Connected / shooting time: Normal connection. If the remote camera shutter has been released, the status display will instead show the time the most recent picture was taken.

Busy: The camera is being controlled from another master camera or the NX Field app. For information on taking control from another master camera, see “Transferring Control to Other Master Cameras (Z 9 Only)” (0 “Transferring Control to Other Master Cameras (Z 9 Only)” ).
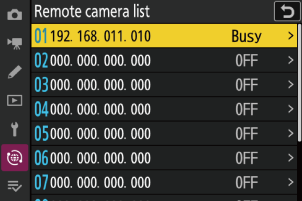
Error: One of the following errors has been detected:
- The remote camera standby timer has expired.
- The remote camera is off.
- The connection with the remote camera is disabled (0 “Readying the Z 9 for Connection to the NX Field System” ).
- The remote camera is not in the same group as the master camera.
- No remote camera has been assigned to the slot (“C” firmware version 2.11 or earlier).
- The IP address is incorrect.
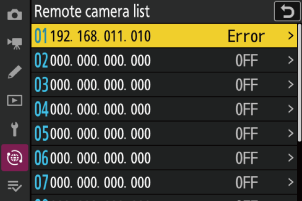
OFF: Either
- no remote camera has been assigned to the slot (“C” firmware version 3.00 or later), or
- [OFF] is selected for [Connect to remote camera] on the camera in question.
The Master Camera “Connect to Other Cameras” Status Display
Cameras that are currently configured to function in the master camera role show “Now in master camera mode” in the status display for [Connect to other cameras] in the network menu. The display also shows the number of remote cameras currently connected or not connected.
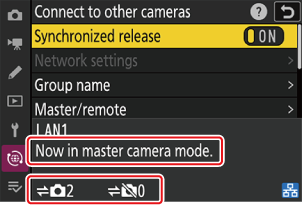
The process of configuring a Z 9 camera for use in the master camera role with the NX Field System is now complete.
Configuring Cameras for Use in the Remote Role
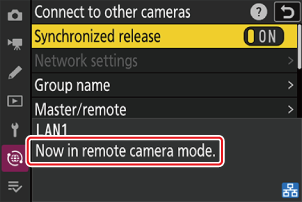
Select [Remote camera] for [Connect to other cameras] > [Master/remote] in the camera network menu. Adjust settings as follows to avoid restrictions on the NX Field app’s use of the shutter release or live view.

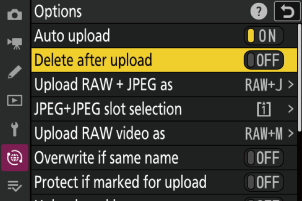
Select [OFF] for [Connect to FTP server] > [Options] > [Delete after upload] in the network menu: Selecting [ON] may interfere with playback in the NX Field app.
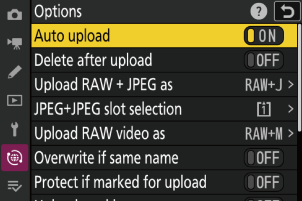
Select [ON] for [Connect to FTP server] > [Options] > [Auto upload] in the network menu: Enable auto upload to automatically upload pictures to the FTP server as they are taken. We recommend selecting [ON] to get the most from the NX Field System.
- When faced with bandwidth limitations or similar issues, you can select [OFF] and manually upload pictures during pauses in shooting.
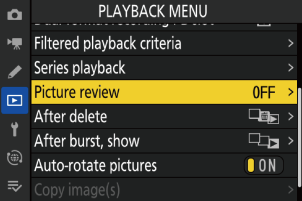
Select [Off] for [Picture review] in the playback menu: If an option other than [Off] is selected, pictures will be displayed in the viewfinder or monitor after shooting, delaying the resumption of live view.
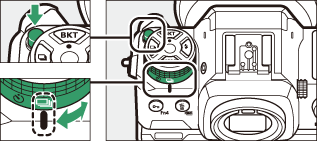
- Rotate the remote camera photo/video selectors to C. No photos can be taken when 1 is selected.
We recommend that you rotate the remote camera release mode dials to “quick release-mode selection”. This allows the frame advance rate to be selected using the NX Field app.
The process of configuring Z 9 cameras for use in the remote camera role with the NX Field System is now complete.
